TABLE OF CONTENTS
Introduction
In this article, we will cover the download, installation and initial setup via the Setup Wizard, for Myriad Playout.
CAUTION – You will need to have MS SQL Express (or higher) installed on your PC or network, prior to installing Myriad Schedule Pro
If you are already running a previous version of Myriad Playout 5/6 then you should already have MS SQL installed, if not then check the article below for comprehensive instructions on installing and configuring MS SQL.

Download & Install
To install Myriad Playout, follow these steps.
- Download the latest Myriad Schedule installs from the Broadcast Radio website.
https://www.broadcastradio.com/myriad-6-playout-support#Download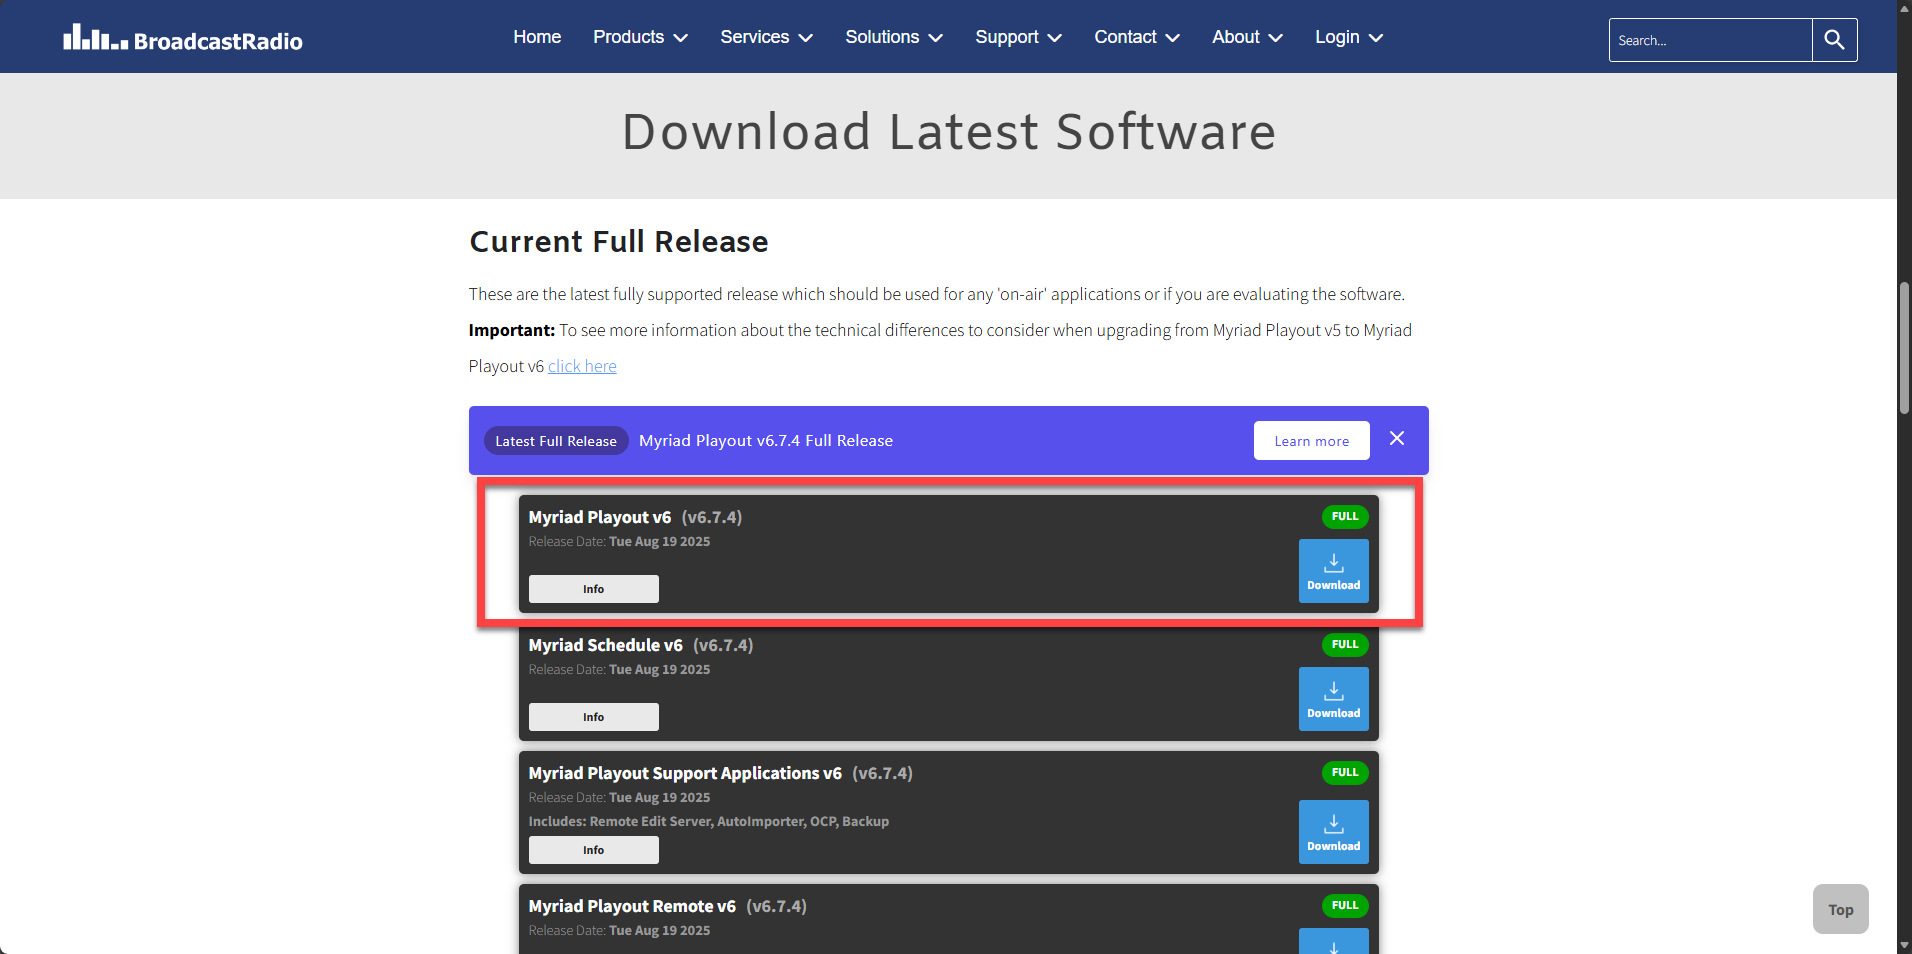
- Run the BRMyriadPlayout6.msi file you just downloaded.
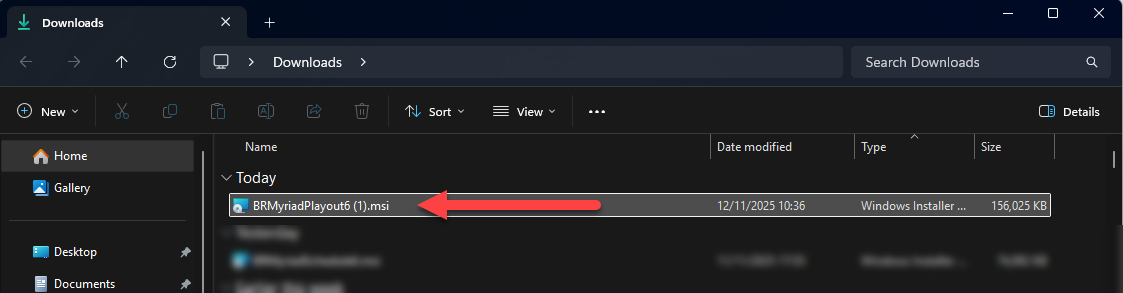
- Follow the onscreen instructions walk through the installation process.
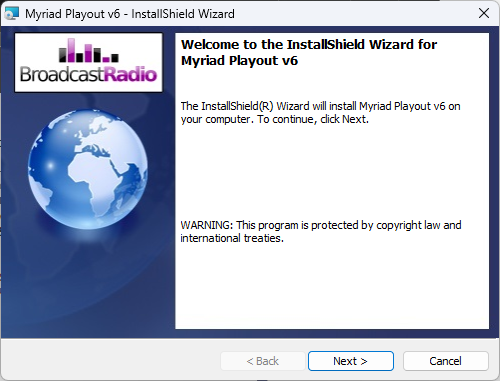
If prompted to allow the software to be installed, click Yes.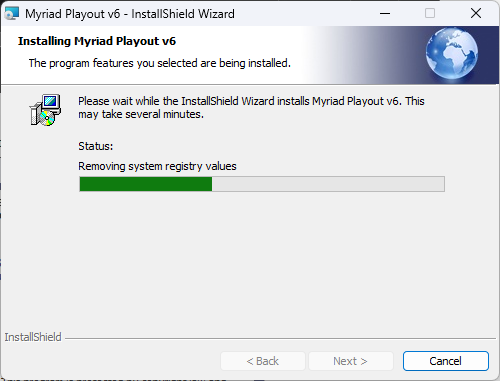
Once the process is complete, you are ready to run Myriad Playout for the first time.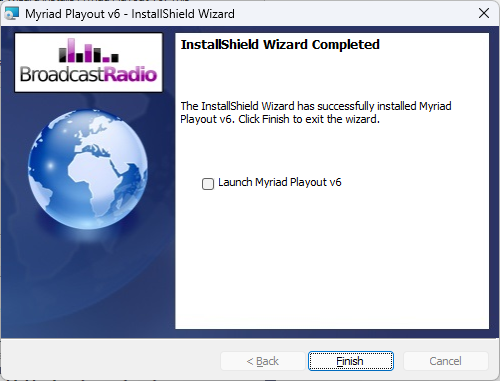
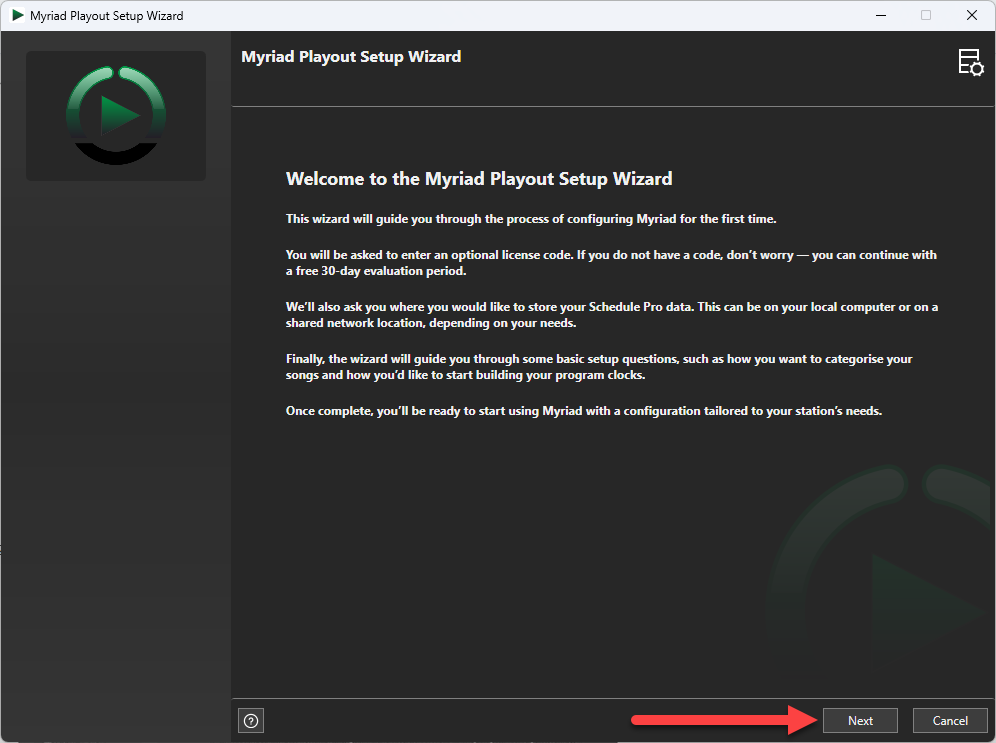
First Run – The Setup Wizard
Once the application is installed and run for the first time, the Setup Wizard will help guide you through the initial setup.
Don’t worry if you need to make changes later, all the options in the Setup Wizard are also available in the main application.
Please note that this process similar for both Myriad Playout and Myriad Schedule Pro.
Setting Up Myriad Playout
The Setup Wizard will guide you through the process of setting up your Myriad Playout system.
- When running Myriad Playout for the first time, the Setup Wizard will automatically start to help guide you through the setup process. At the end of each step, click the Next button to proceed to the next page in the wizard.
- The next page of the wizard allows you to select what type of database engine you want to use with Myriad Playout.
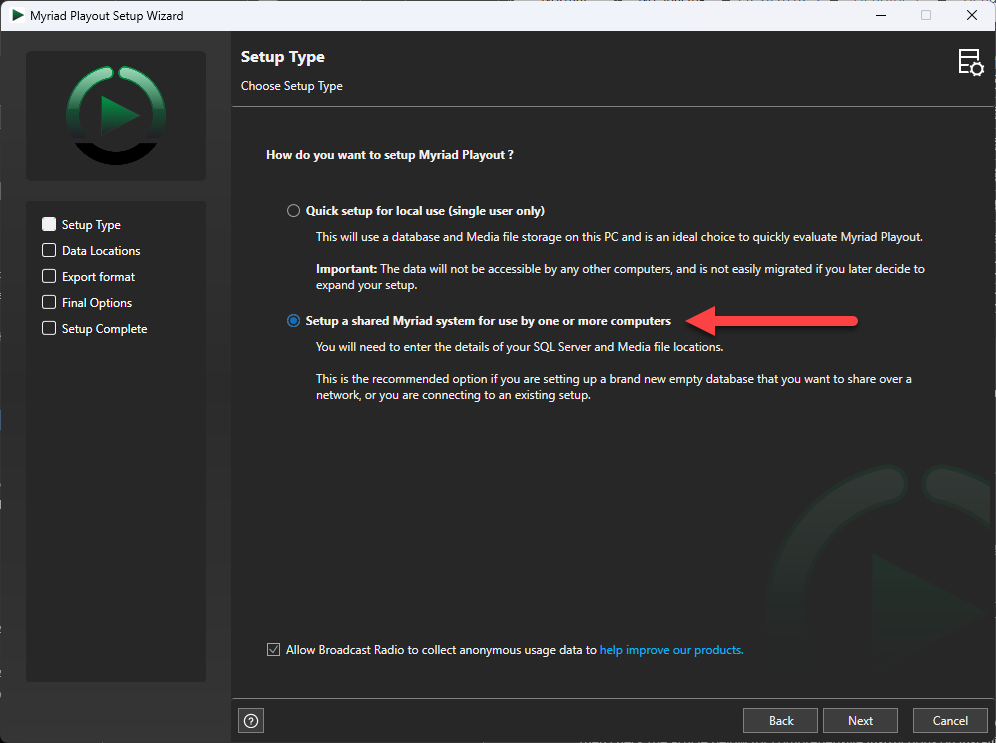
The options are:- Quick setup for local use – This creates a cut down database engine that is only accessible on the local PC (like an old Access DB). This is great for evaluation purposes, but not recommended for full time use, or any installation with more than one workstation.
- Setup a shared Myriad system for use by more than one computer (recommended) – This connects to an instance of Microsoft SQL Server (Express or higher), either on the local PC or a network location. If you already have Myriad Playout 5/6 installed and running then you will have an SQL instance running also. If you need to install MS SQL, you can follow the instructions on the link below.
https://help.broadcastradio.com/en/support/solutions/articles/101000535018-installing-microsoft-sql-server-2019-2022
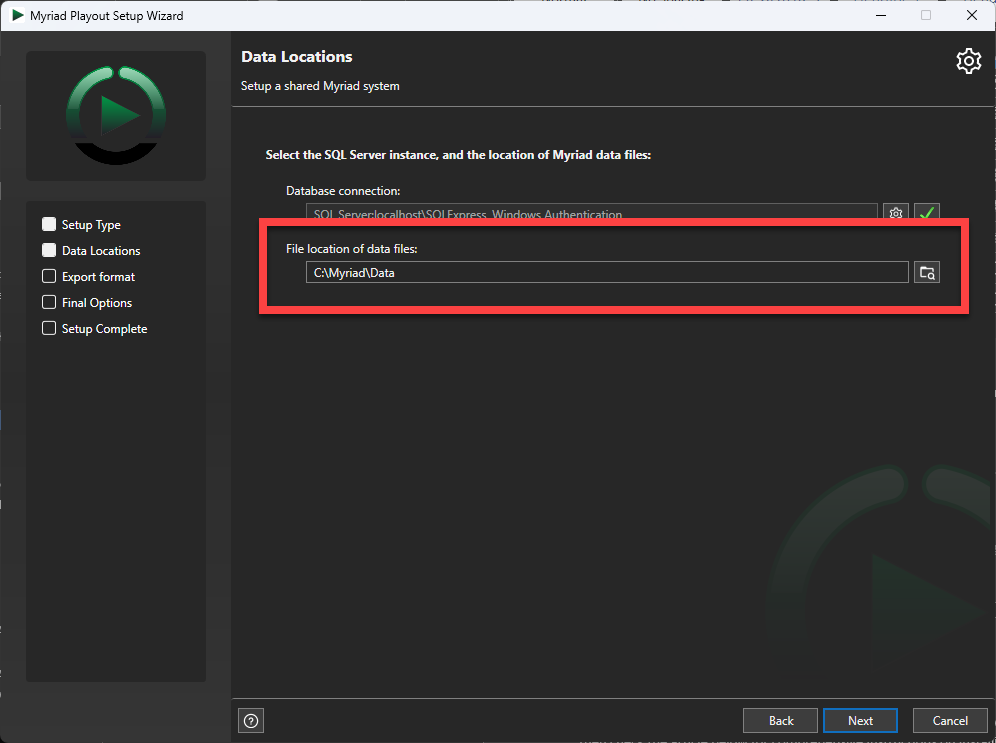
- Next, you need to set the location of the MS SQL Server and the file location that you want to store all additional audio or data files for Myriad Schedule Pro.
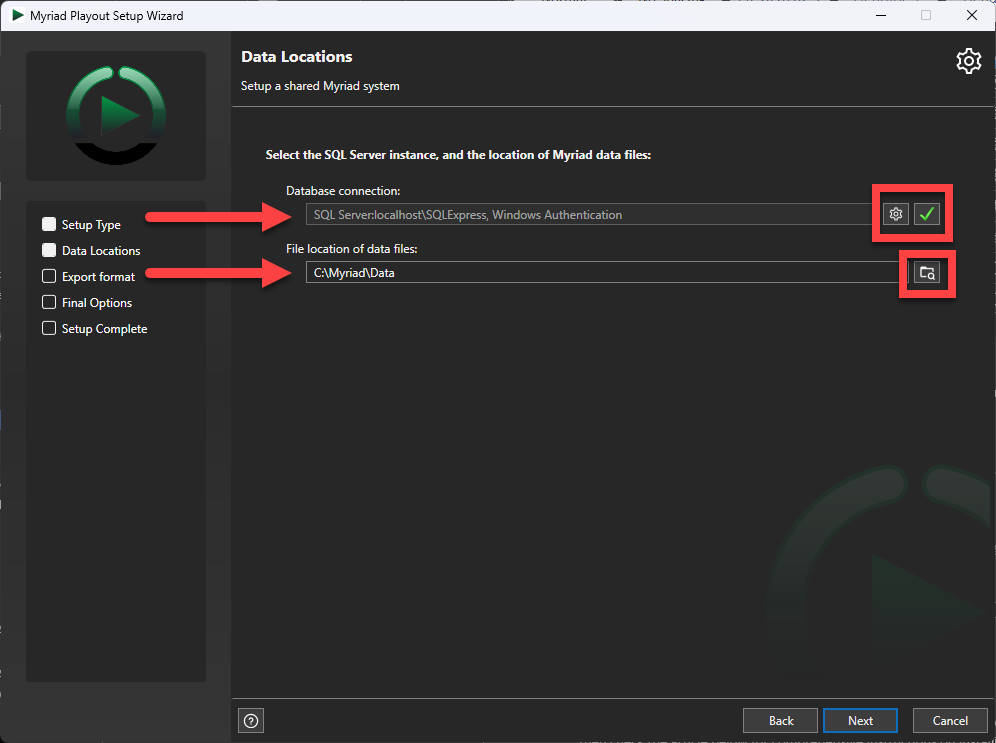
If you opted to use the MS SQL Server option then click on the ‘cog’ icon to set the location and security credentials for your MS SQL Server instance. Add in the location of the SQL Server as well as the authentication method. If you used the BR Script to install the SQL instance then you can leave the User Authentication as Windows Authentication.
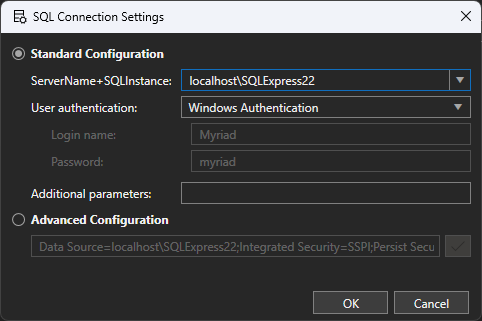
- Be sure to also set the File location for data files to a suitable local or network location.
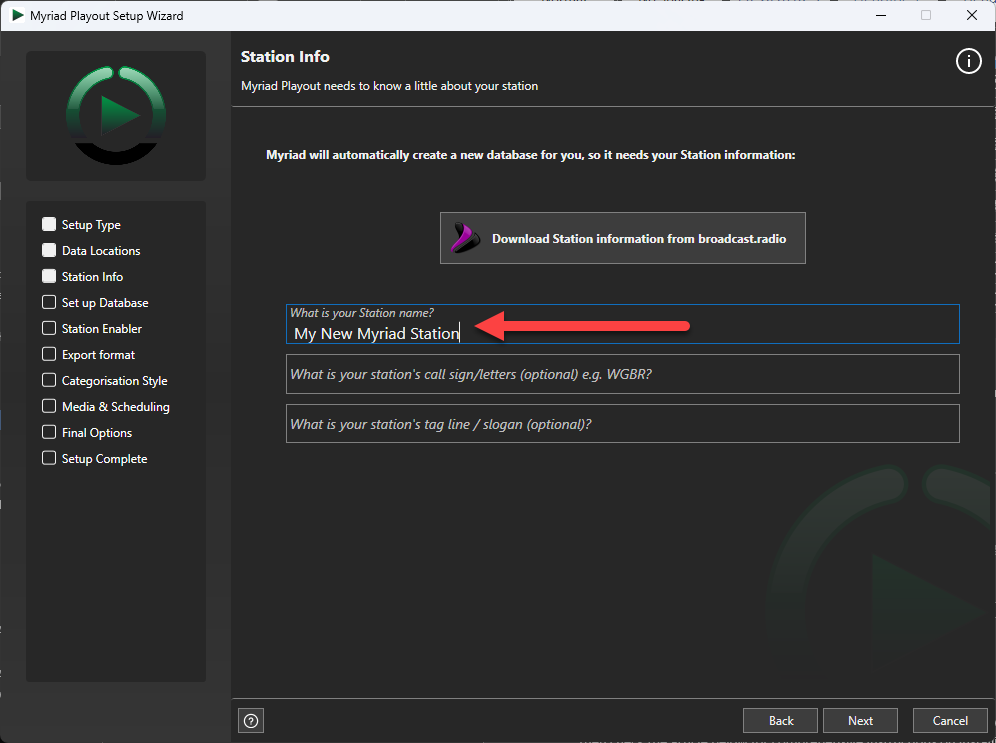
- Give your Station a suitable Name. You can also add a Station Call Sign and Tag Line at the same time if you wish.
The system may take a short time creating the database and basic file structures.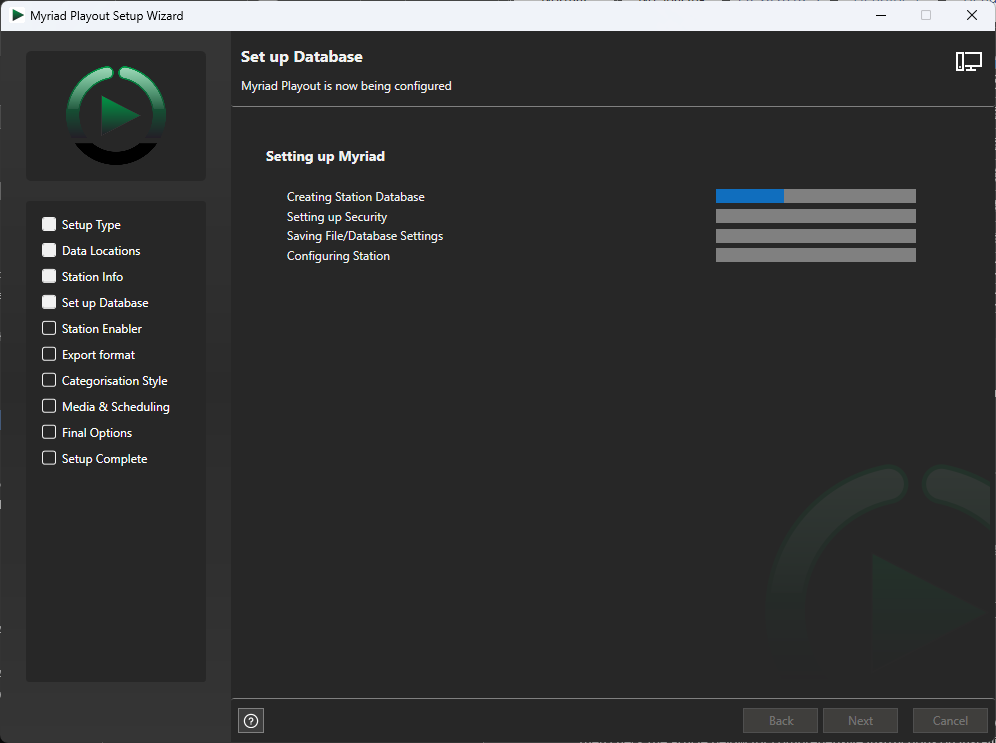
- Next, you need to enter the Station Enabler code provided by Broadcast Radio. This code controls what features are enabled in the software.
To obtain a Station Enabler code (even for an Evaluation), contact hello@broadcastradio.com .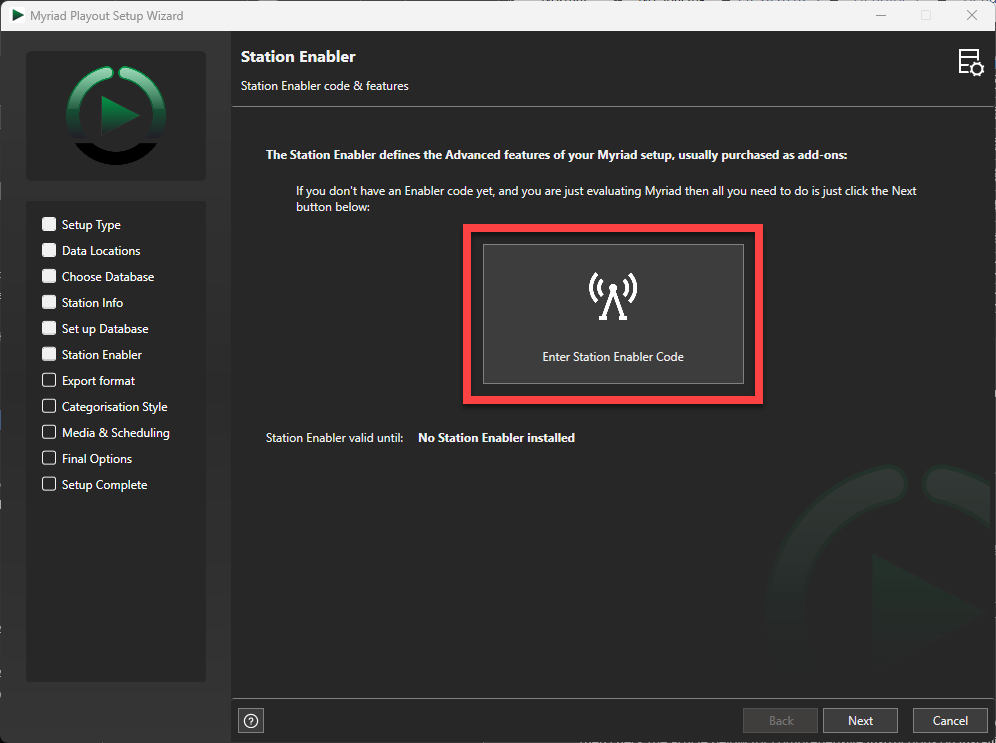
Click on the Enter Station Enable Code button to enter your code. - We recommend pasting the Enabler Code rather than typing it in by hand.
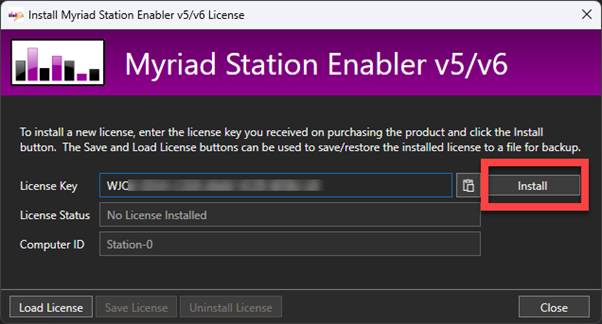
Once you have pasted or entered the code, click on the Install button to enable your selected features.
The license expiry date will be updated to reflect the installed license.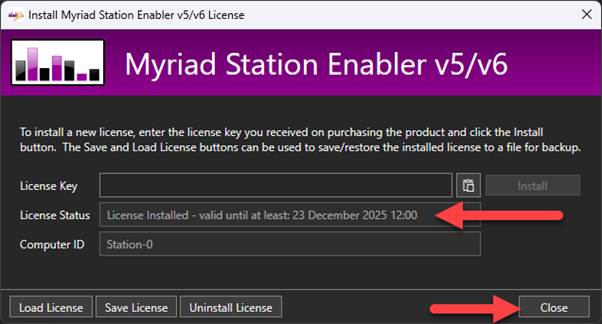
Click on Close to close this License Window. - The license details will be displayed on screen. Click Next to continue.

- You will next be asked to select how you want to classify music on your system. This will pre-populate some basic Song and Link Categories based on your selected method.
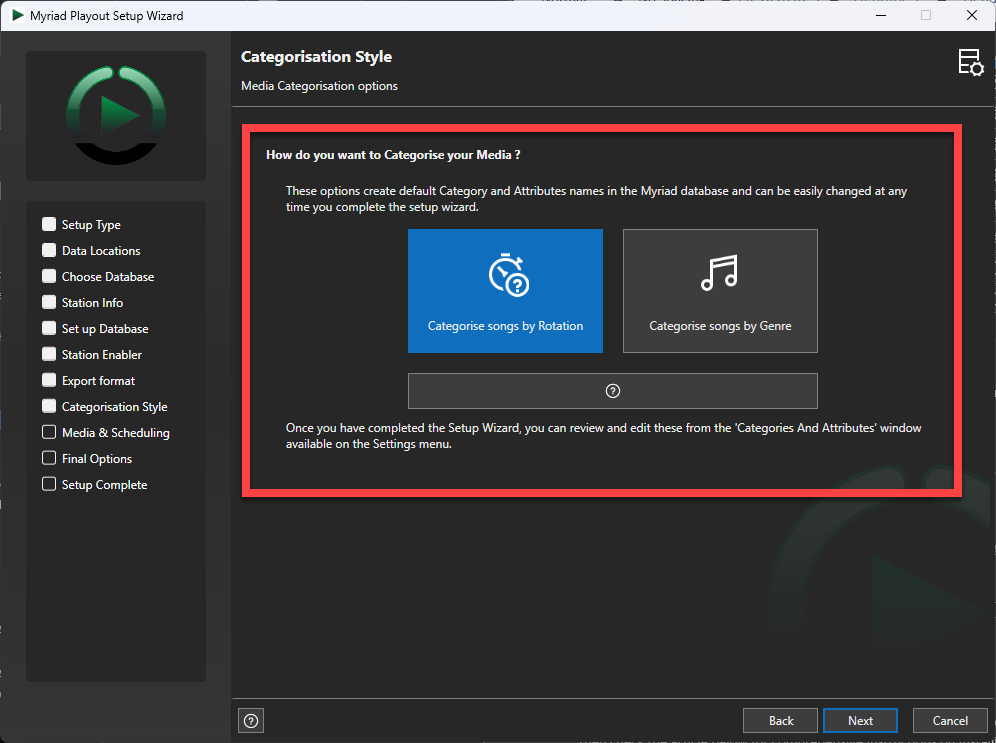
The option are:- Categorise songs by Rotation - Creates typical Song Categories that are used when scheduling is primary driven by rotation. Examples include A-List, B-List, C- List, Recurrent etc.
- Categorise songs by Genre – Creates typical Song Categories that are used when Genres are the primary driver for scheduling. Examples include Pop, Rock, Dance etc.
- Categorise songs by Rotation - Creates typical Song Categories that are used when scheduling is primary driven by rotation. Examples include A-List, B-List, C- List, Recurrent etc.
In both cases, the same set of Link Categories will be created. You can also add more Categories and edit these Categories at anytime from the Station menu.
10. The Media & Scheduling page of the Setup Wizard allows you to set some additional starting configuration options including:
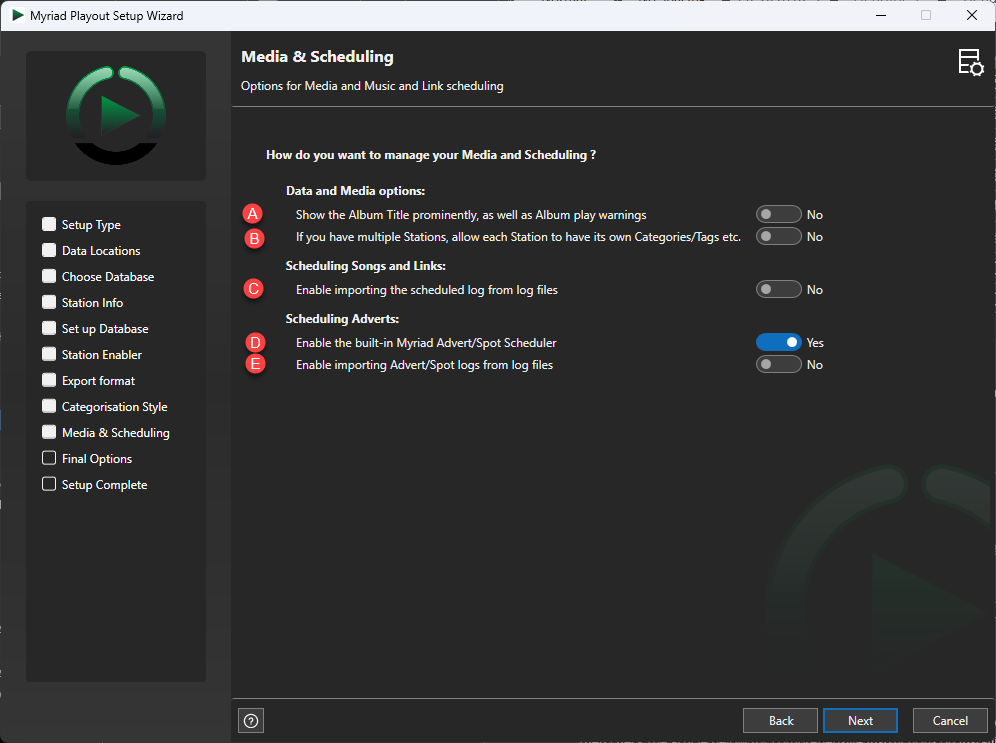
- Show the Album Title prominently as well as Album play warnings – This setting will move the Album field to equal prominence as Title. It also enables recent play warnings on the MediaWall based on Album.
- In multi-station, allow each Station to have it’s own Categories/Tags etc – This allows you to have separate Categories and Attributes for different Stations within Myriad Playout / Schedule.
- Enable import Schedule Log from log files – Enables the ability to import log files from 3rd party music scheduling systems.
- Enable built in Advert/Spot scheduler – Enables the built in Advert/Spot scheduling features in Myriad Schedule.
- Enable importing Advert Logs from log files – Enables the ability to import Advert Logs from 3rd party advert scheduling systems.
All of these options can be altered at a later time from the Station or Database Settings.
11. The next page allows you to set whether the Setup Wizard will create User Account within Myriad (based on the Windows login name) and setup that account to login to Myriad Playout and Myriad Schedule Pro automatically.
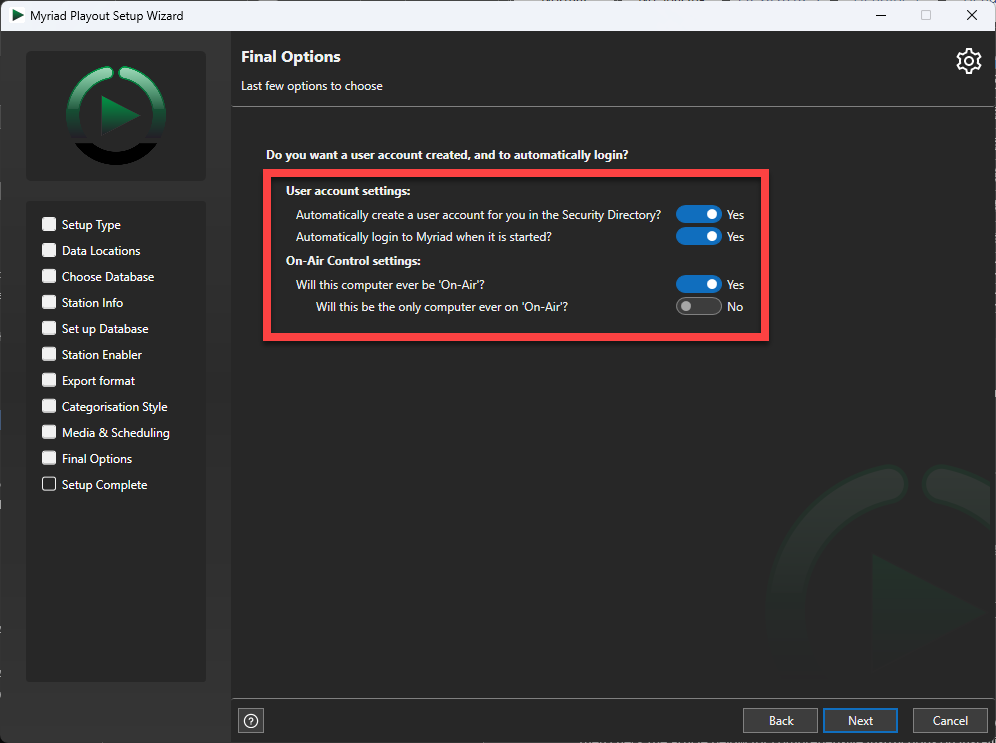
It also allow you to select whether this specific PC will ever be 'On Air' and whether there will be other workstations that could be 'On Air'. These settings will setup the On Air / Off Air settings for the installation.
12. The final page of the Setup Wizard offers quick access to additional Help articles to allow you to learn more about the system. Click on Finish to close the Setup Wizard.

Myriad Schedule will open once the Setup Wizard is complete.

Was this article helpful?
That’s Great!
Thank you for your feedback
Sorry! We couldn't be helpful
Thank you for your feedback
Feedback sent
We appreciate your effort and will try to fix the article