TABLE OF CONTENTS
- Adding Users & Inviting Them to the Broadcast.Radio Platform
- Assigning Myriad Security Group Permissions
- Recording A Voice Tracked Show as A Presenter
- Presenting A Live Show
In this final episode in the series, we will see how to invite some presenters / DJ’s to join the platform and contribute content in the form of Voice Tracked Shows and Live Broadcasts.
Adding Users & Inviting Them to the Broadcast.Radio Platform
Before anyone can contribute content to your station, they first need an account so that they can login to the Broadcast.Radio platform and access the broadcast tools.
Follow these steps:
- Login to Broadcast.Radio.
- Click on Settings > Organisation Settings.
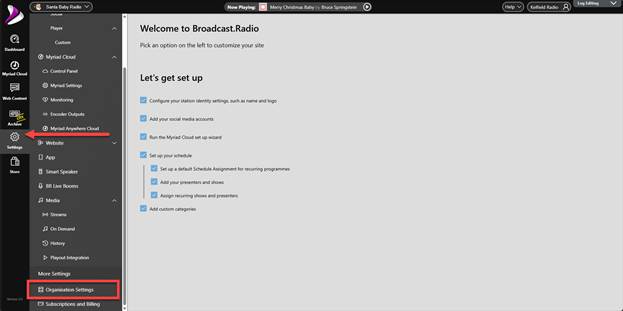
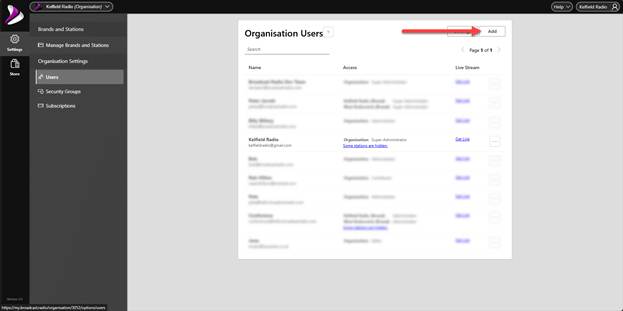
- Click on the Users option.

- This will list all current Users on the platform. Click on the Add button to add a new user.
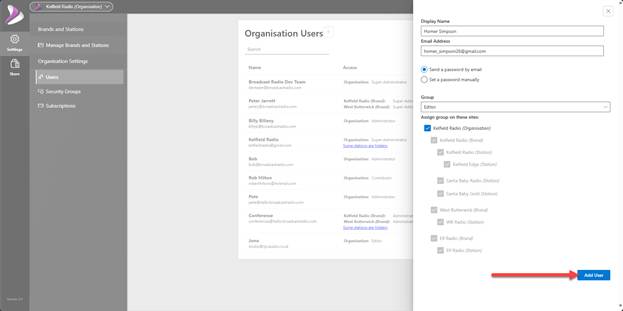
The New User blade will open from the right.

- Add in a Name & Email address.
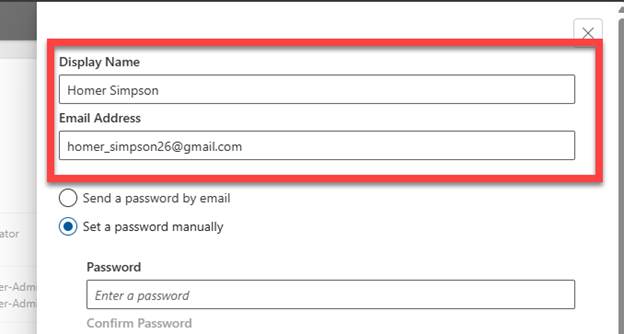
- We would also recommend leaving the password option as Set a Password Manually as this will force the user to add their own password when they first login, which is much more secure than creating a password for them and emailing it to them.

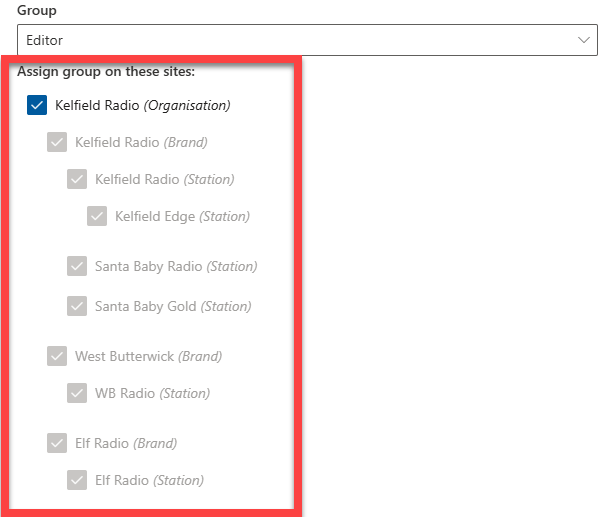
- Next select the Security Group for the User, using the drop down list.

Please note that this is the security permissions for the Broadcast.Radio platform only, the Myriad security permissions are assigned separately.
The permissions are:
Super Administrator - Super administrators are able to create new administrators and super administrators.
Administrator -Administrators can edit the schedule, and update any settings. Administrators can create/edit/delete users, except for other administrators.
Editors - Editors can edit any content, and add/edit/delete attributes like categories, but can't change the schedule or update any settings.
Authors - Authors can create and publish shows, episodes, blog posts, and site pages. Authors can edit their own shows, but can't edit content that was published by another user.
Contributors - Contributors can create new shows, episodes, blog posts, and site pages - but can't publish them - an editor (or above) must finally publish.
Guests - Guests can log into https://broadcast.radio, and can view (but not edit) the schedule.
For more details see - https://help.broadcastradio.com/en/support/solutions/articles/101000535098-adding-users-to-broadcast-radio
- Finally, select Organisation. Brand and Stations that the Group applies to.
- Click on Add User.
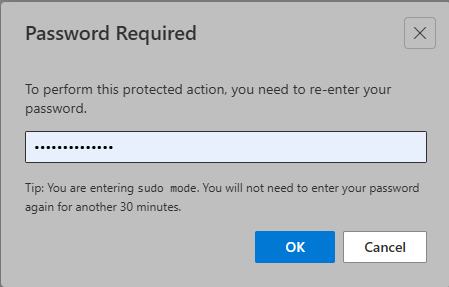
- You may have to reconfirm your password to complete the process.
- The User will now receive an email, inviting them to the Broadcast.Radio platform and prompting them to set their own password.
Assigning Myriad Security Group Permissions
Now that the User has access to the Broadcast.Radio platform, we can assign them to the Myriad Directory group, to allow them to add Voice Tracks or broadcast live.
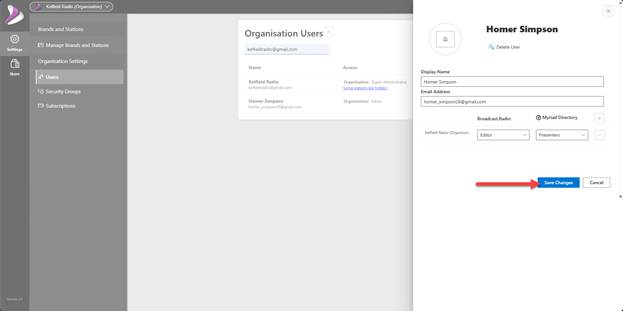
As we just created the User we are already on the Settings > Organisation Settings > Users page which lists all Users and allows you to edit Users or add new Users.
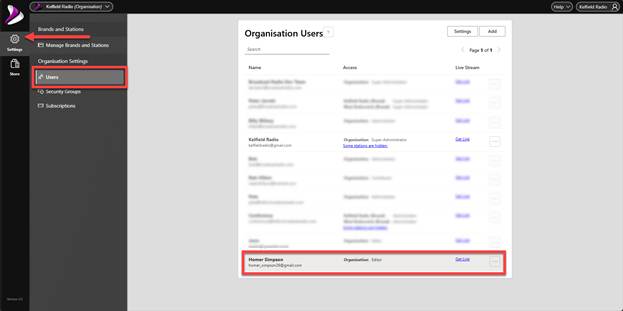
You can see the User we just added, is listed at the bottom of the list. We now need to edit they User to add in the Myriad Directory Permissions.
- Click the edit button to the right of the User you want to edit.

- Locate the Myriad Director options on the User Edit popup.
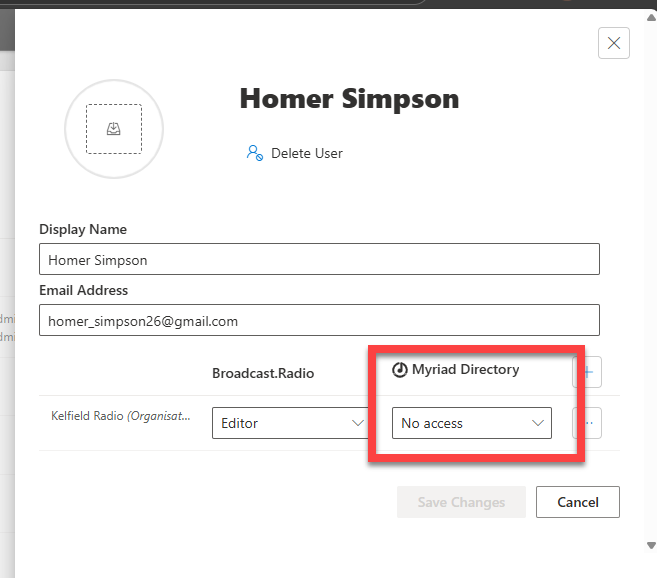
- Use the Myriad Director drop down to select the Myriad Directory security group you want to assign the User to.
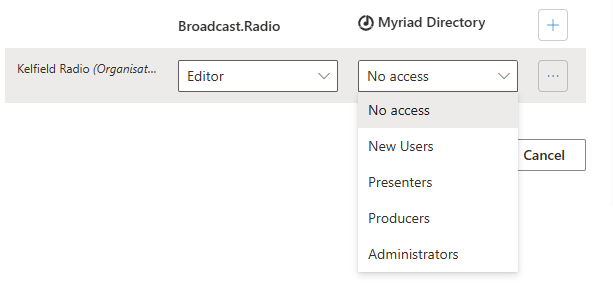
The options are:
No Access – User cannot access any of the Myriad tools.
New Users – User can access Myriad tools but restricted to read only.
Presenters (Recommended) – Can access Myriad Tools and contribute Voice Tracked and Live shows.
Producer – Has more access to administrative functions than a Presenter.
Administrator – Has access to all functions.
For full details see - https://help.broadcastradio.com/en/support/solutions/articles/101000534935-default-security-groups-in-myriad-playout
- Click on Save Changes to save the settings.
Recording A Voice Tracked Show as A Presenter
Now that we have added some presenters / DJ’s, we can switch perspective to the presenters point of view and review the process of recording some Voice Tracks into an scheduled show.
- Login to the Broadcast.Radio platform (https://my.broadcast.radio) with your username and password.
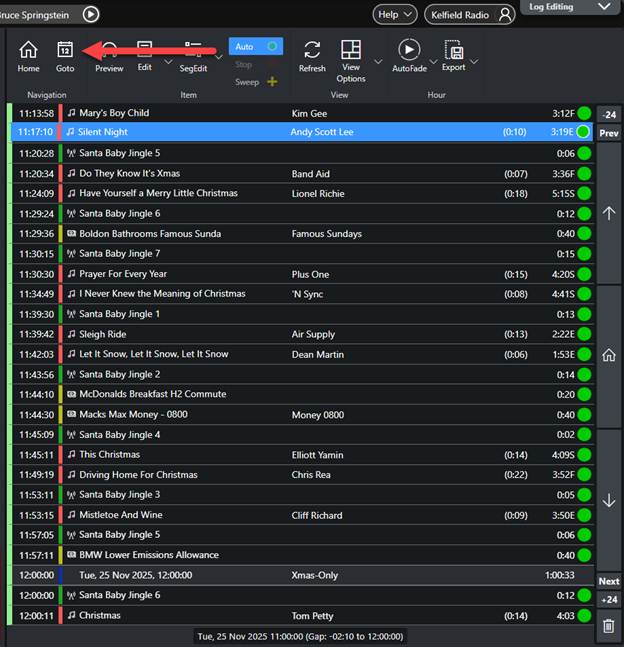
- On the Dashboard, click on Voice Track & Edit Log button.
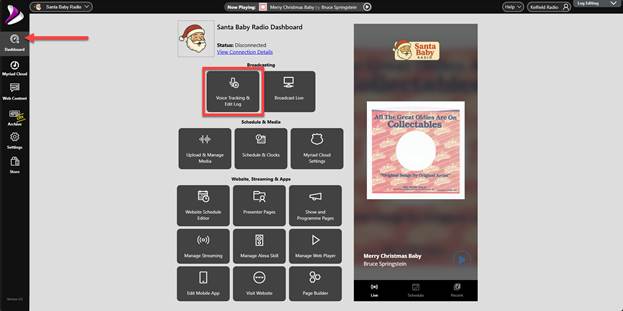
- This will open the Voice Tracking & Log Editing module.
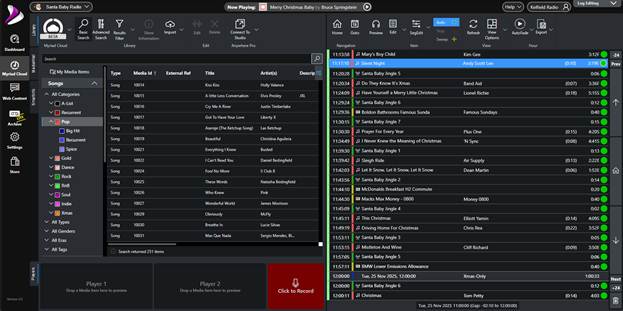
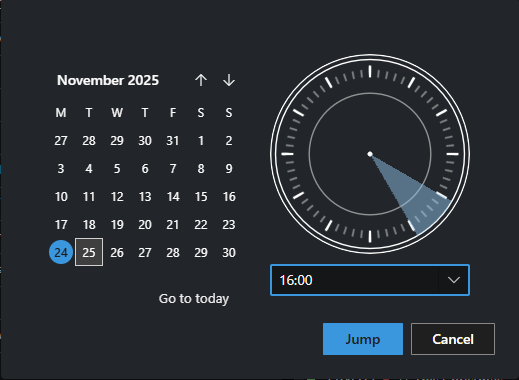
- Click on the Goto button on the Log section and select the time and date of the show you want to add some Voice Tracks to.
Let’s add some VT’s to the 4pm show today.
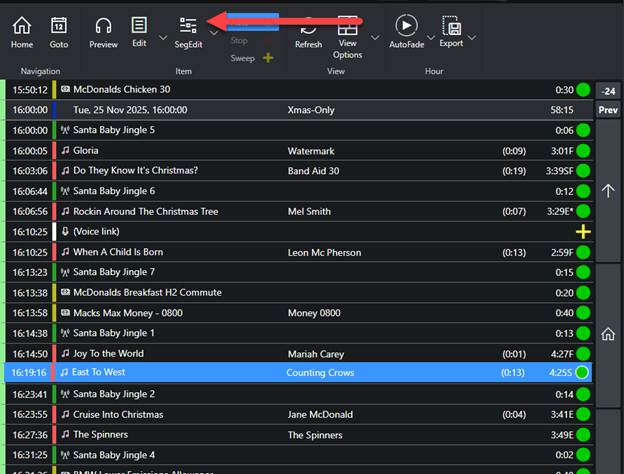
- To review and edit a segue, select the item you want to be playing at the end of the segue, and click on the Seg Edit button.
- The Segue Editor window shows the way that Myriad will segue between the selected items.
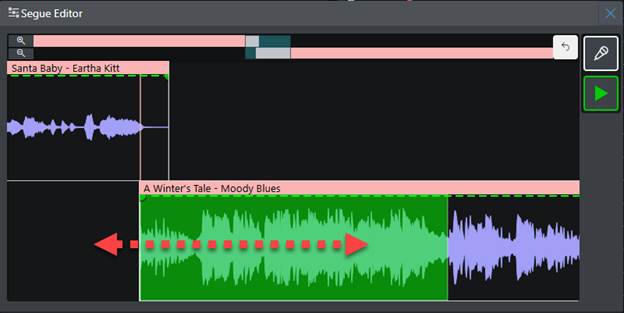
You can change way the segue will sound by dragging the lower item to the left or right.
You can also adjust the volume envelope to if required.
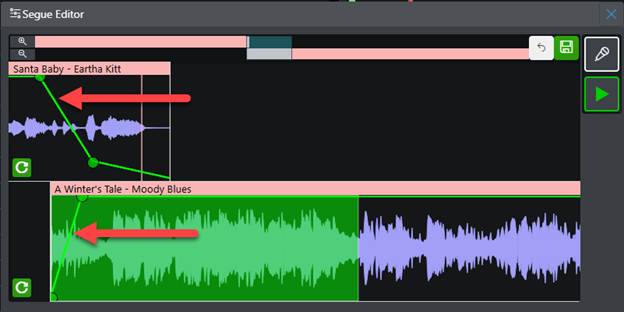
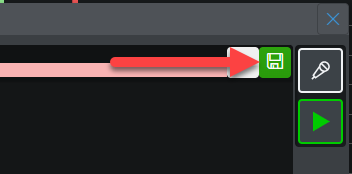
When you are happy with the edited segue, click on the Save button.
If there is a ‘Sweeper’ or Voice Track between two items in the log (signified by a ‘+’ in the right hand column of the Log).

The Segue Editor will display three tracks to allow you to control the more complex segue.
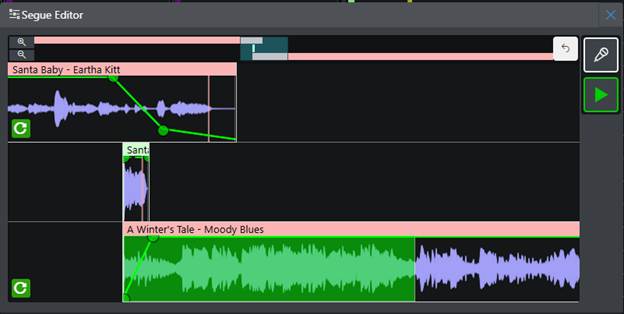
The Segue Editor window is also used to record Voice Tracks between Log Items.
- Select the Log Item you want to be playing at the end of the Voice Track, and click on the SegEdit button. In this example, we have selected East to West by Counting Crows. This will be the song that is played directly after the Voice Track.

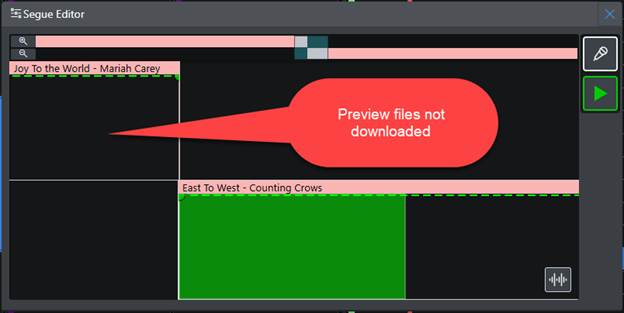
- If you have previously downloaded the preview files for the selected Log Items, then the waveforms will be automatically displayed and you can immediately preview the segue.
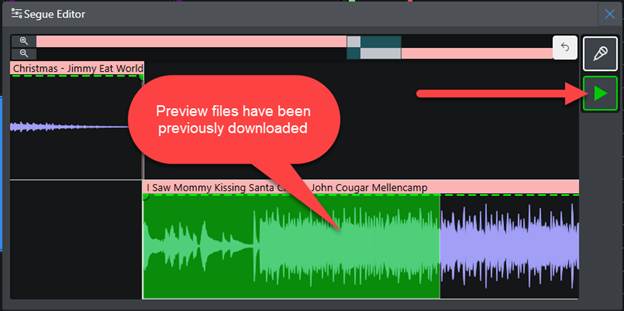
If the Log Items preview files have not previously been downloaded, then the waveform section will be blank and the preview files will be automatically downloaded if you preview the segue or record a Voice Track into the segue.
- To start the process of recording a Voice Track, click on the Voice Track button.

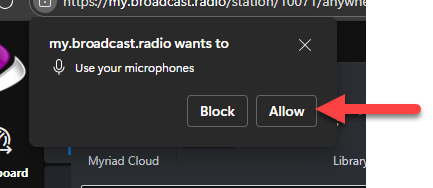
IMPORTANT – If this is the first time you have recorded a Voice Track you will be prompted to allow access to the microphone in the top left corner of your browser window. Click on Allow to allow access to your audio input device.
If any preview audio files are required, they will automatically be downloaded.

- Once the download is complete, playback will automatically start.
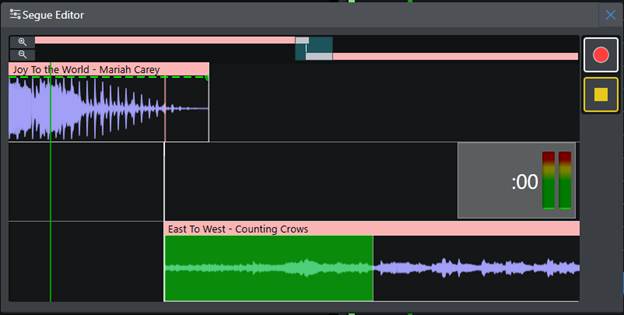
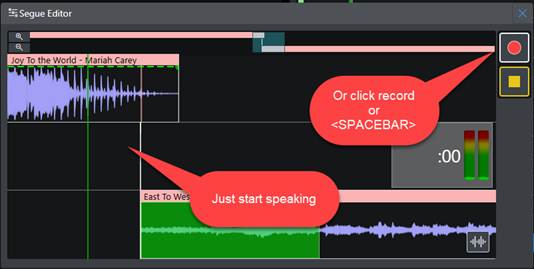
- To start recording your Voice Track, you have three choices:
- Just start speaking into your microphone, the audio will be detected and start recording automatically.
- Click on the Record button.
- Press the <Space Bar> on your keyboard.
- As you record your Voice Track, the wave from will be displayed in real- time and the lower track will automatically move to the right (along with the volume envelope).

- You can start the lower track at any time by:
- Clicking the >> button.
- Pressing the <Space Bar> on you keyboard.

- You can continue to record your Voice Track with the lower track now playing at a quite volume, so your speech is audible.
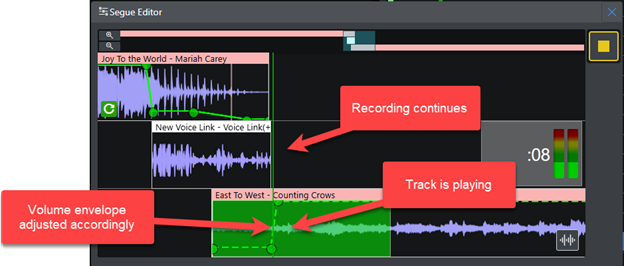
- To finish recording, click on the Stop button or press the <Space Bar> on your keyboard.

- You will be asked if you want to save the Voice Track.
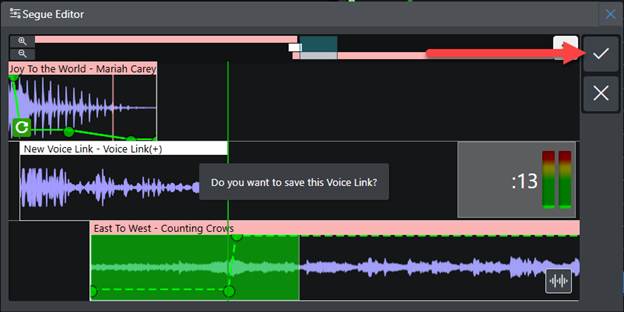
Click on the Tick button or press the <Space Bar> to save and commit the Voice Track.
If you click on the X button, the Voice Track will be abandoned and the recording deleted.
- Once the Voice Track has been successfully uploaded and committed to the Log, you can then adjust the positioning of items in the segue (drag left or right) and the volume envelope if required.
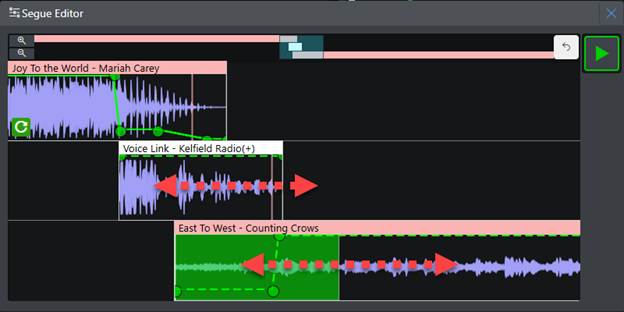
If you make any adjustments, remember to click on Save to re-save the Voice Track.
Presenting A Live Show
The final step for our fictional festive station plan, is for the presenters to present live shows on Christmas Eve. So, let’s see how they can do that!
- Login to the Broadcast.Radio portal (https://my.broadcast.radio) and login with a User account with Myriad Directory permissions of Presenter, Producer or Admin.
- On the Dashboard, click on the Broadcast Live button.

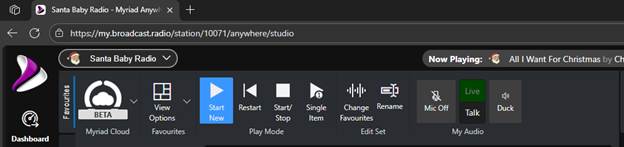
- This will open the Live Studio module which can be used to control the station in real-time and to present links on your station.
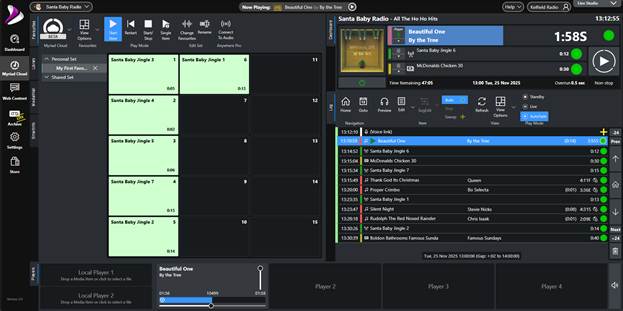
- First let’s take a quick look at the default layout.
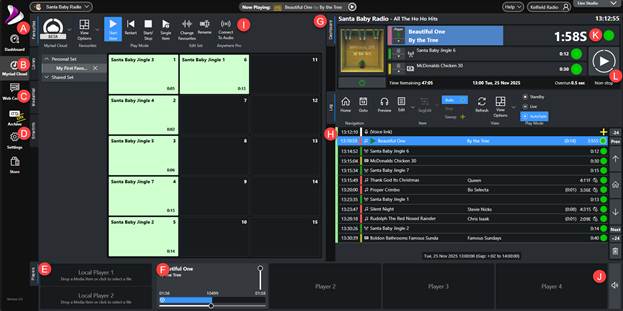
- Favourites Tab – Allows one click playback of your favourite items.
- Library Tab – Browse content by Type, Category and Attributes.
- MediaWall Tab– Browse content organised by Media ID.
- Smart Info Tab – Displays real-time information (Wikipedia, Song Facts etc) about the selected Song.
- Local Players – Drag local audio files into these players for inclusion with the live broadcast. Ideal for beds etc.
- Broadcast Media Players – These show the Media Items currently playing in the cloud. You can adjust the volume per player using the volume control on each player.
- Dashboard Tab – Shows what is currently playing and what is going to play next.
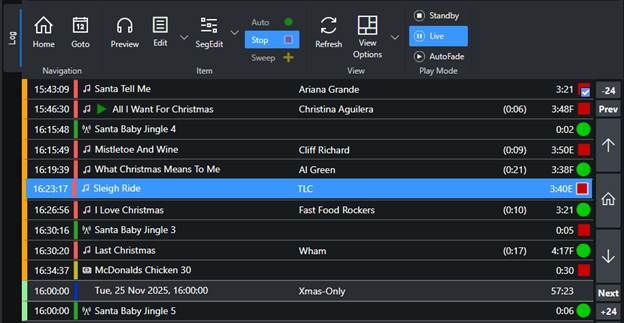
- Log Tab – Shows a list of all Media Items scheduled to play in this hour. You can view and edit scheduled content for the current and future hours.
- Connect to Audio – Allows you to connect your local microphone or sound input (from mixer) to the station for live, real-time audio broadcasts.
- Duck Players – Duck all the Media Players to a pre-determined level.
- Chain Type – Shows what happens at the end of the item.
- Green Circle – Automatically segue into next item.
- Red Square – Stop and wait for User to manually start the next item.
- Yellow Plus – Item will be ‘swept’ into the intro of the next Song if It has an Intro set.
- Go Button – Starts the next item in the Log and fades out the previous item.
- Play Mode – Selects the playout mode:
- Standby – Nothing is played from the Log (station is off).
- Live – Used for live shows. Presenters can change Chain Types to red squares. Backtiming is not automatic.
- AutoFade – Used for automated shows. All Chain Types are set to green circles. Backtiming is automatic.
This is just an overview of the main features of the Live Studio module. Please refer to the main documentation for more details.
- Switch the Play Mode to Live.
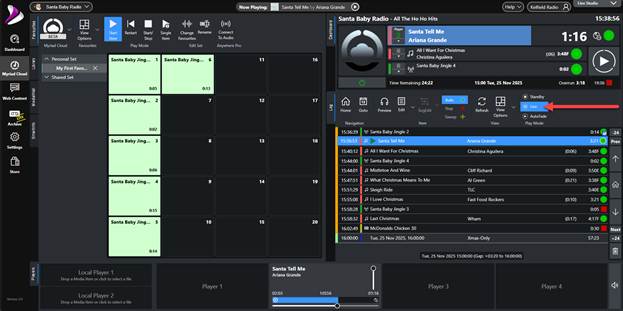
- Change the Chain Type on the currently playing item to a Red Square. You can click on the Chain Type icon in the Dashboard or Log to toggle between Red Square and Green Circle.
By setting it to be a Red Square, then system will pause playback at then end of the item and not start playing the next item in the Log until the presenter presses the Go button.
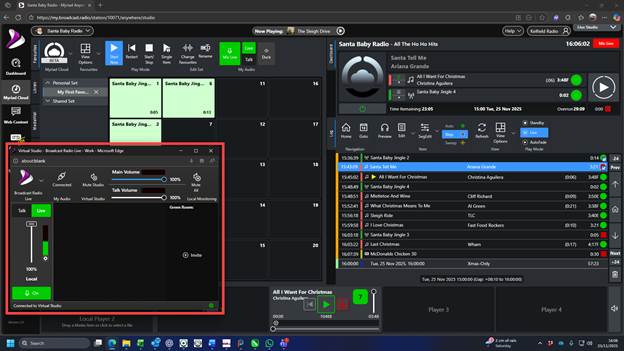
- Next, click on the Connect To Audio button on the Favourites, Library or MediaWall ribbons.

- Select the Input & Output sound devices using the drop down lists, and click on Connect.

- Click the Start button.
- The BR Live control panel will open in it’s own window.
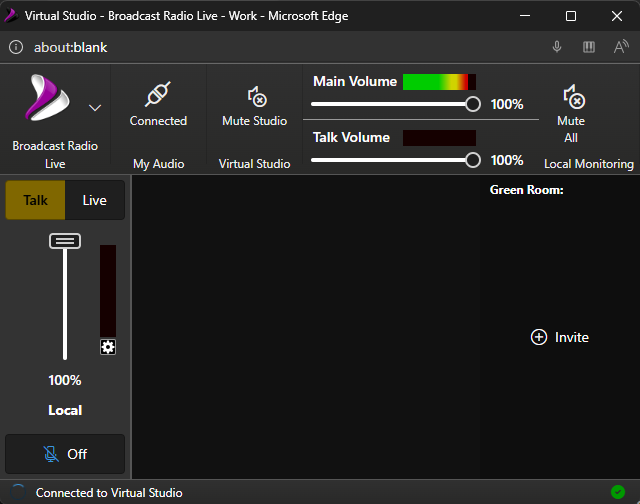
This allows you to control the volume of the monitoring feed from the station as well as the microphone you are sending to the station. If there are any other presenters or guests in the show, they will also be listed here.
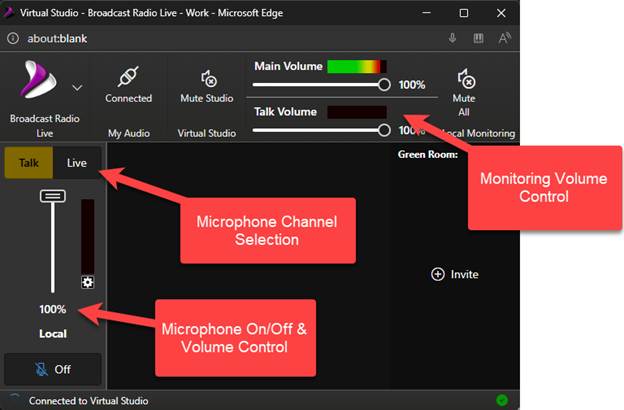
- Minimise this window and return to the main Live Studio module.
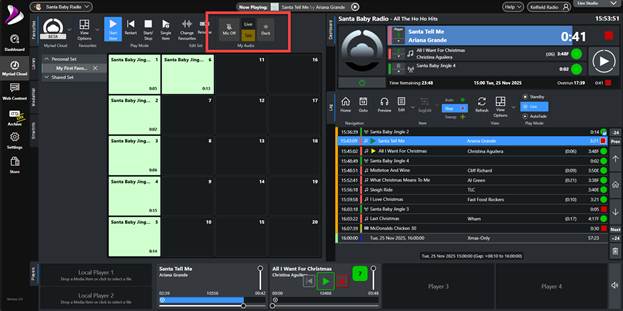
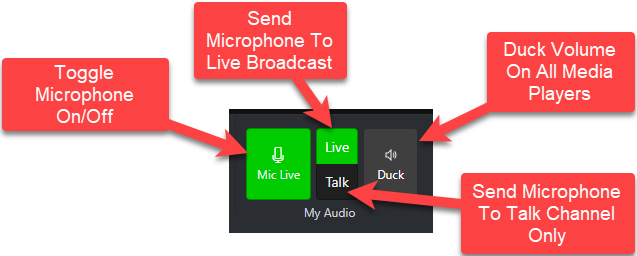
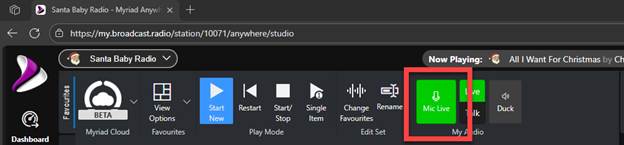
- You will see some new options on the Favourites / Library / MediaWall ribbon. This section allows you to:
Toggle Microphone On/Off – Switch the audio input device on or off.
Choose Broadcast Channel – Switch between the Live channel (the audio is added to the live broadcast in real-time) and Talk channel (the audio only goes to the Talk channel to allow you to talk to co-presenters and guests off air).
Duck – Lower the volume to a pre-set (configurable) level on all Media Players.
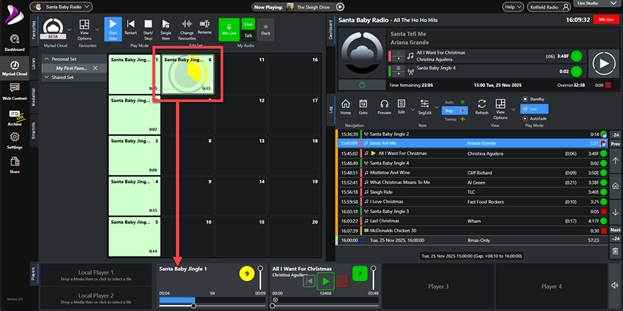
- The playing song (Santa Tell Me) has the Chain Type set to a Red Square meaning the playback will pause at the end of the item allowing us to turn the microphone on and do a live, real-time segue into the next item.

- Make sure the Live channel is selected.

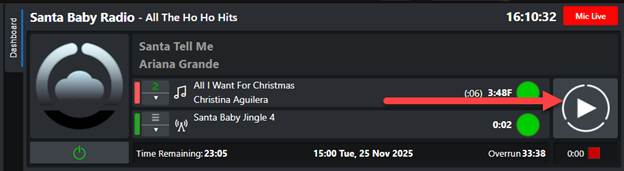
- As the song is coming to the end, click on the Mic On/Off button to switch your microphone ‘live to air’.

- Start your live voice link. You can view the BR Live Panel if you want to control your microphone volume, adjust co-presenter or guest microphone or just confirm you have audio level being sent to the Myriad Cloud platform.
- You can manually play content using either the Local Players or by dragging Media Items into the Media Players.
You can also use the Favourites tab to quickly access regularly used Media with a single click.
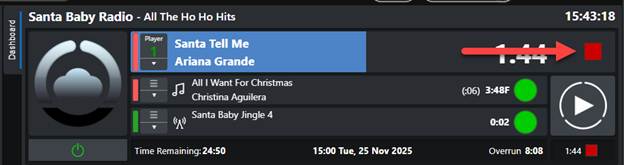
- When you are ready to resume playback from the Log, click on the Go Button in the Dashboard section.

- DON’T FORGET to turn your microphone off!!!
- You can set the Chain Types in the Log to plan where you intend to broadcast live segues throughout your show.
- When you have finished your live show:
- Switch back to AutoFade mode to change all the Chain Types to Green Circles and automatically handle backtiming.

- On the BR Live panel, use the drop down menu to Leave Live Room.
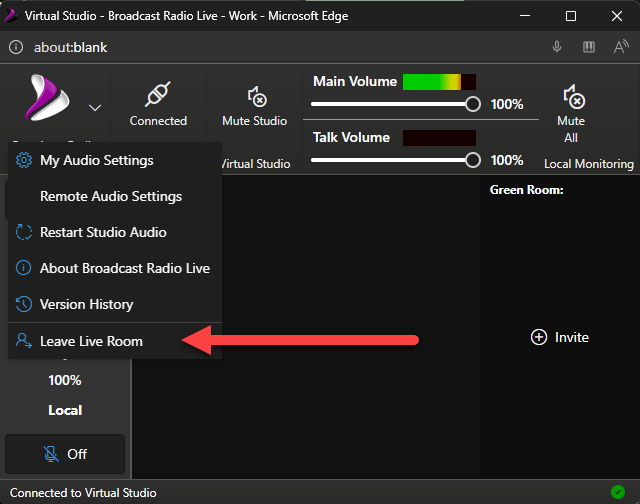
Or simple close the window to disconnect the audio.

- Switch back to AutoFade mode to change all the Chain Types to Green Circles and automatically handle backtiming.
- You can now logout of the Broadcast.Radio portal or simply close your browser tab. The radio station will continue playing from the Myriad Cloud patform.
And that is it from Santa Baby Radio. We hope you have found this series useful, whether you are planning a popup station or just wanted to know more about how to create a radio station on Myriad Cloud.
If you need any further information or would like a free quote for any of our products and services, email hello@broadcastradio.com
Was this article helpful?
That’s Great!
Thank you for your feedback
Sorry! We couldn't be helpful
Thank you for your feedback
Feedback sent
We appreciate your effort and will try to fix the article