In the previous episodes, we created a new popup radio station, on the Myriad Cloud platform, called Santa Baby Radio.
In this episode, we will explore how we can use the content that is already uploaded to other Radio Stations within our Brand on the Myriad Cloud platform, to quickly and simply build our popup radio station.
If you have created a new Myriad Cloud station from scratch then you can move straight onto the next episode, where we will cover uploading new content to your station.
There are two options available for using existing content in your Brand to schedule your popup radio station.
The Simple Way
By default, all Stations within a Brand on Myriad Cloud, share a common MediaWall along with shared Categories and Attributes. Each Station does have its own Clocks, Rules and Scheduled Log.
In our example setup, Kelfield Radio has a library full of categorised content, including songs in a Christmas category.
As Santa Baby Radio is in the same Brand, the same content will be available, so all we have to do is create the Clocks and Rules needed to schedule the popup Christmas station.
The steps we need to take are:
- Confirm we have Songs in the Christmas Category.
- Create a new Clock that only uses Christmas Category Songs.
- Assign the Clock to hours of the week.
- Run a test schedule to check it is working.
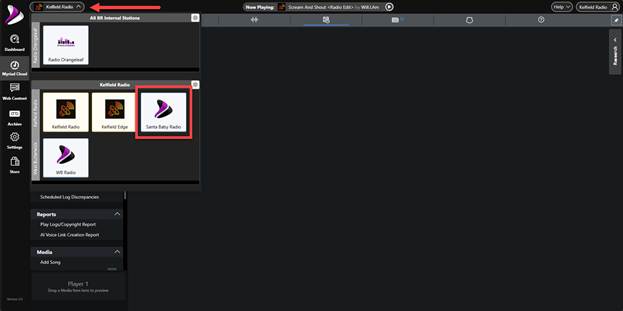
Start by logging into the Broadcast.Radio portal (http://my.broadcast.radio) and select the Station you want to use from the Station Selector drop down.

Scroll down to the Media section and click on the Media Library/Mass Change option. This will open the Media Library tab which shows all the content on the MediaWall.

Click on the Songs > All Categories node at the top of the navigation tree, this will list all the Songs available along with their current Categories and Attributes.
We want to check we have some Christmas music, so click on the Xmas Category on the navigation tree.
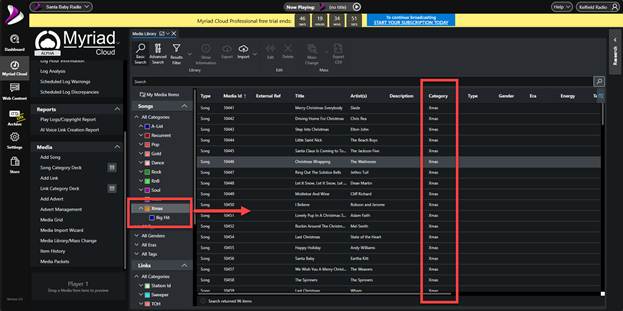
Now that we have confirmed that there are Songs in the Xmas category, we can add a Clock that will only use Songs from the Xmas Category.
Close the Media Library tab and then click on the All Clocks option in the Clocks & Rules section of the left hand menu.

This will show a list of the available Clocks. As this is a new station, only the two default Clocks will be listed.
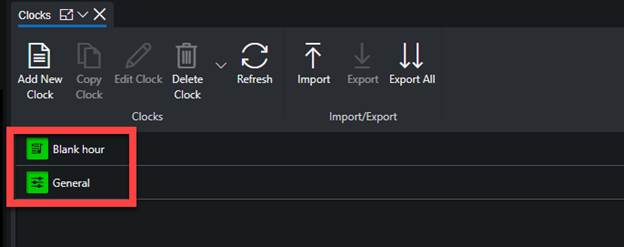
To add a new Clock, click on the Add New Clock button.

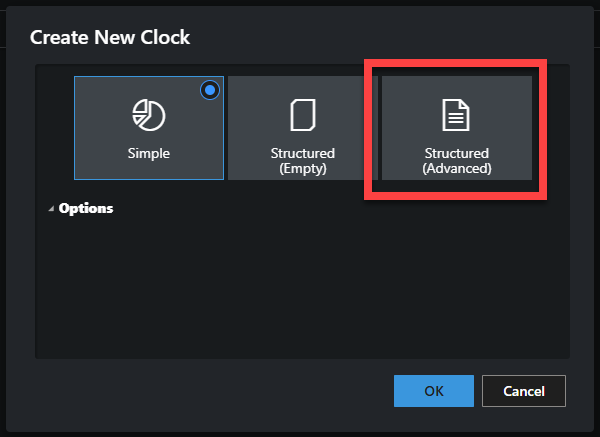
You can select the type of Clock you want to add. The options are:
- Simple – A non-structured Clock with Category Goals and regular Link placement.
- Structured (Empty) – A structured Clock that allows you to position the Clock Items within the hour. The Clock starts with an empty Clock Items list with this option.
- Structured (Advanced) – A structured (Advanced) Clock that allows you to position the Clock Items within the hour. The Clock starts pre-populated based on some simple criteria.
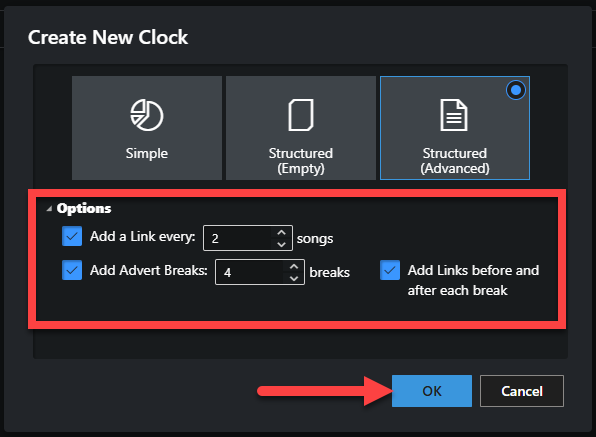
- Add a Link every X songs – Determines the frequency that Links will be placed in the Clock.
- Add X Advert Breaks – Determines how many Advert/Spot breaks will be in the Clock. They will be positioned evenly across the Clock.
- Add Links before and after Advert Breaks – Automatically ad Links ether side of Advert Breaks.
So in the example above, the Clock will include a Link every two Songs and have four Advert / Spot breaks in the hour with Links position either side of Advert Breaks. Click on OK to generate the Clock.

As you can see from the screen shot, the Clock has been pre-populated using the Link > Song > Song > Link pattern the options requested, and four Advert breaks have been placed in the Clock (with Links either side). The pie chart shows a breakdown of the whole Clock over an hour.
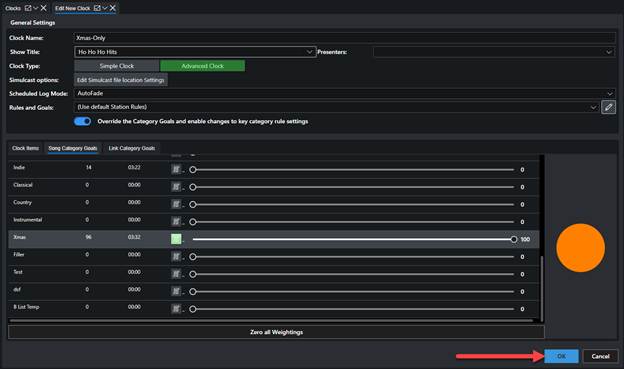
Crucially, the Category column for Songs and Links has been pre-set to ‘Use Goals’ which means that rather than choosing from a specific Category, the system will refer to the Category Goals tabs to determine what Song and Link Categories to use.

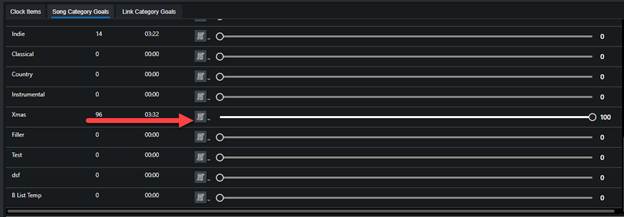
If we switch to the Song Category Goals tab, you can see the mix of Song Categories that will refer to all Song Clock Items in the Clock that are set to ‘Use Goals’.
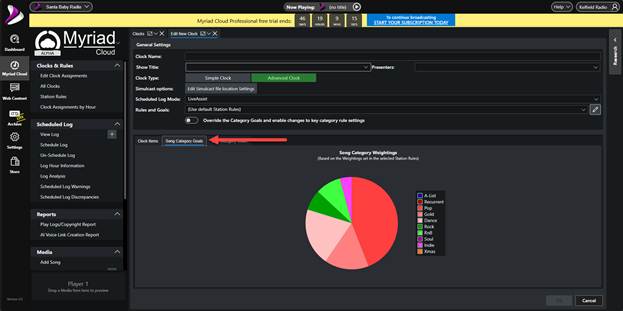
To set the Song Category Goals specifically for this Clock, toggle the option for Override the Category and enable changes to key category rule settings.
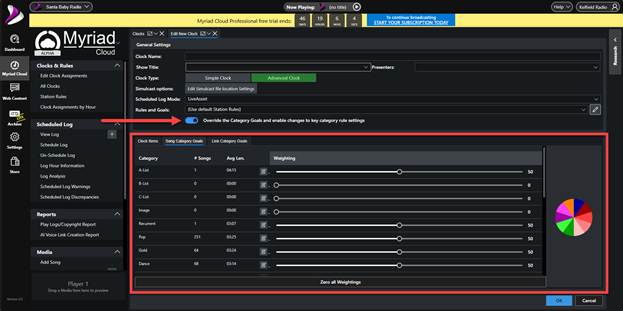
The fixed pie chart is replaced with options for each Category to allow you to set a weighting for each Category and override some of the basic Rules when using this clock.

In this case, we will use this section to set all the Category Weightings to zero, except for the Xmas Category.
Firstly, click on the Zero all Weightings button to set all the weightings to zero.

Scroll down the list of Categories until you find the Xmas Category. Drag the weighting for this Category all the way to the right to set it to 100%.
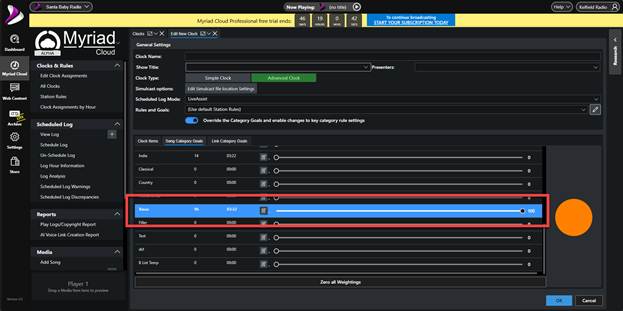
While we are in this window, we can also adjust the Rules for the Category in this Clock to ensure content will be scheduled.
Click on the Override Rules button ![]() for the Xmas Category.
for the Xmas Category.
This will show the Rules based on the default Rule Set. You can adjust them for this Category in this Clock only, as required.
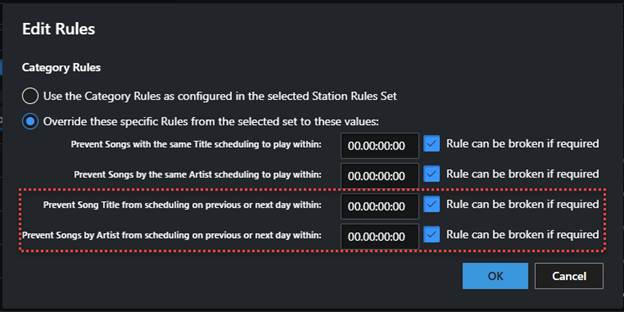
With a specialist station such as Santa Baby Radio, we will be scheduling from a fairly small pool of content so you may with to relax the Title and Artist rules accordingly.
Please note that Previous/Next Day rules for Artist and Title are only available to Myriad Schedule Pro users.
Finally, you will need to add a Clock Name and optional Show Title & Presenter. You can also choose the playout mode (Live Assist or Autofade).

Now that the Clock is complete, we can assign it to hours of the week using the Edit Clock Assignments option in the Clocks and Rules section.

For Myriad Schedule users, this will open the Clock Assignment Grid immediately. Myriad Schedule Pro users can access multiple Clock Assignment Grids so have the option to select the grid or create a new one. Double click on a Clock Assignment Gris to open it.
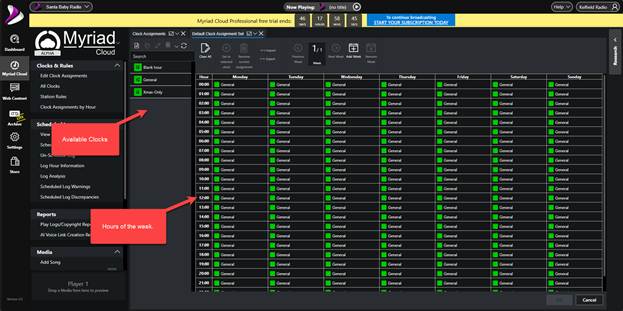
The Clock Assignment Grid has a slot for each hour of the week, and you can assign a Clock to be used when scheduling for that slot. In the example above, the ‘General’ Clock is being used for every hour.
To assign the Xmas-Only Clock we just created, follow these steps.
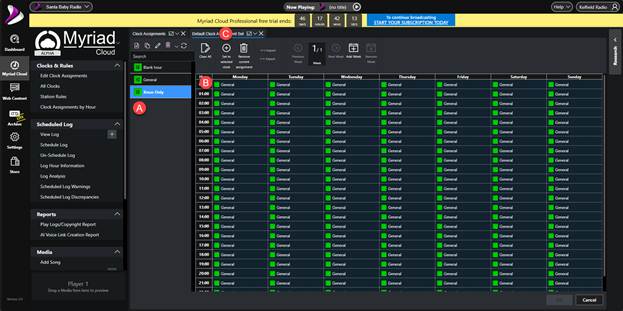
- Select the Xmas-Only Clock from the list of available Clocks.
- Select all the hour in the week using the mouse.
- Click on the Set selected to Clock button.
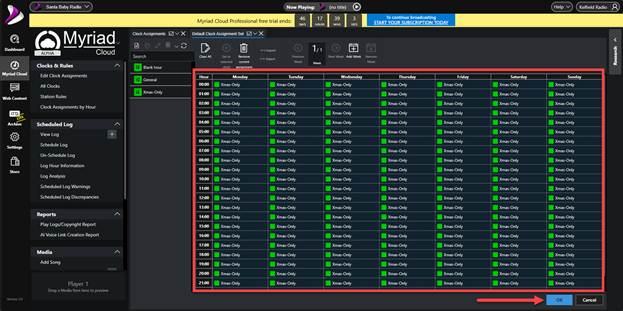
The grid will update to show the Xmas-Only Clock in each hour of the week.
Click on OK to save the Clock Assignment grid.
With the Clock created and assigned to hours in the week, we can now run a test schedule and check that Christmas music is scheduling correctly.
At this stage, we have not added any Links or other content so it will only be the Songs that will be scheduled. More on that in a later episode.
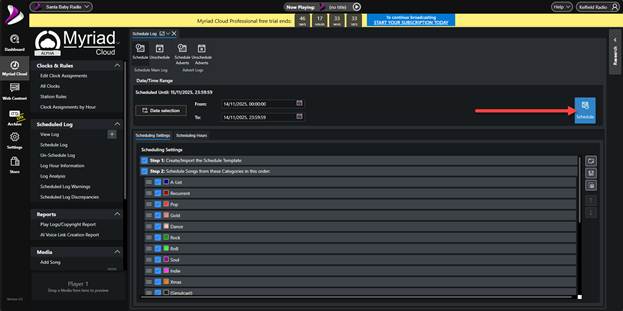
To run a test schedule, click on the Schedule Log option in the Schedule Log Section on the left-hand menu.

You can use the Date Selection button to select a pre-determined time, or use the From / To fields to specify a specific date range.


The click the Schedule button to begin scheduling.
A small progress bar show scheduling progress on the left-hand side.

Once the scheduling is complete, the Log can be viewed and edited if required.

We can see from the Log that only Christmas music is being used.
In the next episode, we will tackle how to replicate content from an on-premise Myriad Playout system, to your Myriad Cloud pop-up station.
Was this article helpful?
That’s Great!
Thank you for your feedback
Sorry! We couldn't be helpful
Thank you for your feedback
Feedback sent
We appreciate your effort and will try to fix the article