TABLE OF CONTENTS
- Creating A Myriad Anywhere User Account for Replication
- Switching To Mixed Login Mode In Broadcast.Radio
- Finding Your Myriad Anywhere URL
- Setting Up Replication
- Replicating Data
In the previous episode, we have focused on adding a popup station to an existing Myriad Cloud Brand and reusing the content in the pop-up station, but what if you use Myriad Playout at your studios and do not have any existing Myriad Cloud stations?
Luckly, there is simple way to do a one-time replication from your on-premise Myriad Playout system to your new Myriad Cloud station, so you will not have to upload and categorise all the content again!
In Part 3, we covered setting up a brand-new Myriad Cloud station from scratch, so now we will walk through the steps needed to replicate an on-premise Myriad Playout with an empty Myriad Cloud station.
For this guide, we will use a totally new Myriad Cloud Station called Elf Radio, created within its own Brand so that it doesn’t share any content or settings with Santa Baby Radio or Kelfield Radio.
Creating A Myriad Anywhere User Account for Replication
Accessing Myriad Cloud is typically done via a Broadcast.Radio login which includes permissions to access areas of the system. We strongly recommend using two-factor authentication to greatly increase security for the station.
Replication requires the on-premise Myriad Playout system to connect to the Myriad Cloud Playout system directly so instead of using a Broadcast.Radio account, we will need to create a new Myriad User account with suitable permissions, to allow the software to connect directly to the cloud system.
To create a Myriad User Account, follow these steps:
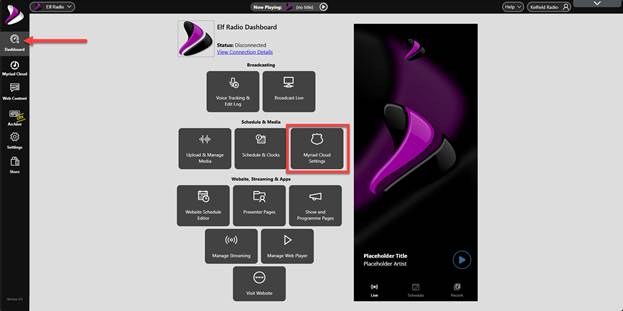
- Login to your Broadcast.Radio (https://my.broadcast.radio) portal and click on the Myriad Cloud Settings option on the Dashboard.
- In the Users & Security section, click on Add New User.
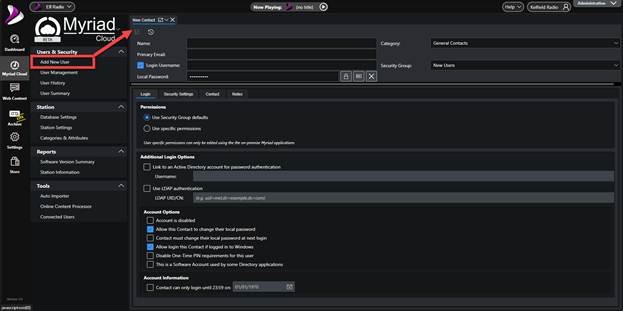
- Fill in the following details:

- Give the User a suitable name (like Replication Account).
- Add a suitable Username (like replication).

- Click on the Change Password button and add a suitable password.


- Use the Security drop down to select the Administrator Role.

- Click on the Save button to save the User details.

- You now have an Administrator level Myriad User Account that can be used for replication.
Switching To Mixed Login Mode In Broadcast.Radio
You also need to switch the Broadcast.Radio portal to allowing a mix of Broadcast.Radio Users and Myriad Users to login to the system.
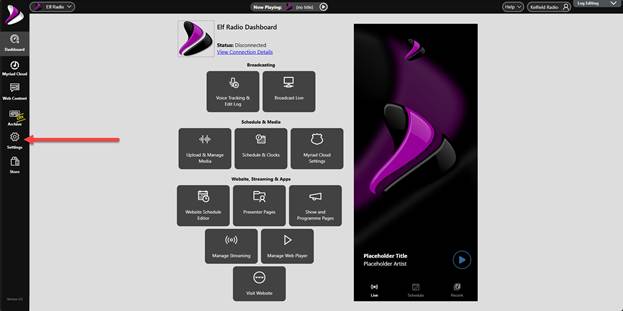
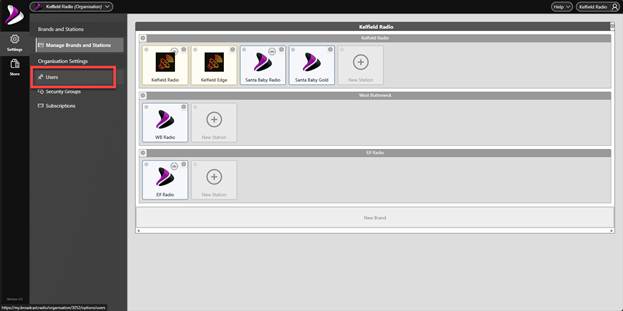
- Starting in the Dashboard, click on the Settings button.
- Scroll down and select the Organisational Settings option.

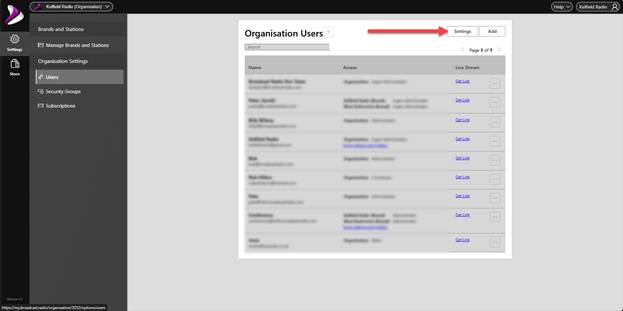
- Select the Users option.
- Click on the Settings button.
- Ensure the Allow signing in with Myriad accounts and Broadcast.Radio option is selected and click on OK.
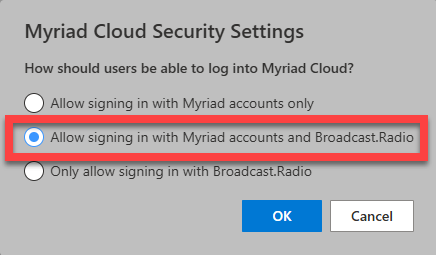
- Please note that this is an Organisation wide setting.
Finding Your Myriad Anywhere URL
You will also need to know the Myriad Anywhere URL to setup the replication. This is a unique web address for your Station, that allows users or software to connect directly to your Myriad Cloud system, bypassing the Broadcast.Radio portal.
To locate your Myriad Anywhere URL, follow these steps:
- Click on Settings tab and select Myriad Anywhere Cloud.

- Make a note of your Myriad Anywhere Cloud URL as you will need to use this to setup the replication connection.

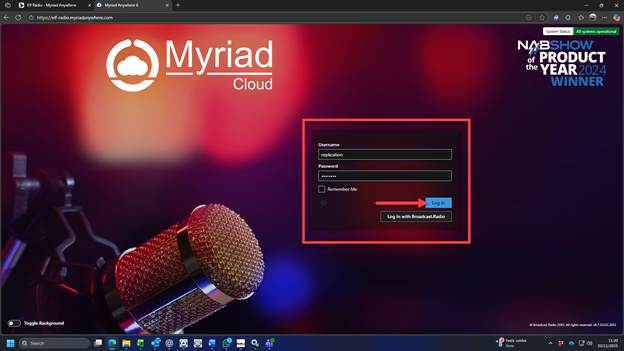
- Please note you can click on the link to open the login page in a new tab.
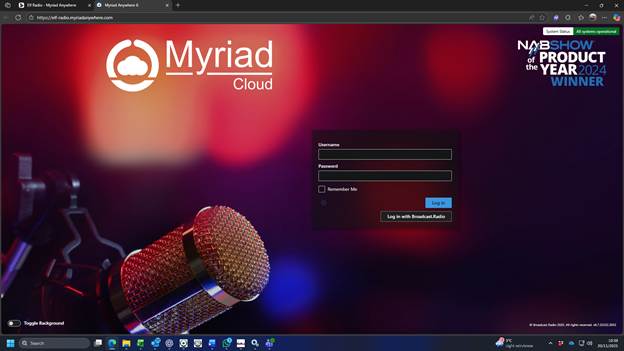
- It is a good idea to test the Username and Password you setup in the previous section, to check it is all functioning correctly.
Setting Up Replication
With the Myriad User account created and Myriad Cloud set to allow connections from Myriad Accounts & Broadcast.Radio Accounts, we are ready to connect our on-premise Myriad Playout system to the new Myriad Cloud station and start the replication process.
- Login to your on-premise Myriad Playout system with an Admin level User Account.
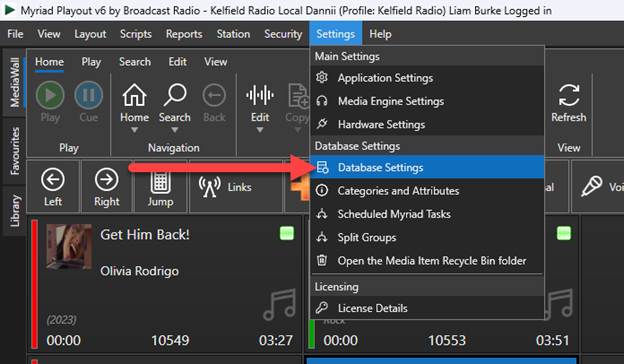
- Click on Settings Menu > Database Settings.
- Switch to the Database Connections tab and the click on the New Connection button.

- Fill in the details required as follows:
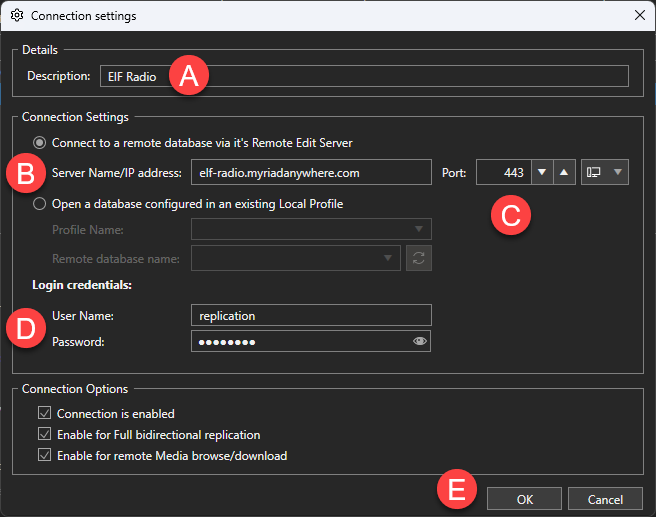
- Add a suitable description.
- Paste in the Myriad Anywhere URL from the last section. Make sure you only include the address with no ‘/’ or https etc.

- Leave the port as 443 for connecting to a Myriad Cloud station.
- Add the Username & Password we created in the previous section.
- Click on Save to save and close.
- The new Connection will be added to the list. Click on OK to close the window.

Replicating Data
- Next, click on the Station Menu > Replicate data with a remote station database option.

- Select the Station you want to connect to, and click OK.

- Choose the options you want to replicate. The recommended settings are:
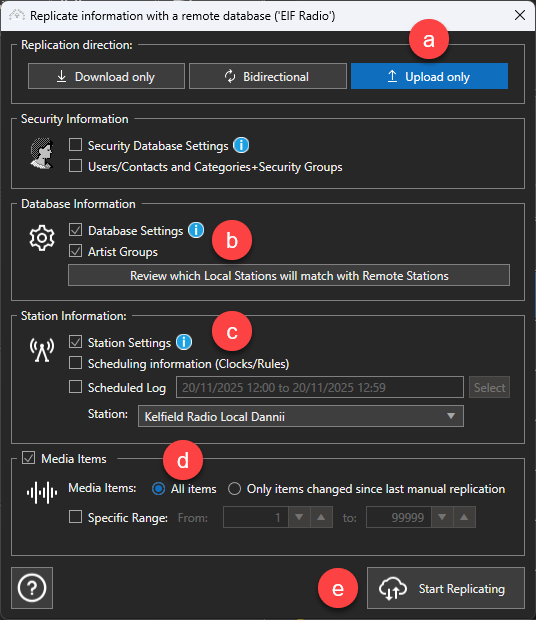
- Upload only – The data will be pushed in a single direction from your Myriad Playout to your Myriad Cloud.
- Database Settings – This is optional but allows you to match settings between Myriad Playout and Myriad Cloud. If you do not replicate Database Settings, the defaults will be used on the Myriad Cloud station.
- Station Settings – Again, this is optional. If you do not replicate Station Settings, the defaults will be used on the Myriad Cloud station.
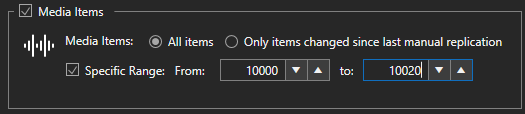
- Media Items – Tick the option to enable Media Item replication and select All Items to replicate all Media Items to the Myriad Cloud station. You can also select a specific range to be replicated.
- Click Start Replication to start the process.
- The replication process may take some time depending on the amount of content being replicated.


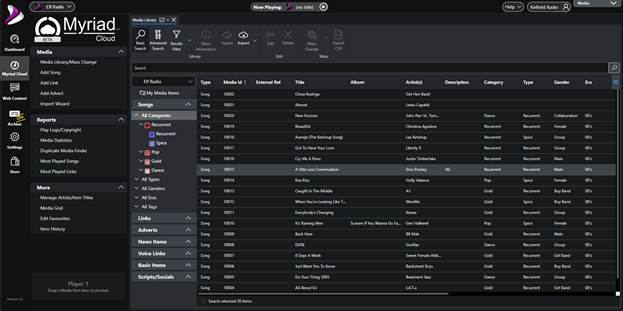
- Once the process is complete, you can browse the replicated content on your Myriad Cloud station.
In the next episode, we will review how to upload new Songs and Jingles to your Myriad Cloud radio station.
Was this article helpful?
That’s Great!
Thank you for your feedback
Sorry! We couldn't be helpful
Thank you for your feedback
Feedback sent
We appreciate your effort and will try to fix the article