Requires:
- Myriad Playout / Cloud v6.9 or higher.
- Active Promo Only Online (POOL) Subscription.
 Myriad Playout and Myriad Cloud customers that have one or more active subscriptions with the Promo Only Online (POOL) service, can add their login details to the Station Database to allow browsing the available Songs and downloading them directly into the Myriad Media Wall.
1. First let's add in the Promo Only login details. In Myriad Playout, click on the Settings menu.
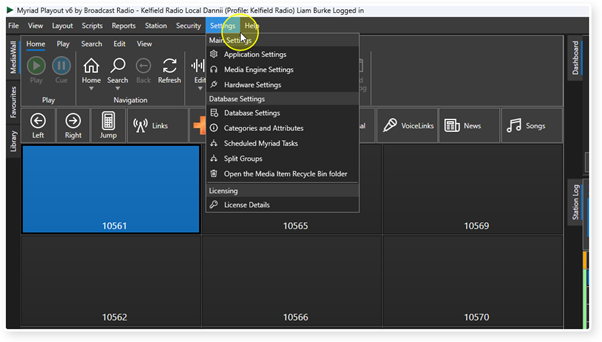
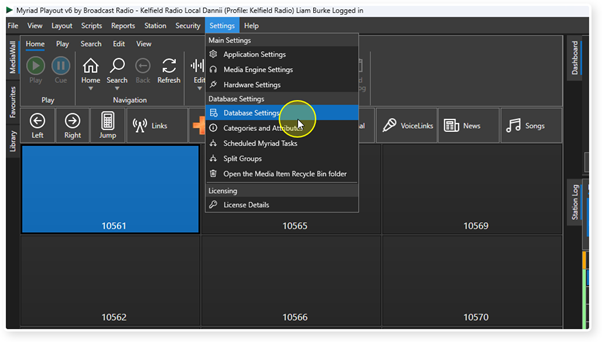
2. Select Database Settings.
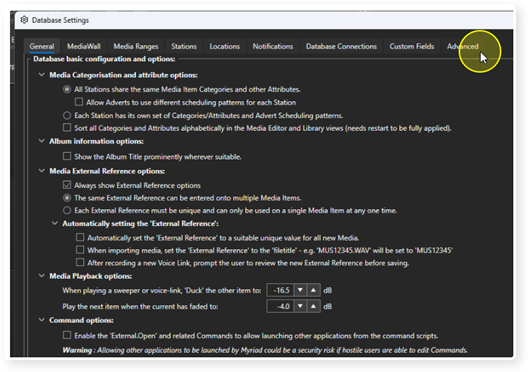
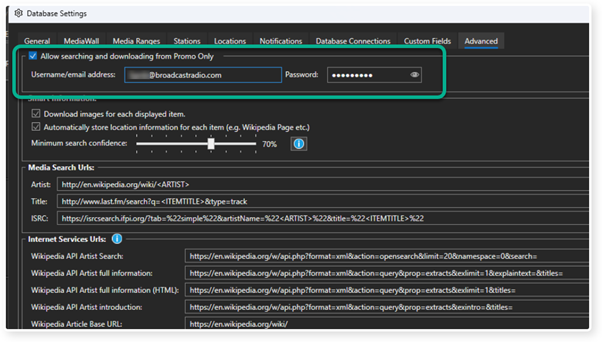
3. Switch to the Advanced tab.
4. Tick the Allow searching and downloading from Promo Only option.
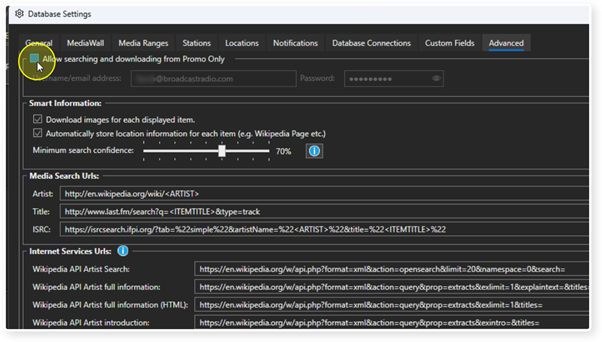
5. Type in the Username / Email Address and Password you use to login to the POOL service.
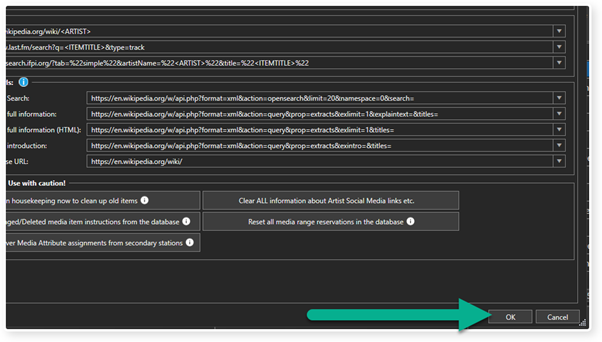
6. Click on OK to save the settings and close the Database Settings window.
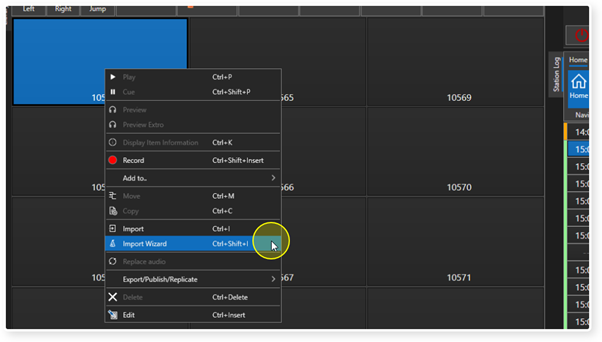
7. Right click on an empty Media Item on the Media Wall and select the Import Wizard option.
You can also use <Ctrl>+<Shift>+<I> if you prefer.
8. In the Import Wizard, click on the Promo Only button to open the Search Promo Only window.
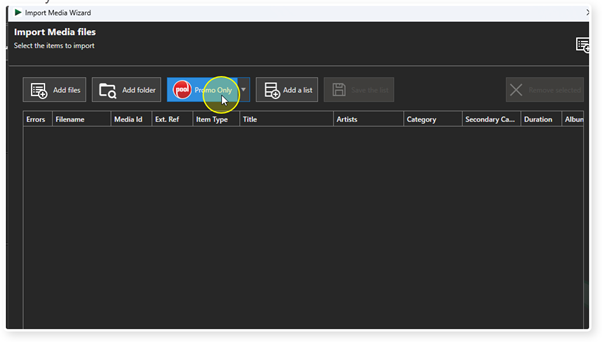
You can also use the drop down option to toggle whether to automatically check a track has already been downloaded.
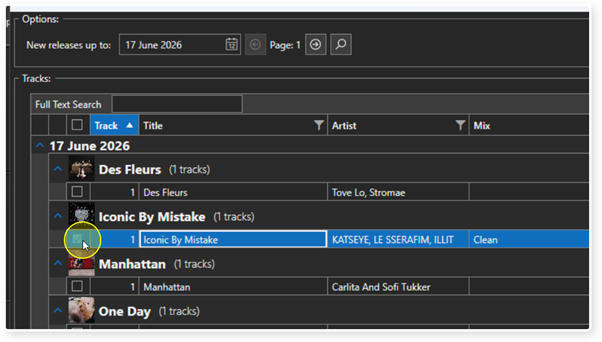
9. The Search Promo Only window shows a list of the most recently available Songs to download.
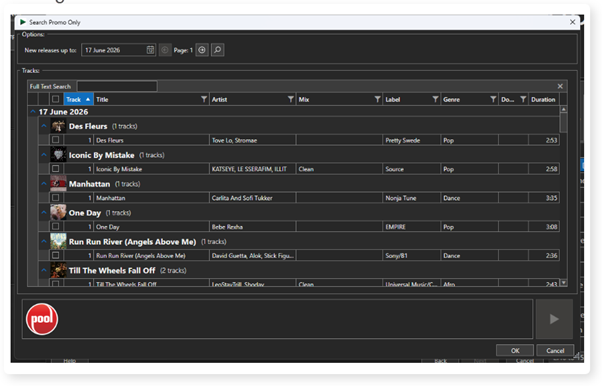
10. The Options section allows you to select the date to display new release up to.
You can also scroll forwards and backwards through the list, page at a time and refresh the list using the search button.
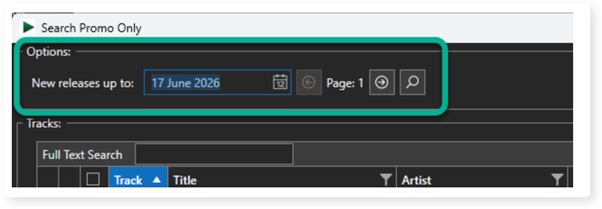
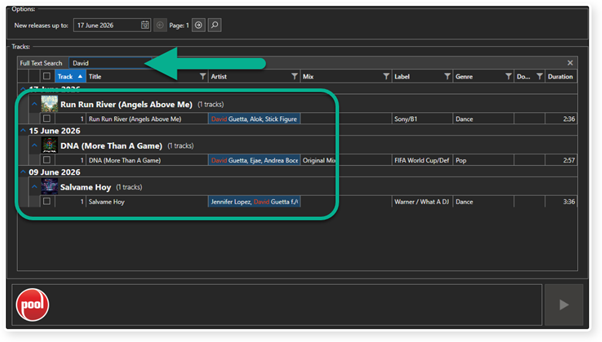
11. You can also search for a specific Name or Title by typing into the Full Text Search field.
The results are automatically displayed in the track list.
12. To preview a Song, select it and then click on the Play button in the preview player. This will play out of the Preview Media Device in Myriad.
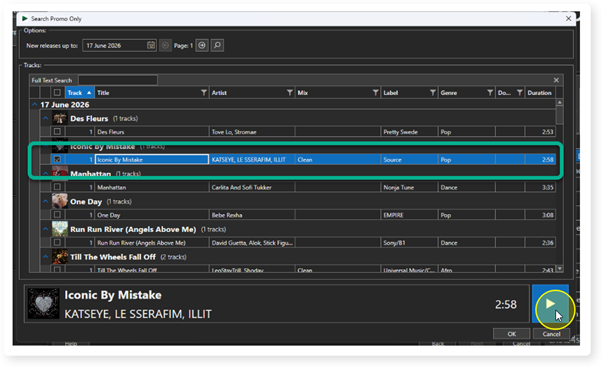
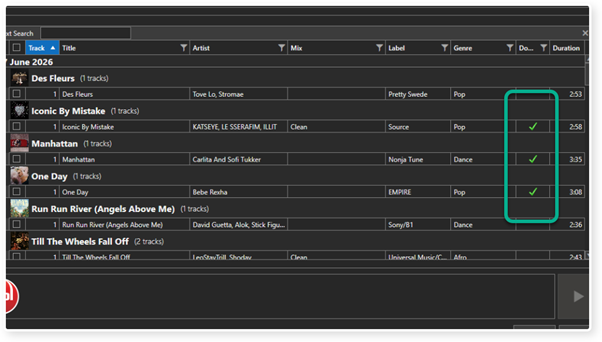
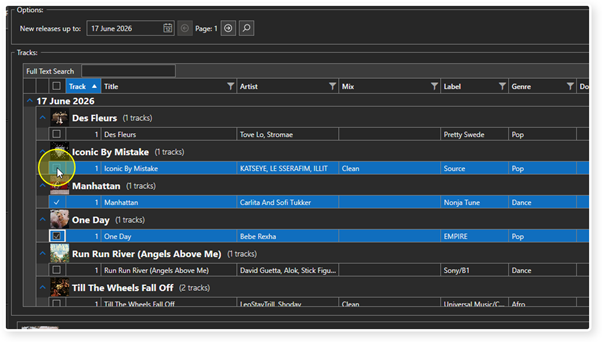
13. Songs that have already been downloaded to Myriad will bear a green tick.
14. To add a Song to the download list, tick the checkbox to the left of the song.
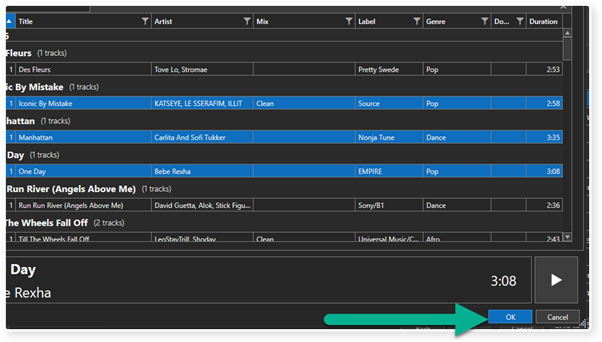
15. You can select as many Songs as you like, to add to the download list.
16. Once you have made your selection, click OK to close the window.
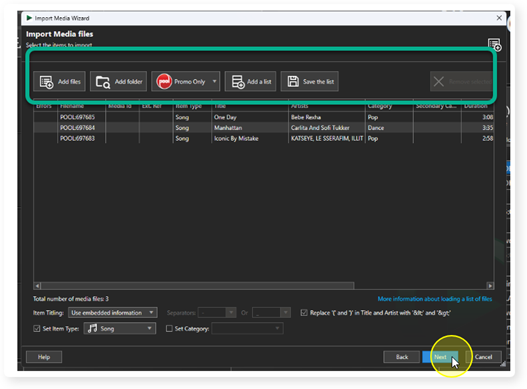
17. The selected Songs will be added to the list of audio to import using the Import Wizard. From this point you just use the Import Wizard in the normal way.
Click Next to move on to the next page of the wizard.
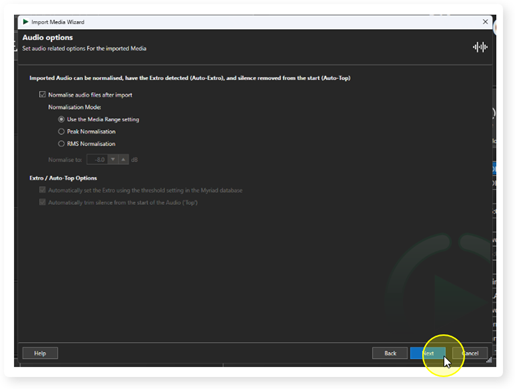
18. Unless you want to override the Normalisation settings, click Next.
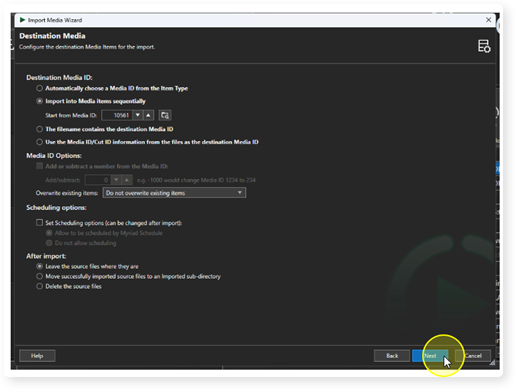
19. The selected Songs will be added to empty Media ID's on the Media Wall sequentially starting with the Media ID you originally right clicked on. Unless you want to override these settings, click Next.
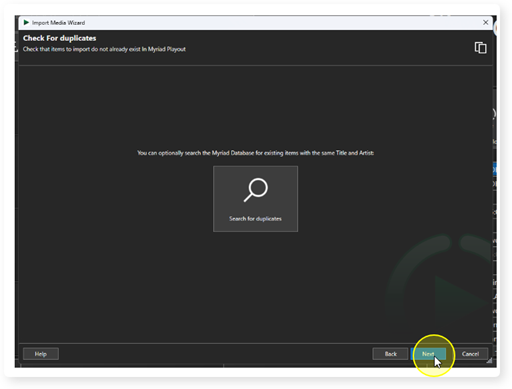
20. You can search for duplicates if you wish, otherwise click Next.
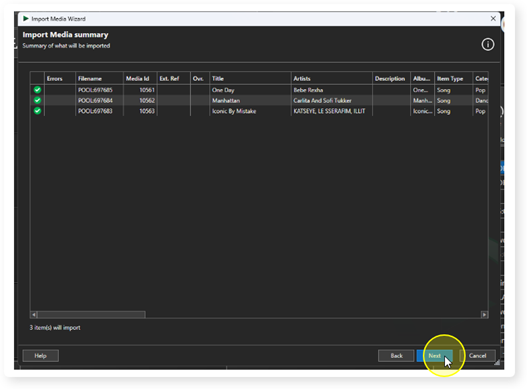
21. The Import Summary shows what will be imported along with metatdata that will be used. Click Next to continue.
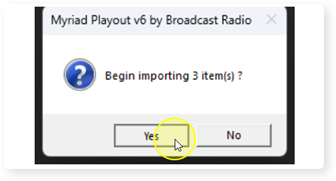
22. You will be asked to confirm the Import. Click Yes to continue.
23. The Importing screen shows progress on importing the current item as well as overall progress.

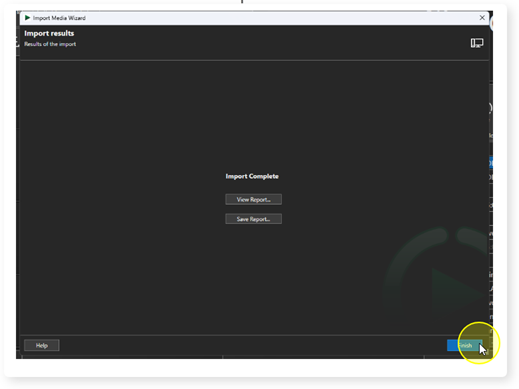
24. Once the import process is complete, you can view the summary report or just click Finish to close the Import Wizard.
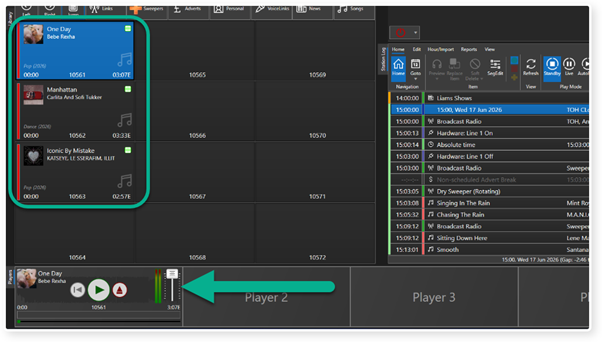
25. The imported Songs are listed on the Media Wall and are immediately available to be played in a Media Player.
Was this article helpful?
That’s Great!
Thank you for your feedback
Sorry! We couldn't be helpful
Thank you for your feedback
Feedback sent
We appreciate your effort and will try to fix the article