TABLE OF CONTENTS
- Start with a new Layout
- Adding the Dashboard Tile
- Adding the SmartInfo (Wikipedia) Tile
- Adding the Clock Tile
- Add the Log View Tile
- Adding the Tabbed Container (Favourites, Listener Requests, Library, MediaWall & SmartInfo)
- Adding the Listener Request Count Tile
- Adding the Mini Media Player Tile
- Adding the Recorder Tile
In this guide, we will use the Dynamic Layout Editor to build a new layout from scratch, that is a variation of the standard Myriad 7 layout.
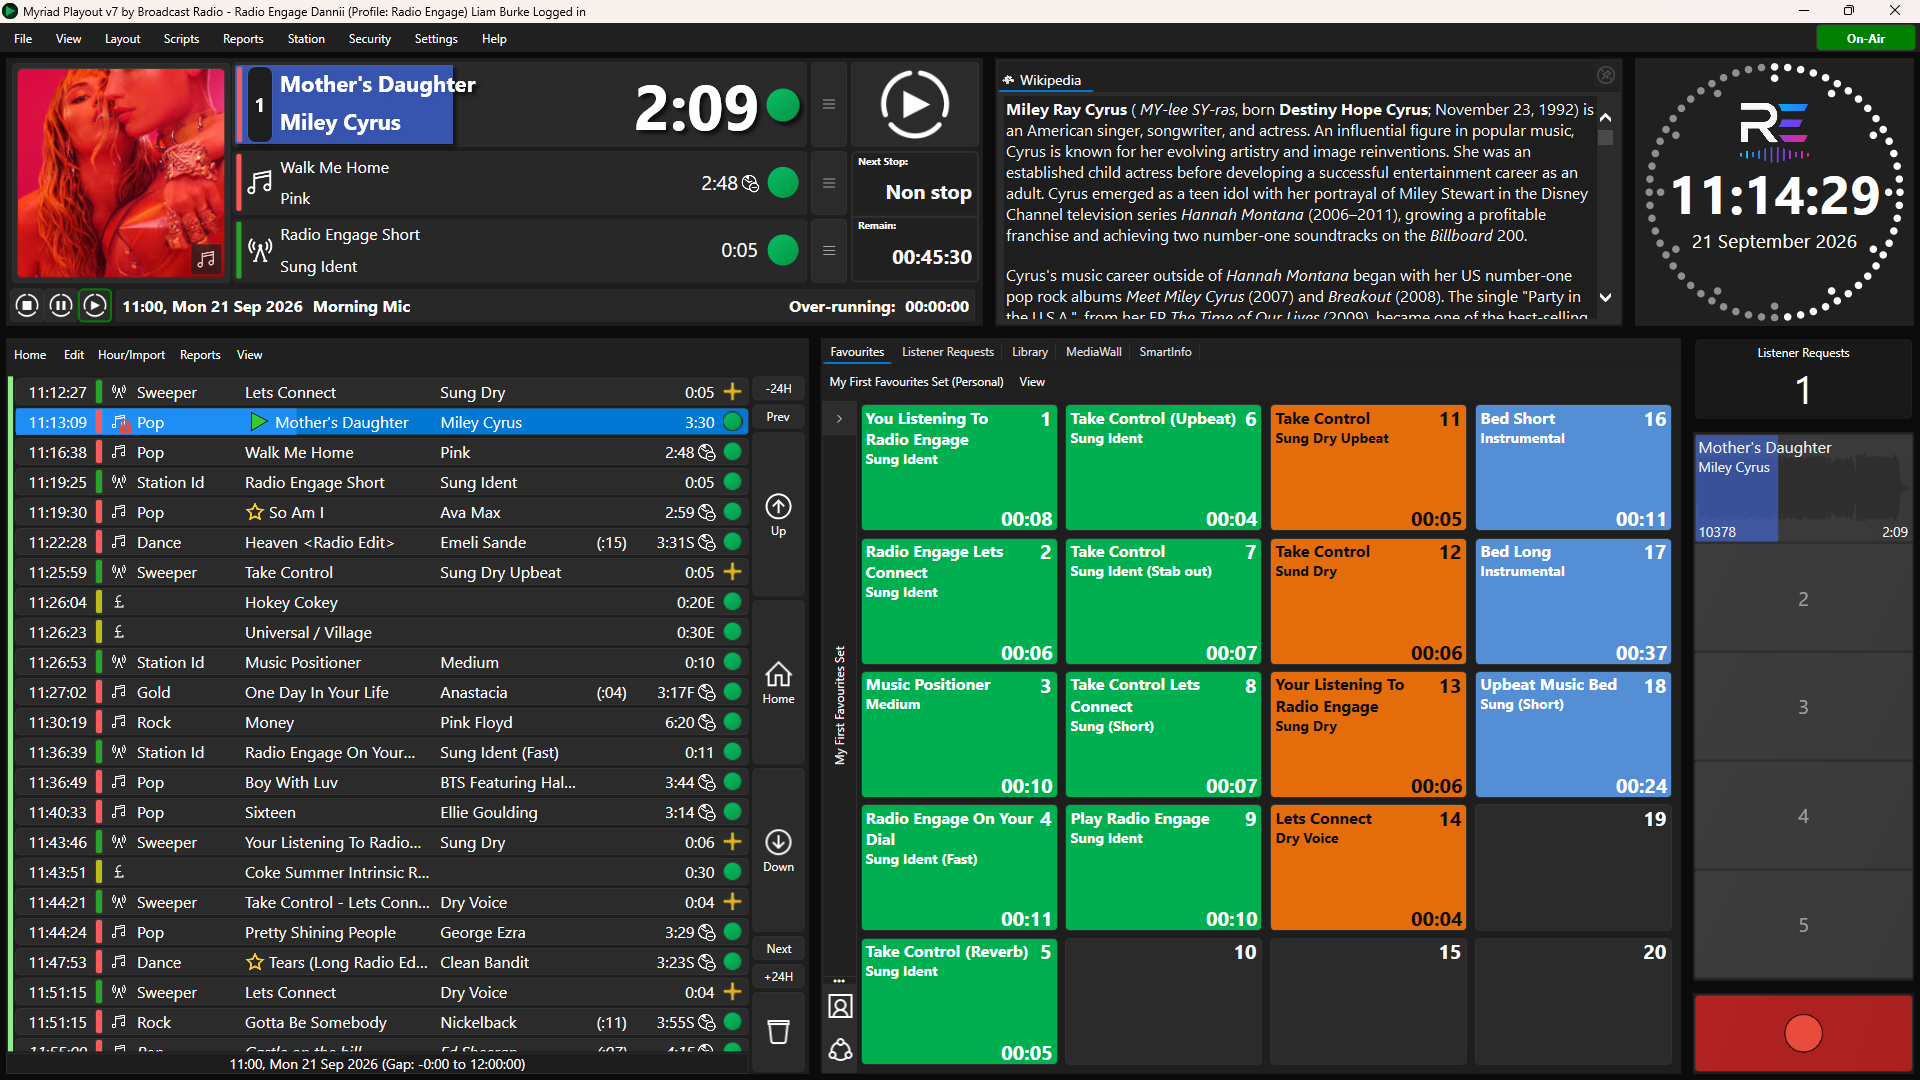
This layout consists of eight tiles positioned over a 33 x 22 grid to achieve the above design. You can of course, modify the design to suit your needs.
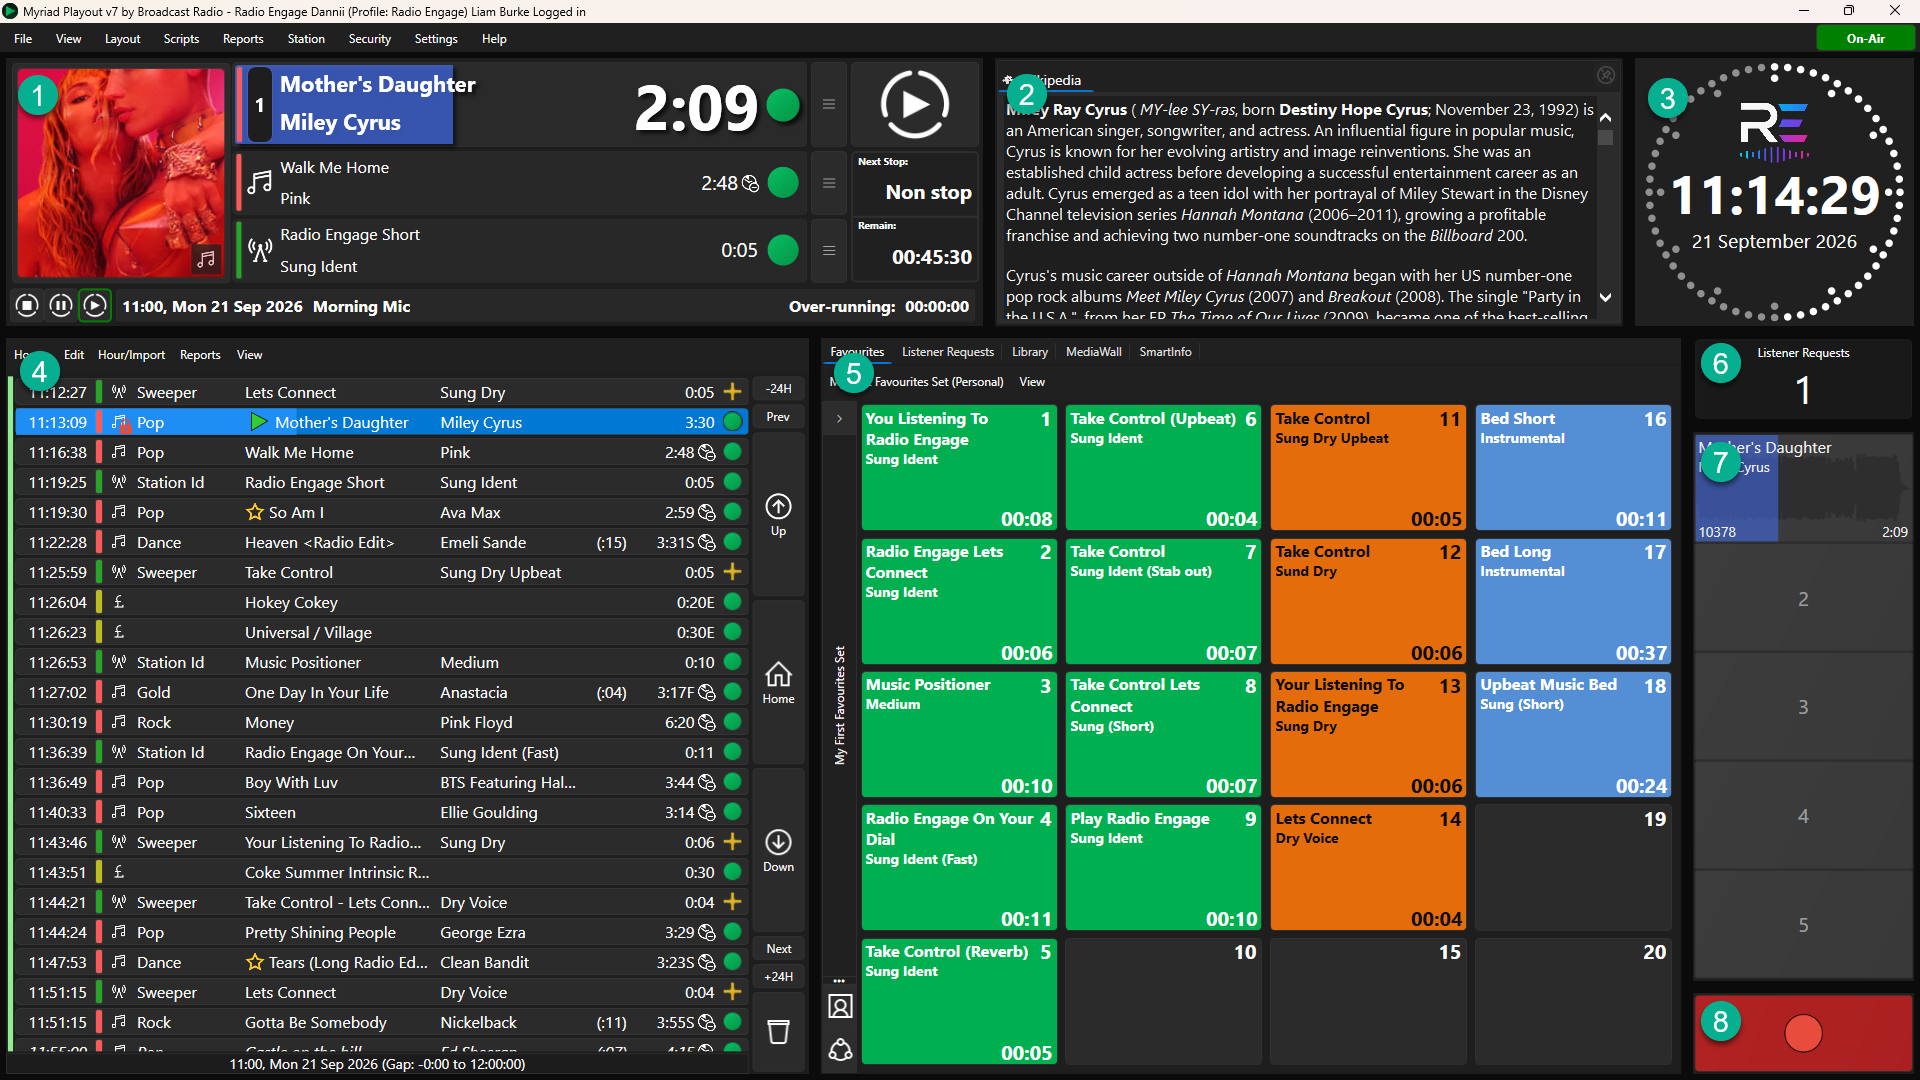
The Tiles we will use in this layout are:
- Dashboard
- SmartInfo (restricted to only showing Wikipedia
- Clock (including Station Logo and date)
- LogView
- Tabbed View (includes Favourites, Listener Requests, Library, MediaWall & SmartInfo)
- Listener Request Count
- Mini Media Player (vertical stack)
- Mini Media Player (Record only)
Start with a new Layout
Rather than modify an existing layout (which is the most common approach), in this guide we will start with a new empty layout and add each Tile in turn.
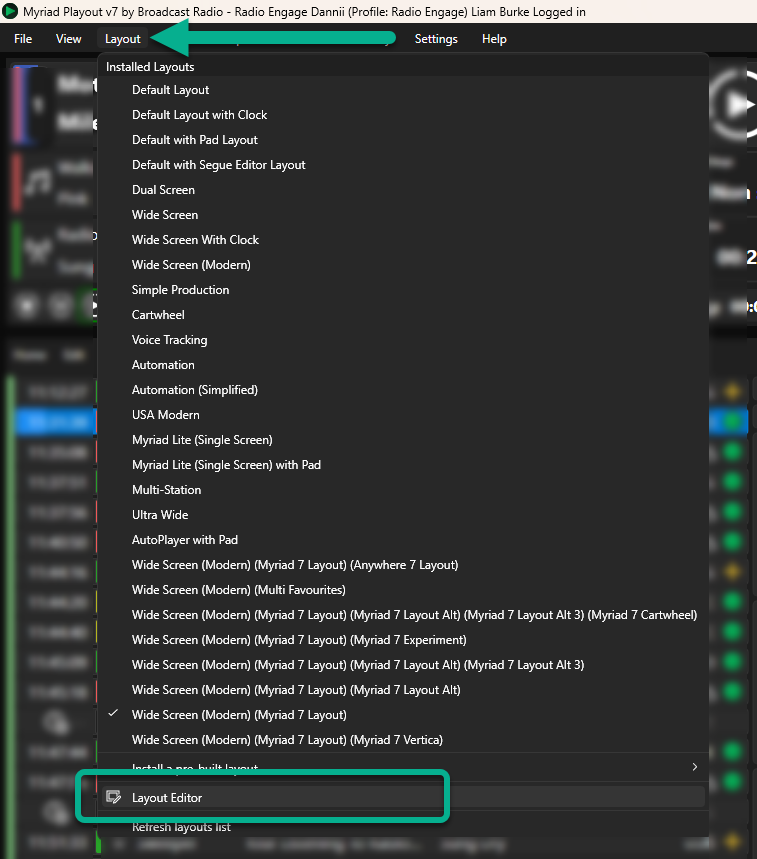
- Click Layout Menu > Layout Editor to open the Layout Editor window.
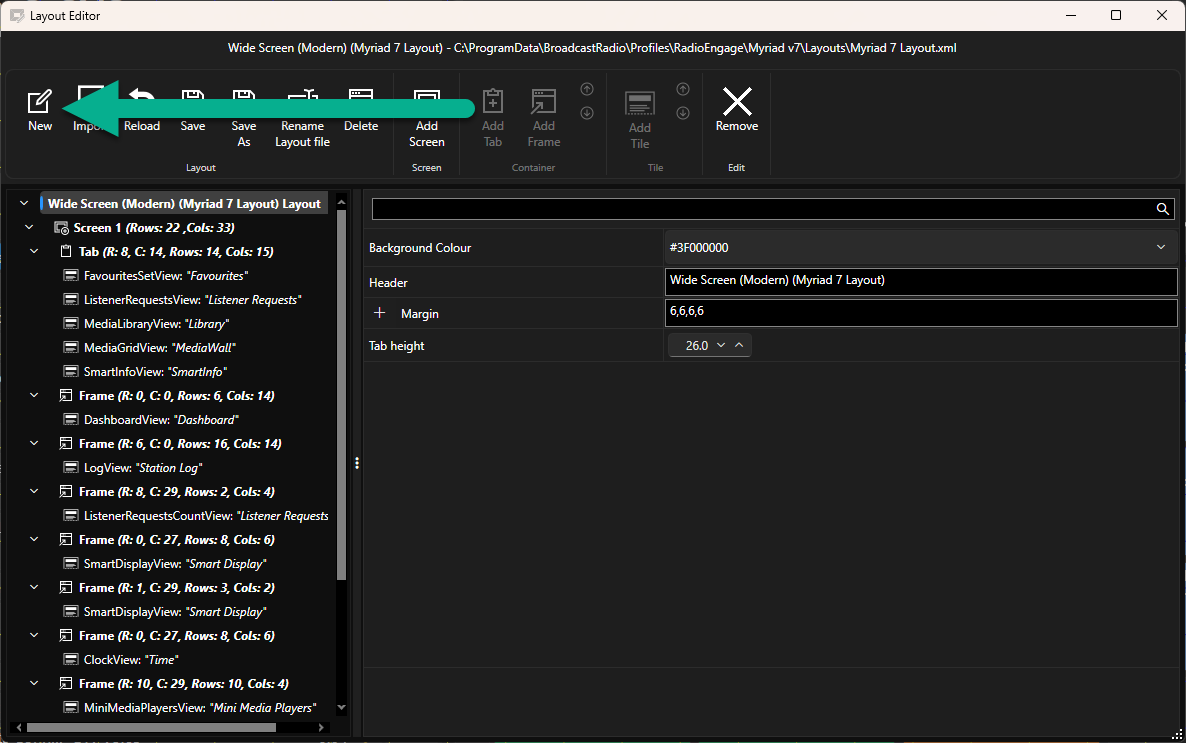
- Click on the New button on the ribbon, to start a new Layout.
- Type in a File Name and click ok.
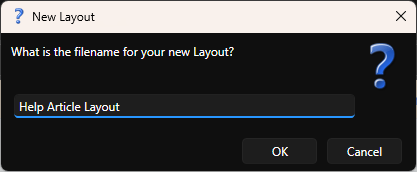
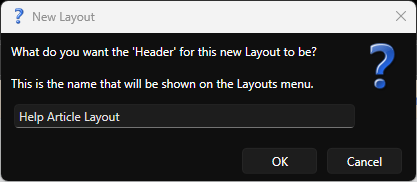
- Type in a suitable Header, this is label that will appear in the Layout Menu.
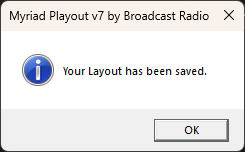
- The Layout will automatically be saved.
- The Layout Editor has a navigation window on the left hand side which allows you to select the top level Layout settings or select a specific screen. All attached screens are listed and you can build separate Layouts for each screen. In this example we will build a single Layout that will be displayed on Screen 1.
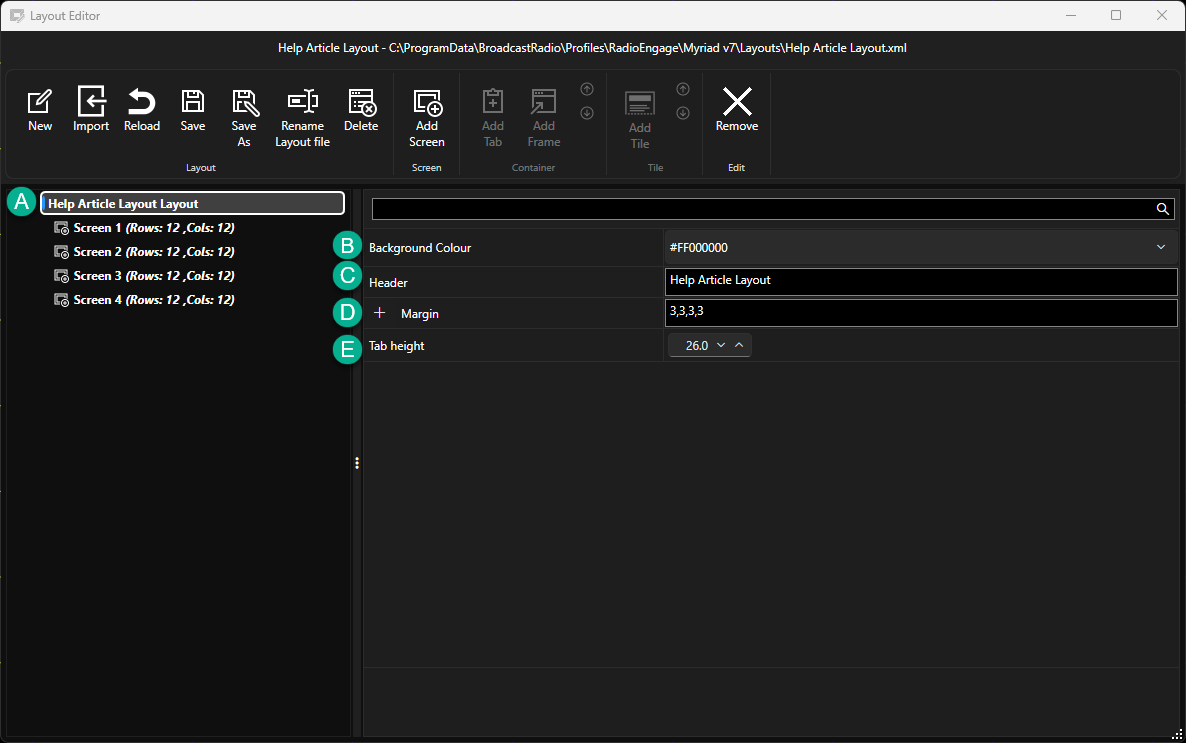
- Navigation Panel - Allows you to select the top level Layout settings or a specific screen.
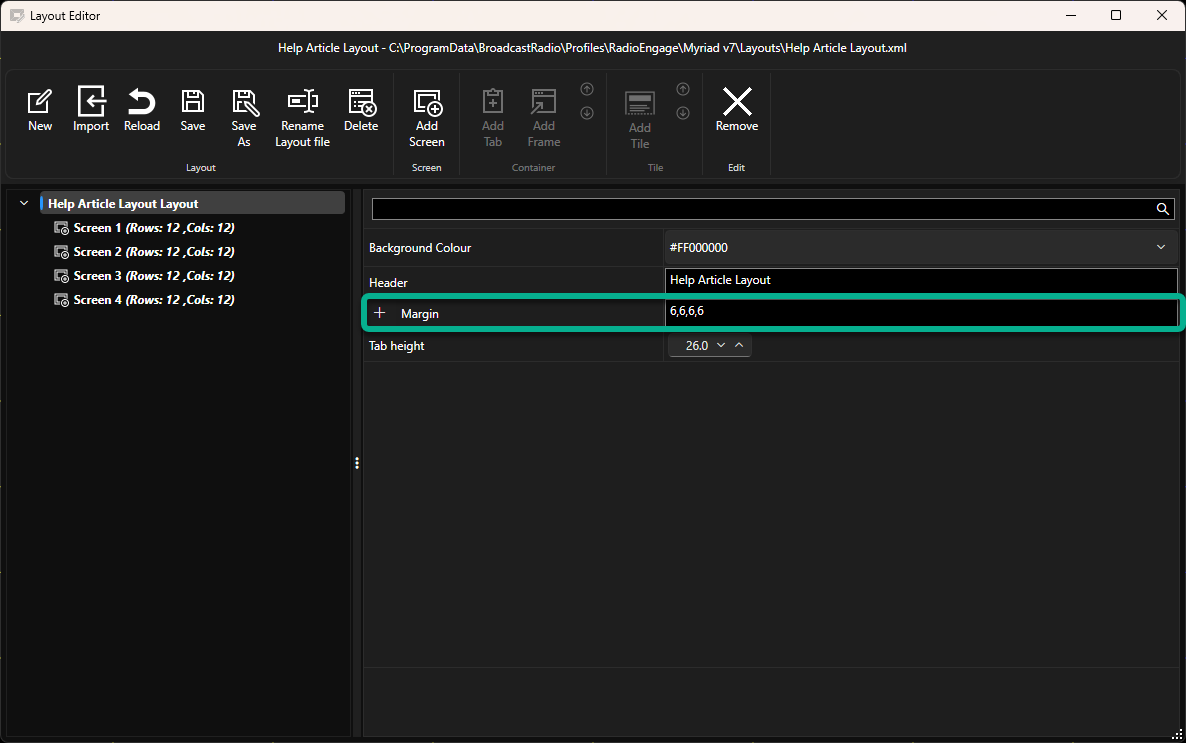
- Background Colour - Sets the background colour which will be visible between all Tiles as well as any Tiles that are set to be transparent (only some Tiles allow this).
- Header - Sets the label displayed when the Layout is in use and also sets the label on the Layouts Menu.
- Margin - Sets the margin (in pixels) around each Title in the Layout. The greater the margin, the bigger the gap between Tiles. The order is Left, Top, Right, Bottom.
- Tab Height - Sets the height of any Tabbed Tiles. Text automatically scales to fill height.
- For this Layout, we will set the Margin to be 6,6,6,6 and leave all the other top level settings as the defaults.
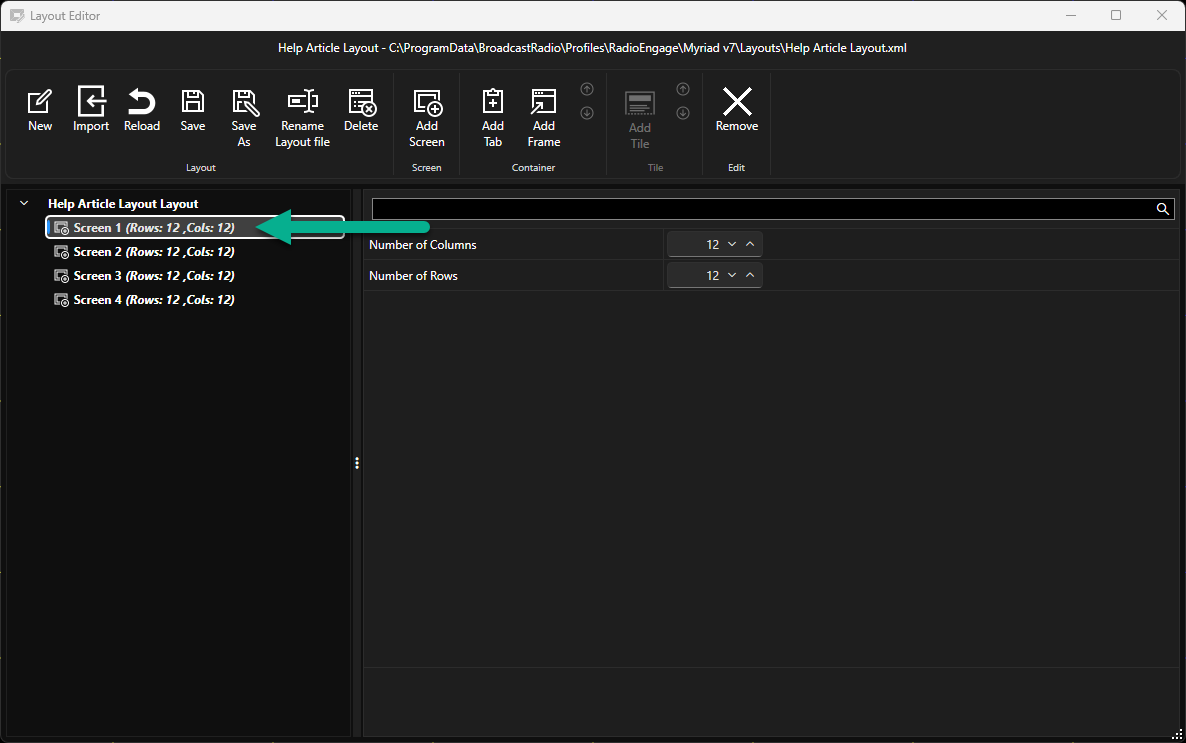
- Click on Screen 1 to select the screen we want to build the Layout for.
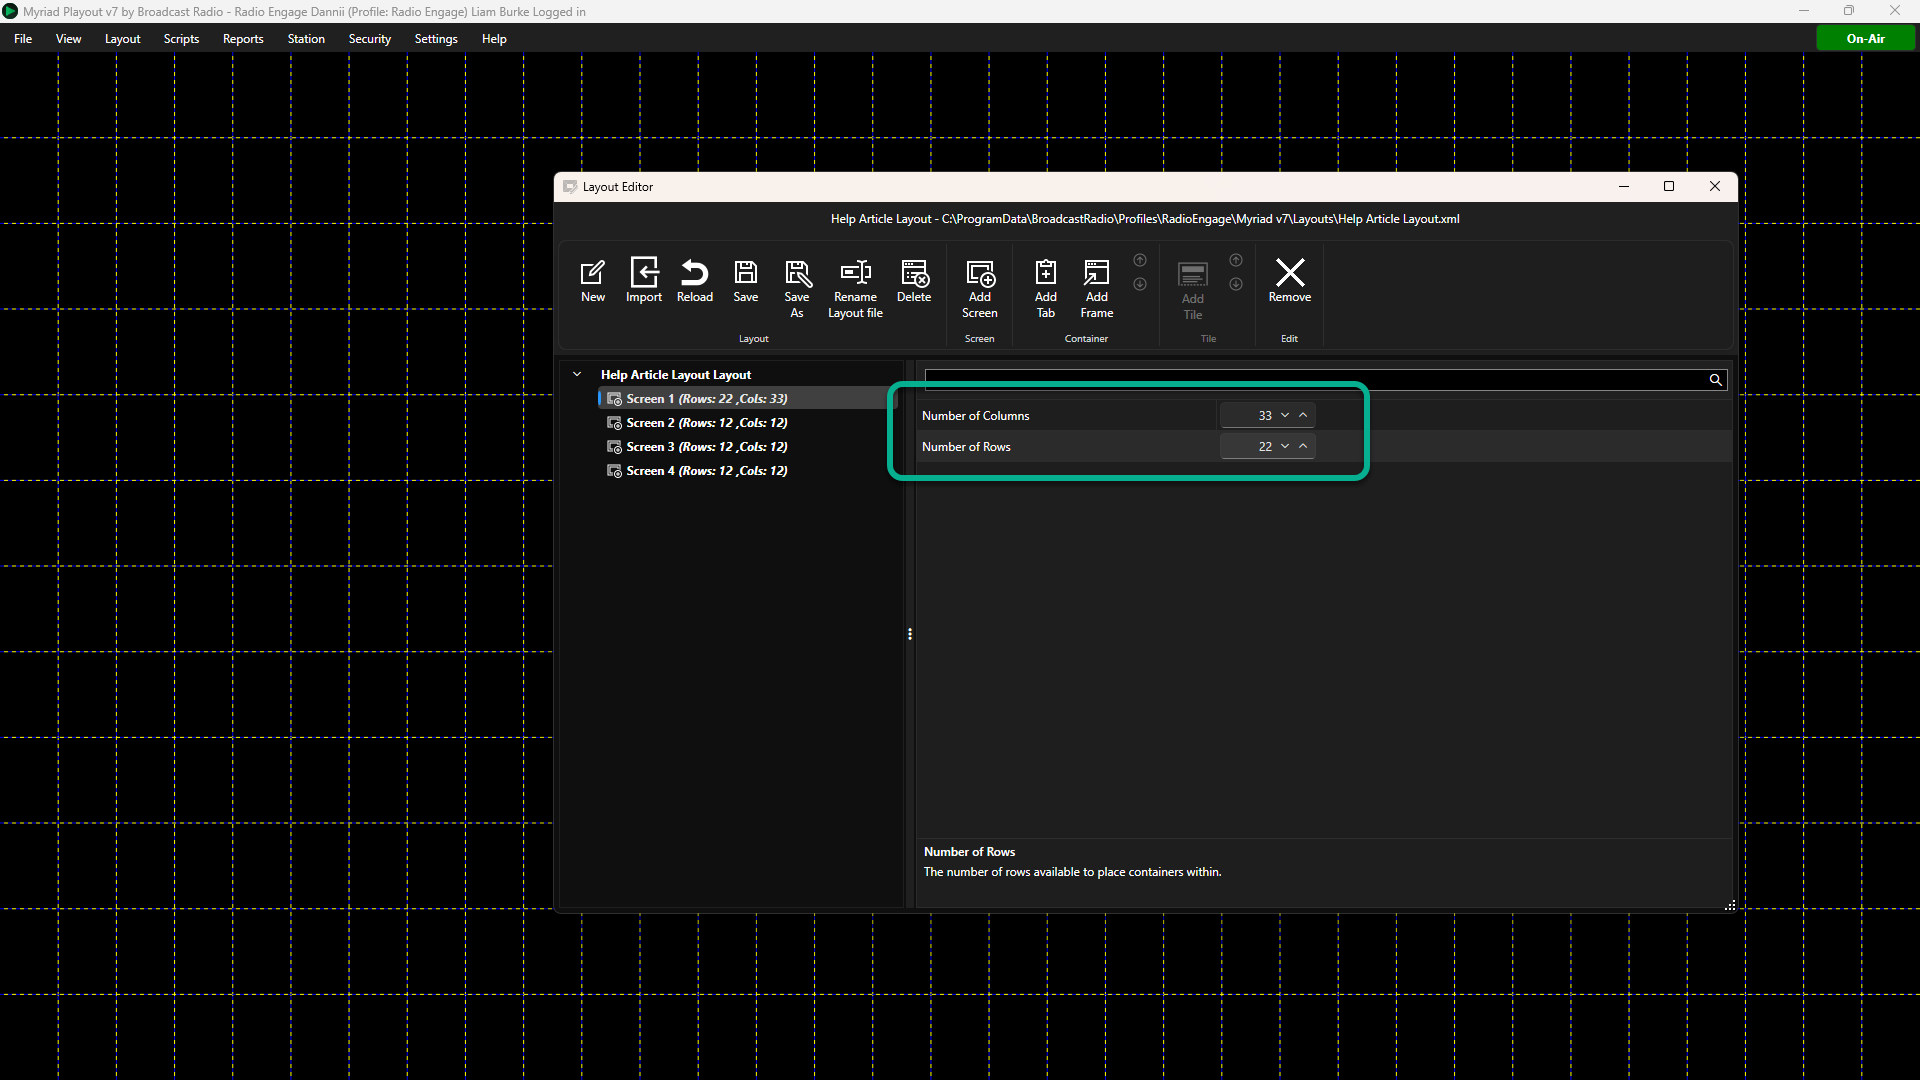
- Be default, Layouts start with 12 columns and 12 rows, but we need a higher number of rows and columns to allow us to position the Tiles as required. Increase the settings to 33 x Columns & 22 x Rows. You will see the grid on the screen change to reflect the increased column and row count.
We can now start to add the Tiles for the Layout.
Adding the Dashboard Tile
The first Tile we want to add is a Dashboard Tile. In the target layout, the Dashboard is with a Frame Container, meaning that it is the only Tile within the Container. If we wanted to allow users to switch between the Dashboard Tile and something else, we would place it in a Tab Container.
- Click on the Add Frame button to add a Fame Contain to contain the Dashboard Tile.
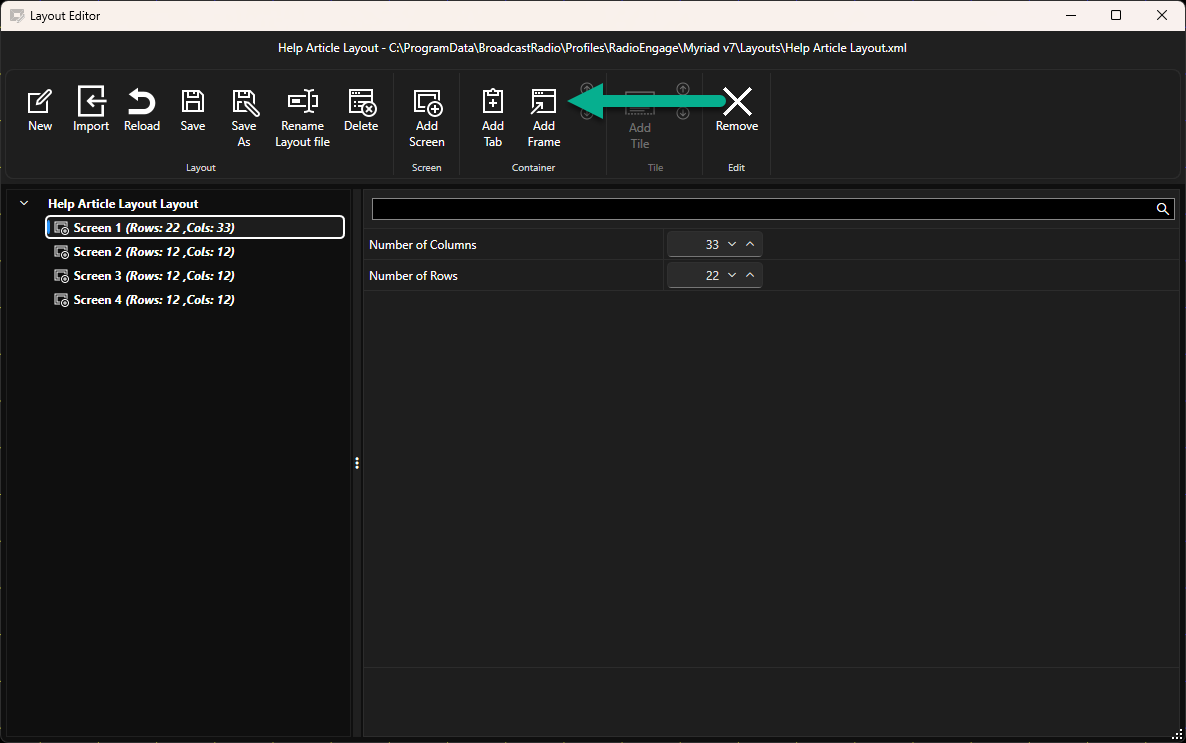
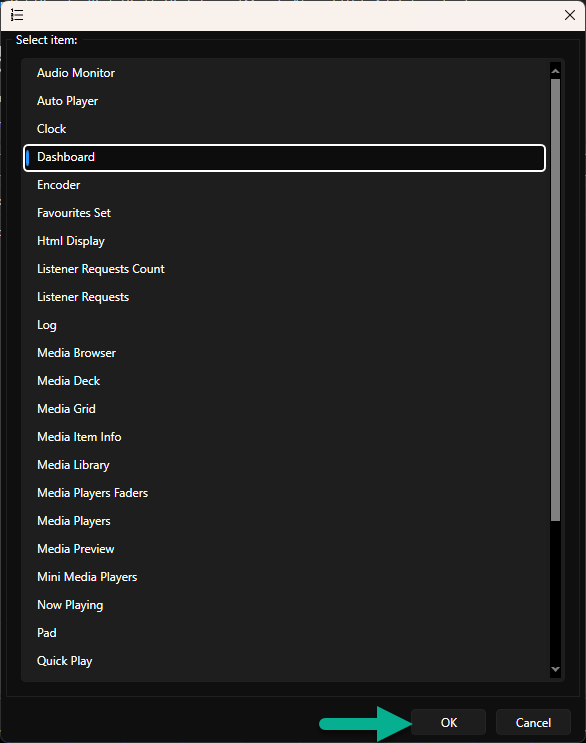
- You will be given a list of all avilable Tiles. Select the Dashboard option and click OK.
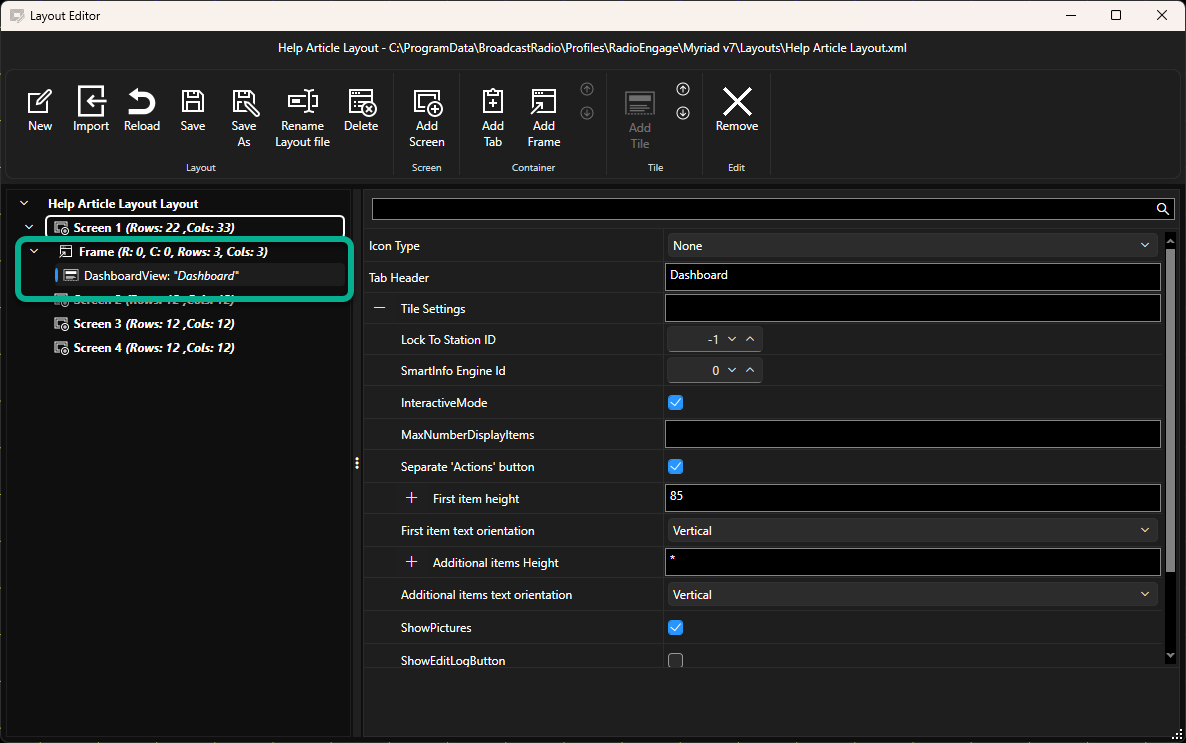
- You will see that the Frame Container is added to the Navigation Panel with the Dashboard Tile listed. With the Dashboard Tile selected, the settings for the Tile will be displayed in the right hand panel, however, before we change any Dashboard Tile settings, we will position the Frame Container on the screen and set it to be the correct size.
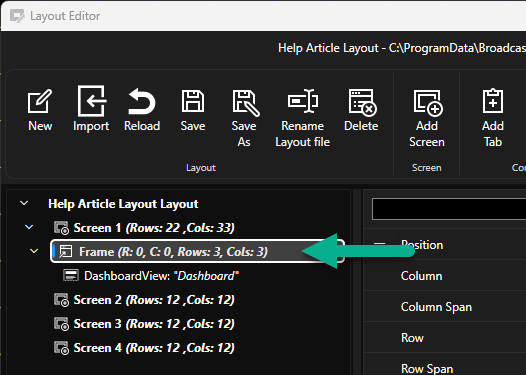
- Click on the Frame Container.
- You will see the location of the selected Frame outlined in red on the overlay grid.
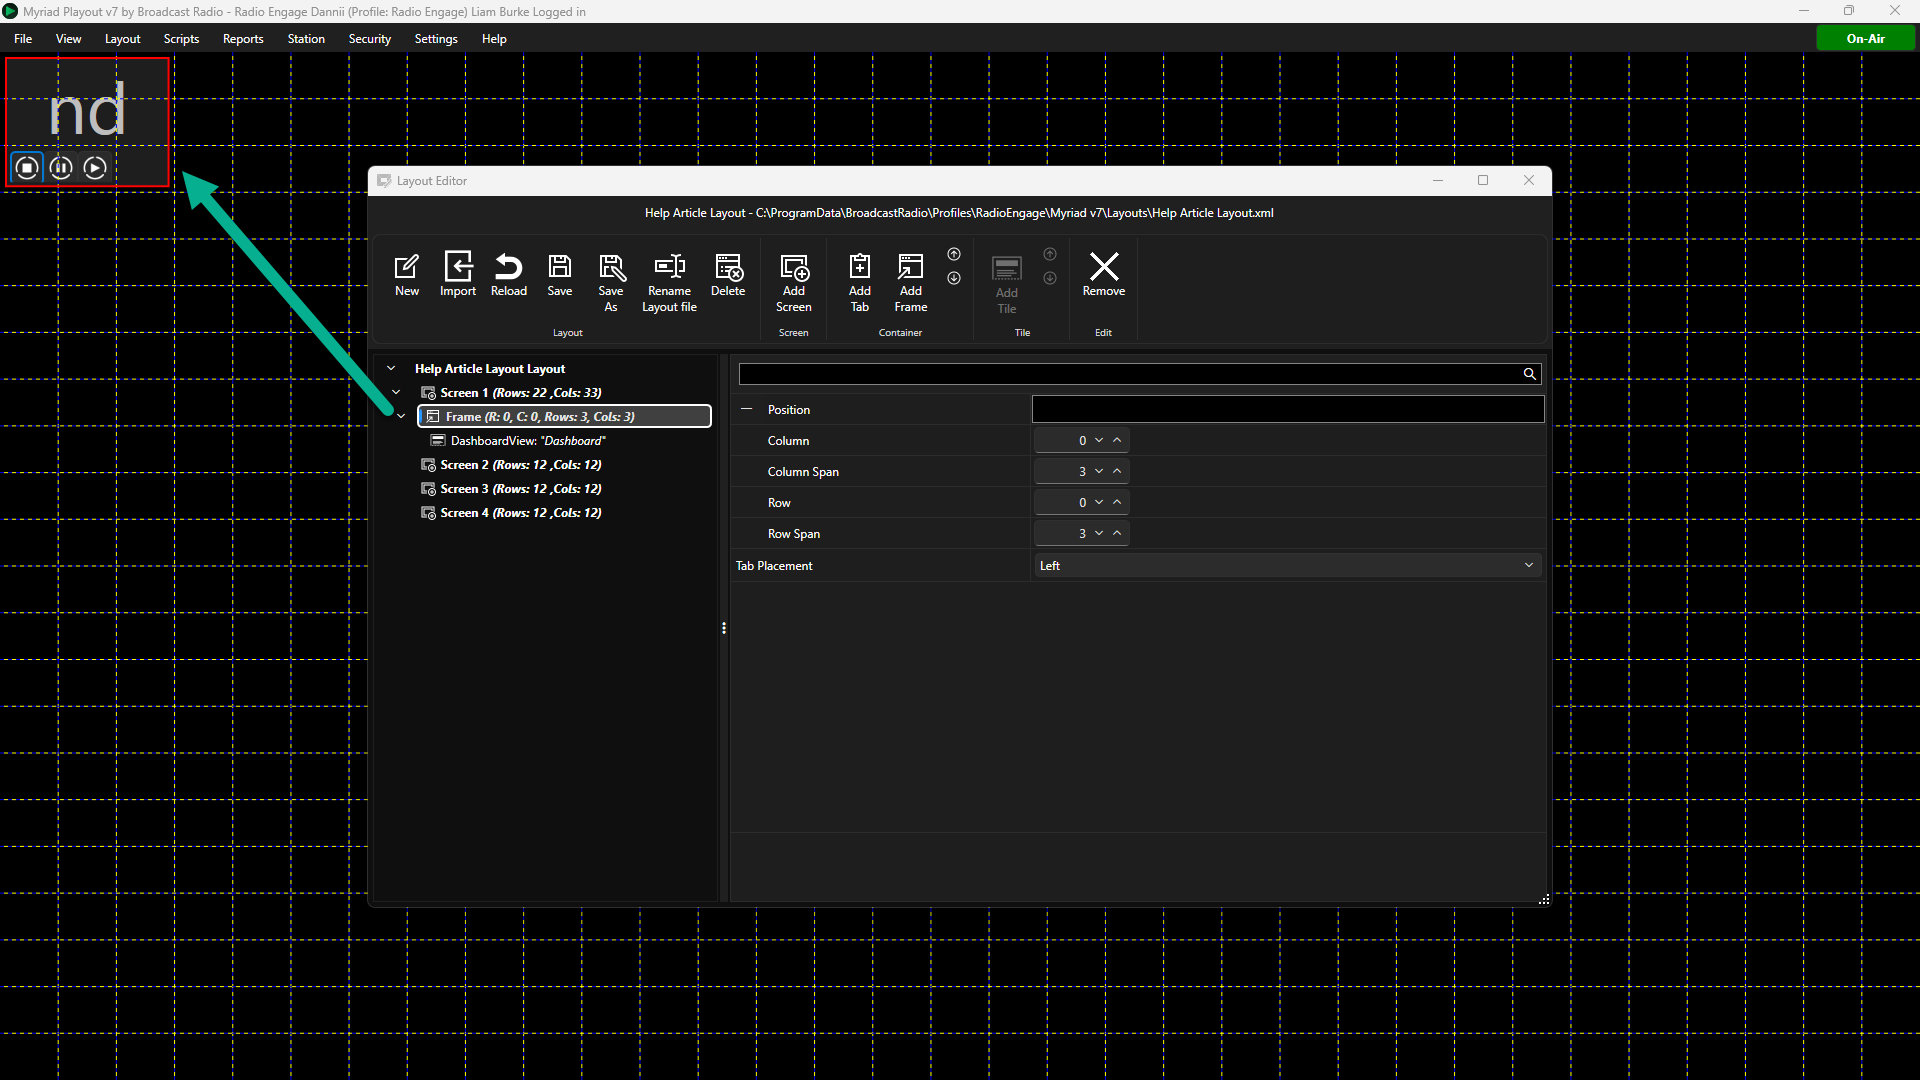
- You will also see the properties for the Container on the right hand panel.
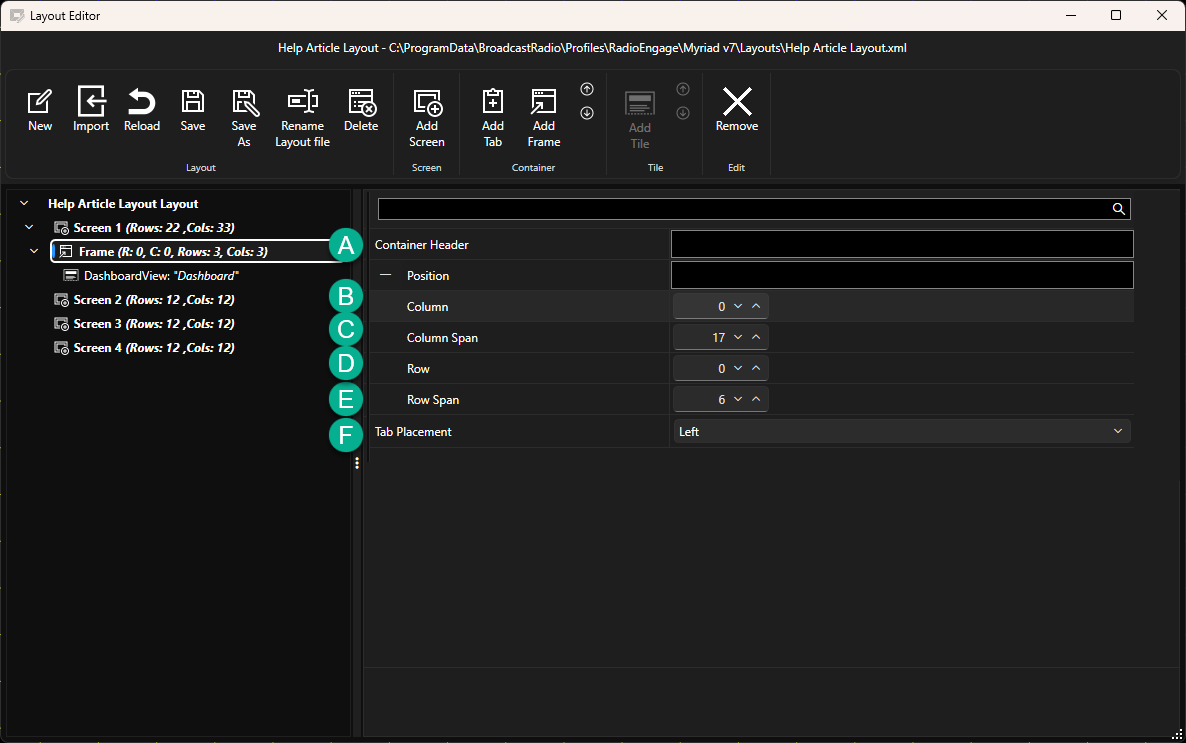
The options are:- Container Header - This is a text field you can add to containers to help identify them in the Navigation panel. This is not displayed in the Layout in Myriad.
- Column - Stating Column position for the Container (zero is the the left most column).
- Column Span - Number of Columns the Container should span (ie how wide should it be).
- Row - Starting Row position of the Container (zero is the top row).
- Row Span- Number of Rows the Container should span (ie how tall should it be).
- Tab Placement - Sets the position for the Tabs on Tabbed Containers (Left, Top Right or Bottom) - This property is not used by Frame Containers.
- The Layout we are building has the Dashboard in the top left corner, spanning 17 x columns and 6 x Rows so we need to set the following:
Column: 0
Column Span: 17
Row: 0
Row Span: 6
You can use the grid to check on the size and position of the Fame Container.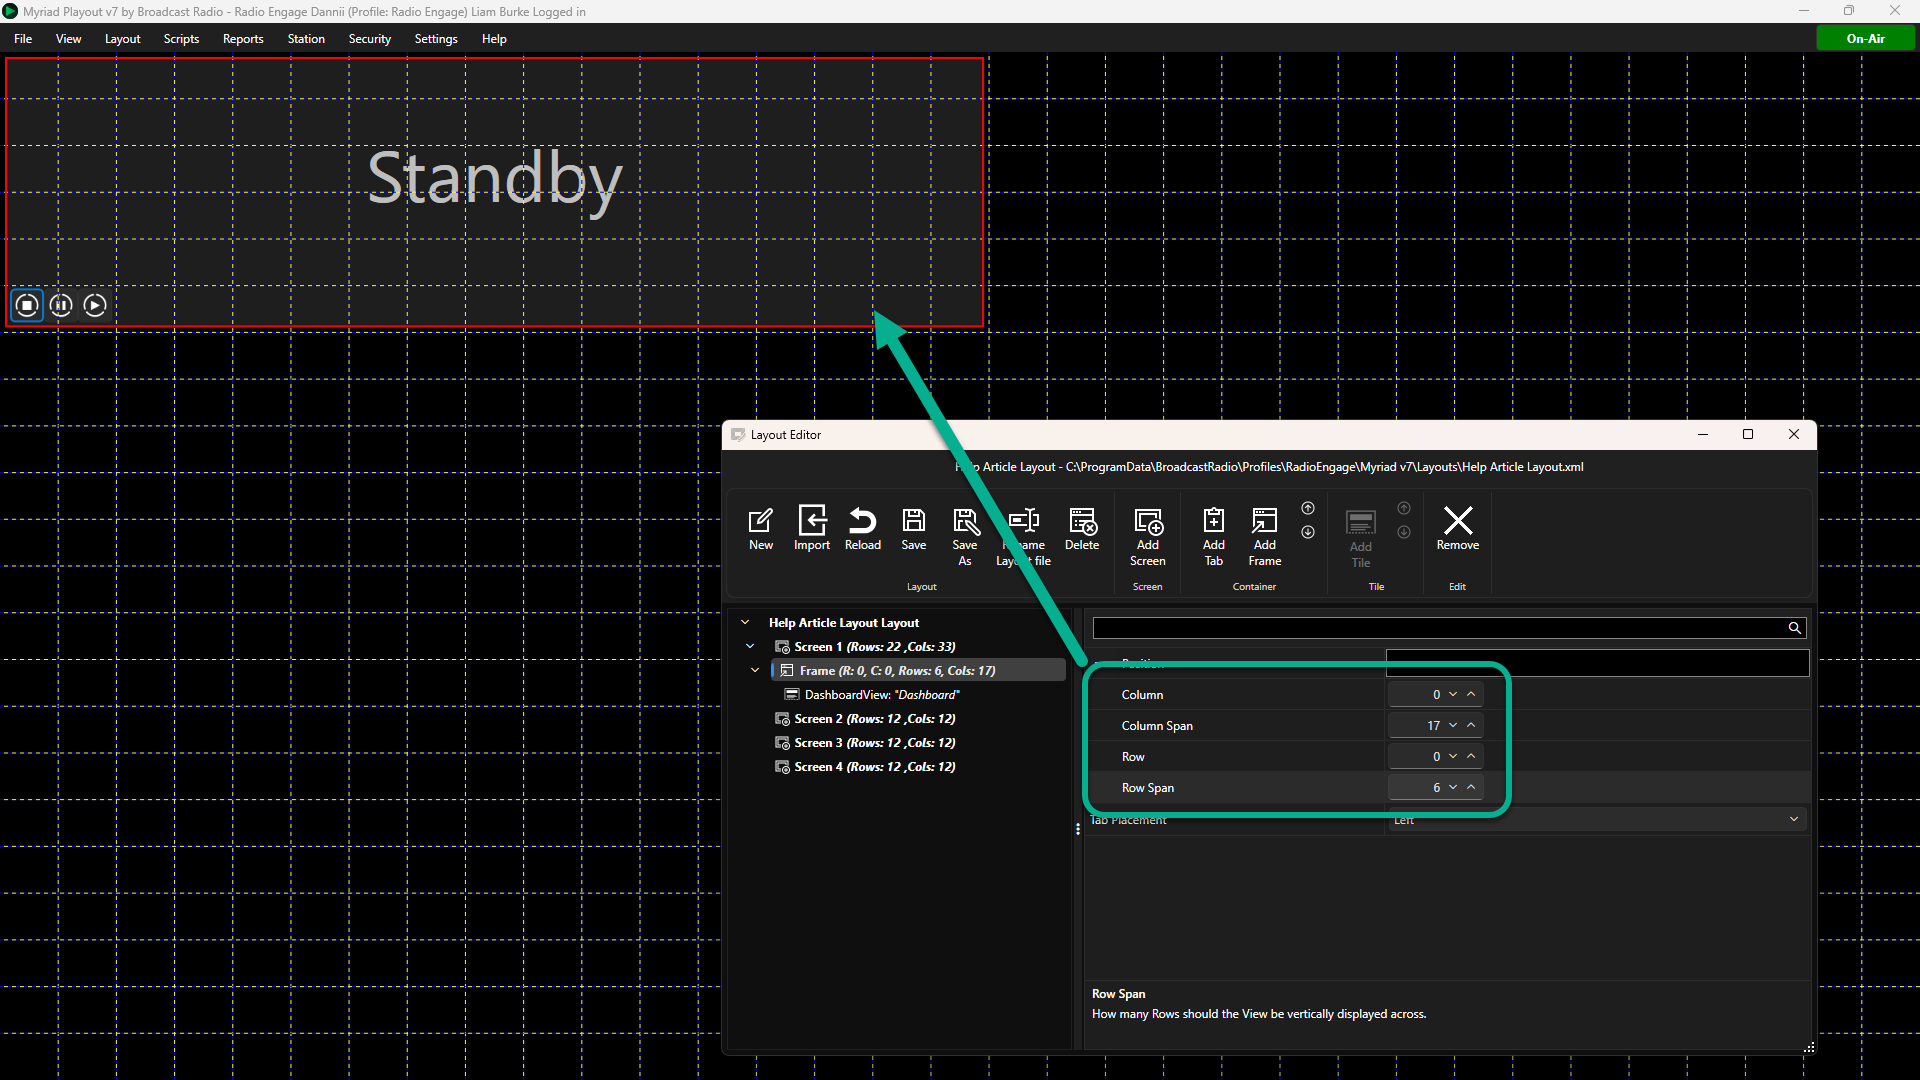
Now that the Frame Container is the correct size and position, we can return to the Dashboard Tile Settings.
You can also add a Container Header which is only displayed in the Layout Editor to help you locate the correct nodes in the Navigation panel.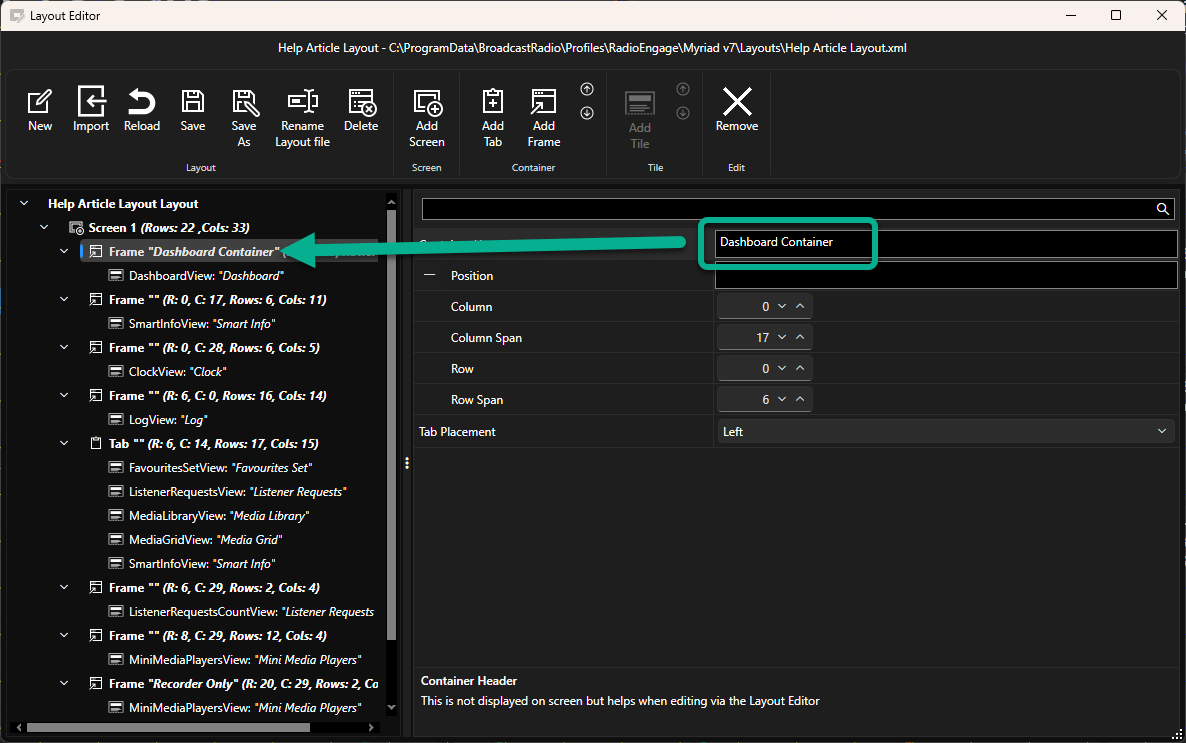
- Click on the DashboardView Tile in the Navigation section to access the Dashboard Settings.
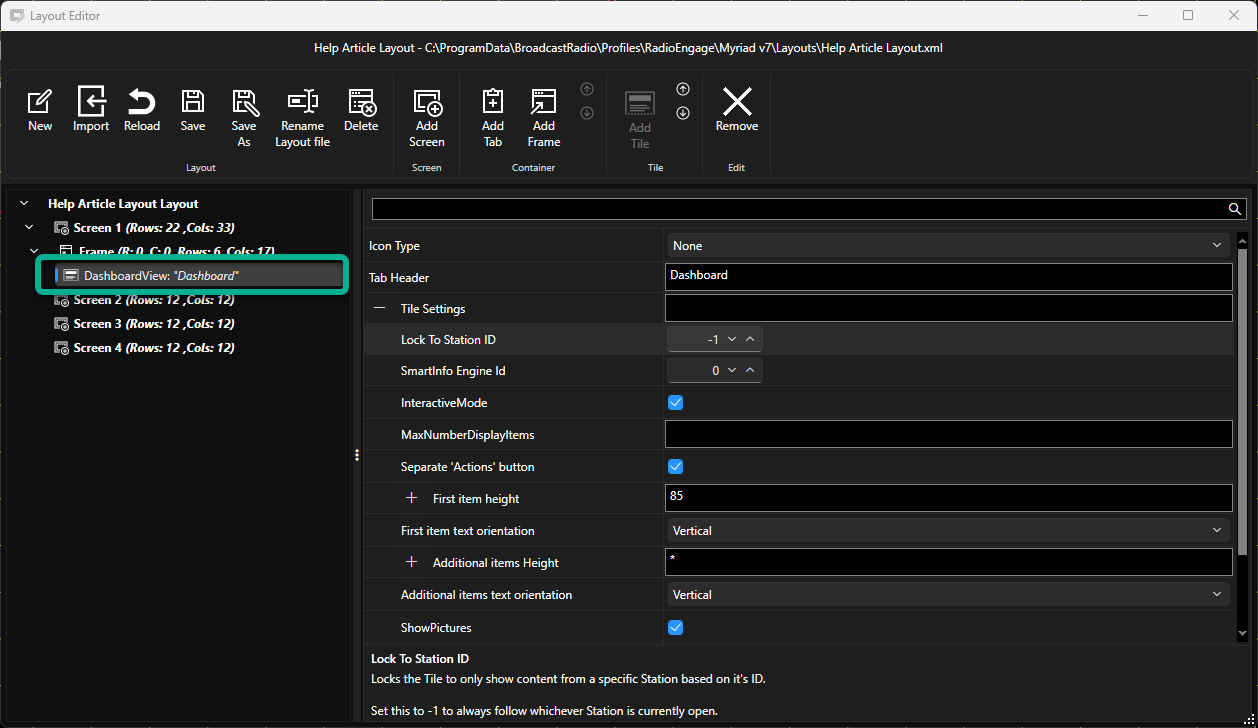
- Each Tile has it's own collection of properties and setting, with new settings added periodically as the product evolves. When you select a property, the description panel will offer a brief description.
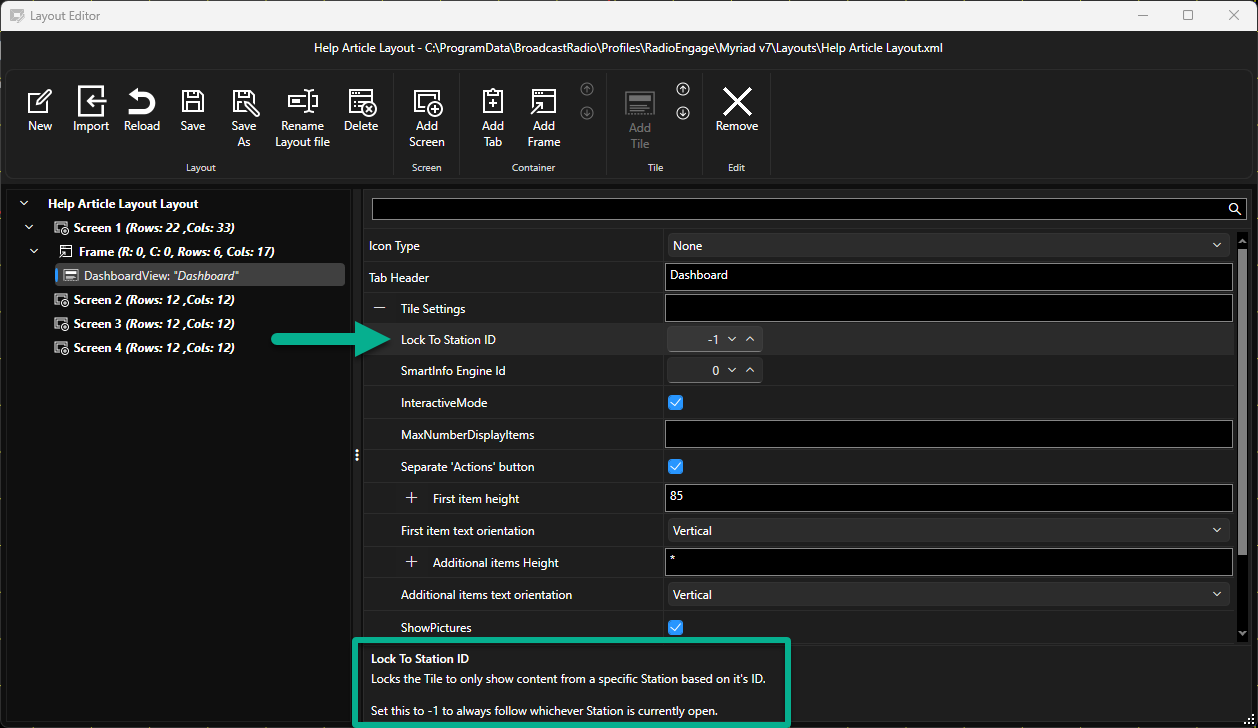
For some simple properties, the label is adequate to explain the function. Feel free to experiment with the settings and properties on Tiles as there is nothing that can be detrimental to Myriad,however, we would advise saving your layout regularly to allow you to 'roll back' if needed. - For the Dashboard in our example Layout, set the following settings:
Header: Dashboard
Lock to Satation ID: -1 (the open Station)
SmartInfo ID: 0 (allows you to have more than one SmartInfo displaying different things).
Interactive Mode: Ticked (allows Users to use the Dashboard).
Max Number Display Items: Leave blank - this will then use the main Myriad Settings.
Separate Action Buttons: Ticked (modes Action buttons to right of Dashboard items as opposed to combined with Player Number).
First Item Height: 85 (sets the height of the currently playing item).
First Item Text Orientation: Vertical (vertically stack Title & Artist over two lines. Set to Horizontal to display Tile / Artist on a single line).
Additional Item Height: * (sets the height of the other items in the dashboard).
Show Pictures: Ticked (show album art when available).
Show Edit Log Button: Un-ticked (enables a button that opens the Log for editing).
Show Open Players Button: Un-ticked (enables a button that displays the Media Players).
Combine Mode Buttons: Un-ticked (enables the separate buttons for Standby, Live and Autofade).
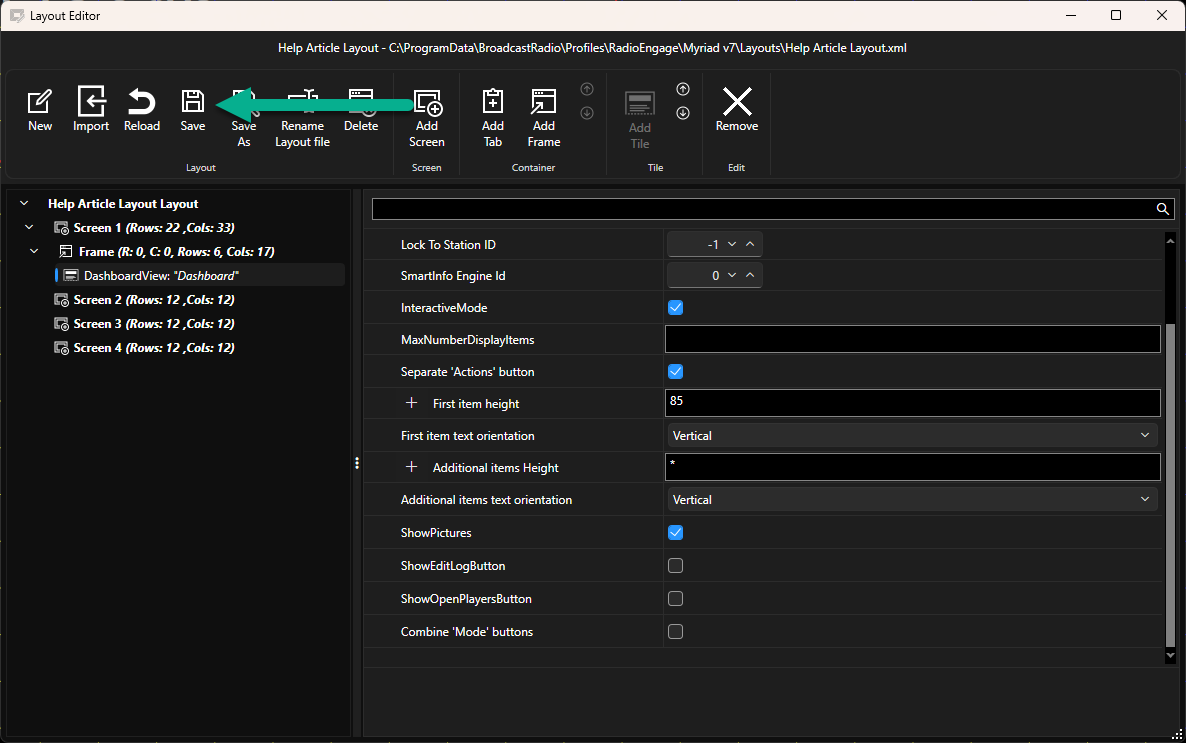
These are all default settings in Myriad 7 so you should not need to change anything. Now we have added our first Tile, it is a good idea to save the Layout before proceeding. Click on the Save button on the ribbon and follow the on screen prompts.
Adding the SmartInfo (Wikipedia) Tile
Now that we know how to add Frame Containers and control their size and position, we can move forward with adding the other Tiles we need for our Layout.
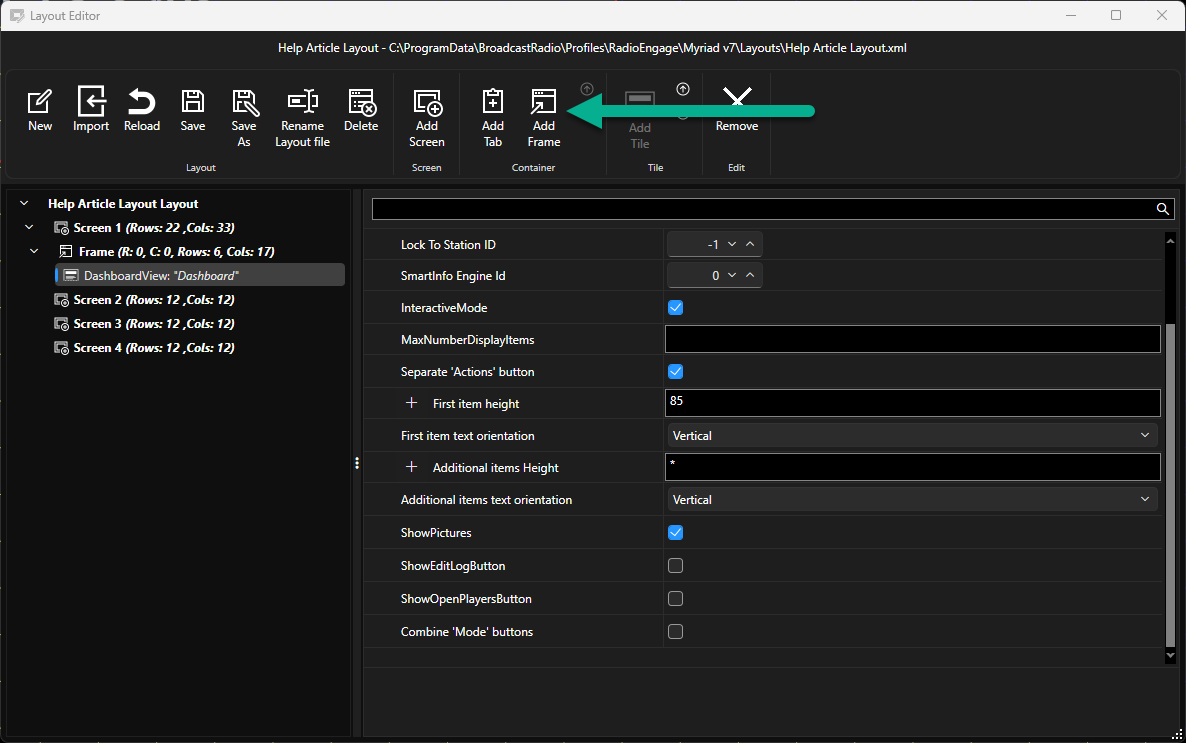
- With the correct Screen selected, click on the Add Frame button.
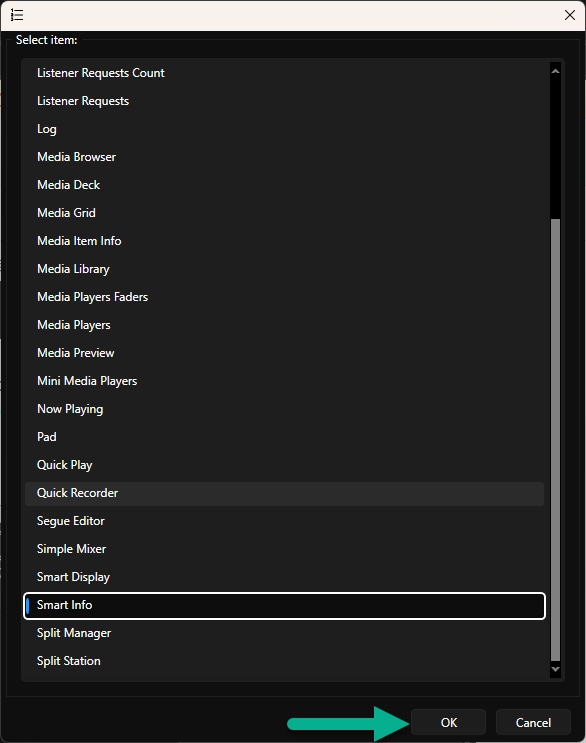
- Select the SmartInfoTile and click on OK.
- Select the Frame Container for the SmartInfo Tile and set the following properties:
Column: 17
Column Span: 11
Row: 0
Row Span: 6
Use the grid view to check the Container Frame is in the correct position and the right size.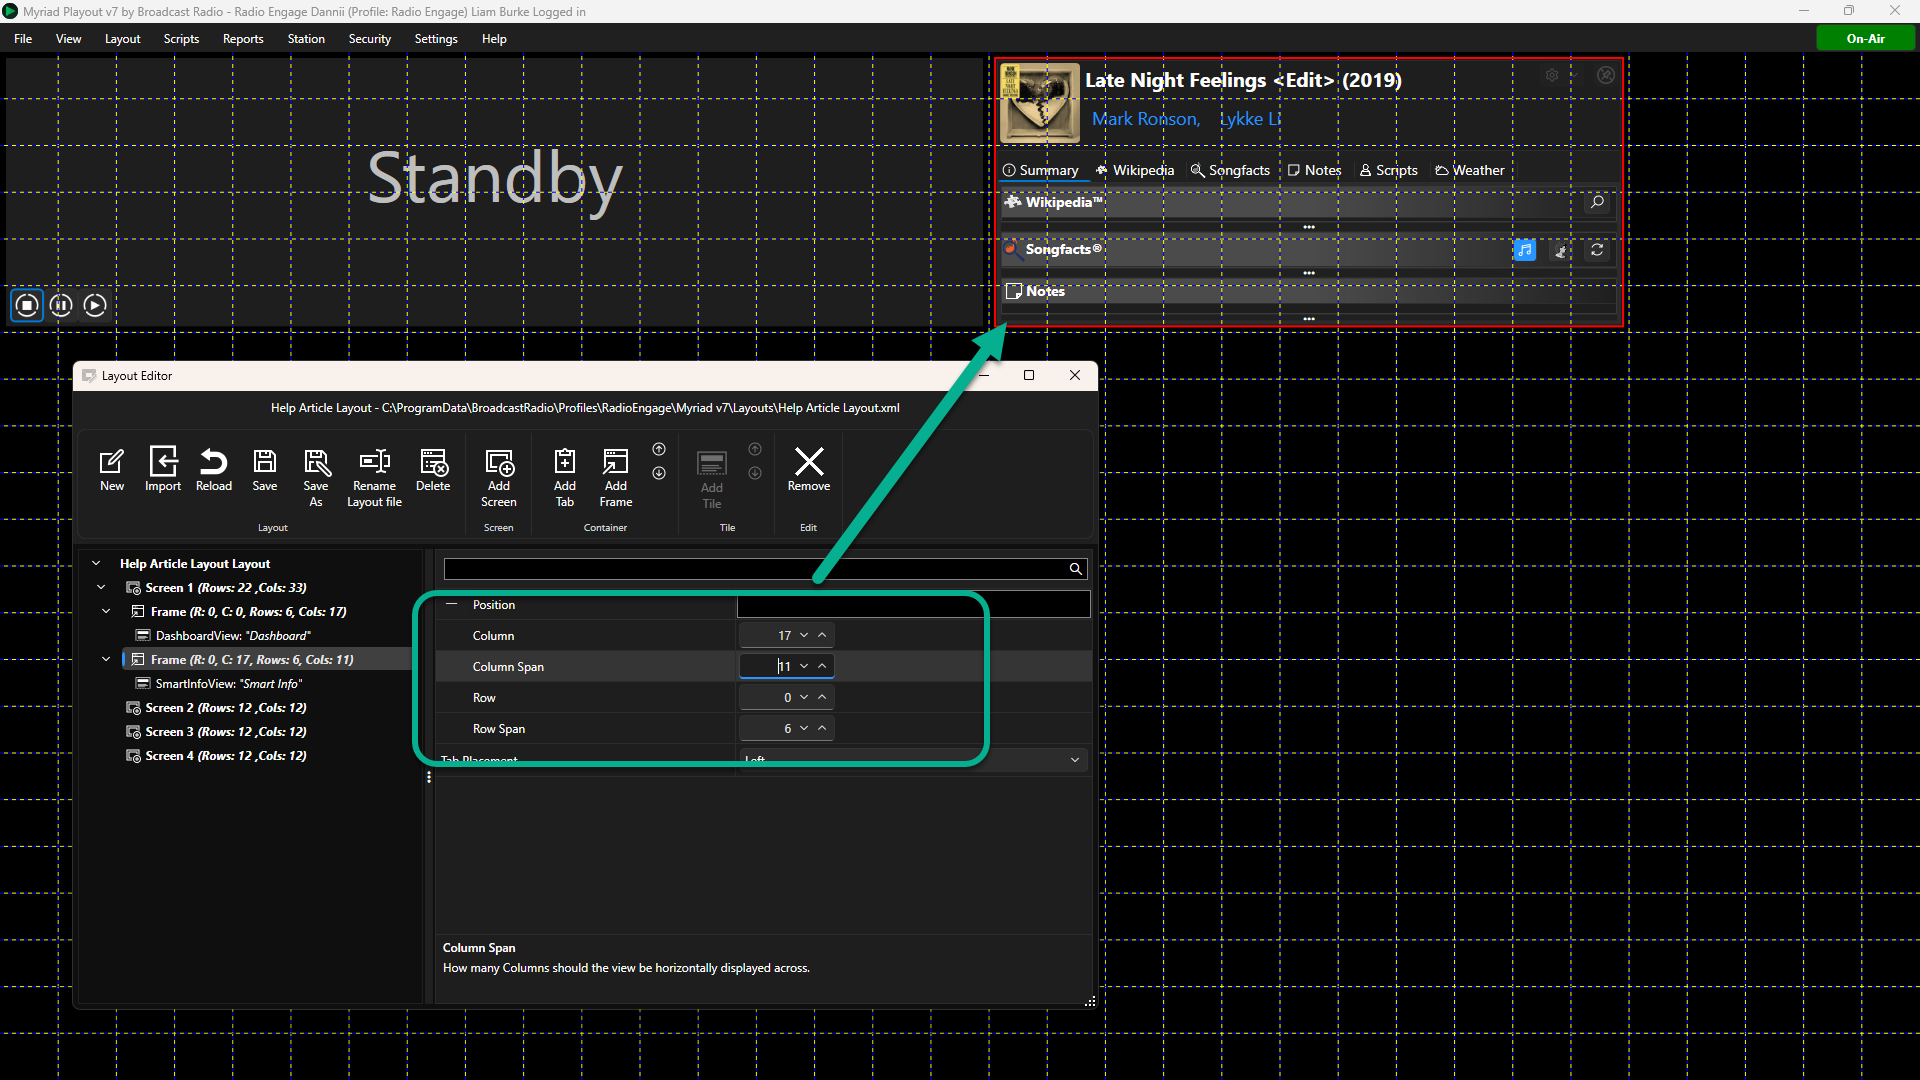
- Click on the SmartInfo View node in the Navigation panel and set the follwoing settings:
Header: Smart Info
SmartInfo Engine: 0
Is User Configurable: Un-ticked
Show Header Bar: Un-ticked
Show Summary Bar: Un-ticked
Show Wikipedia: Ticked
Show SongFacts: Un-ticked
Show Notes: Un-ticked
Show Weather: Un-ticked
Show Traffic: Un-ticked
Show Scripts: Un-ticked
Show Customer Tab 1: Un-ticked
Be default, all these options are ticked for SmartInfo Tiles but as our layout specifically only has Wikipedia, we have un-ticked all but the Show Wikipedia options.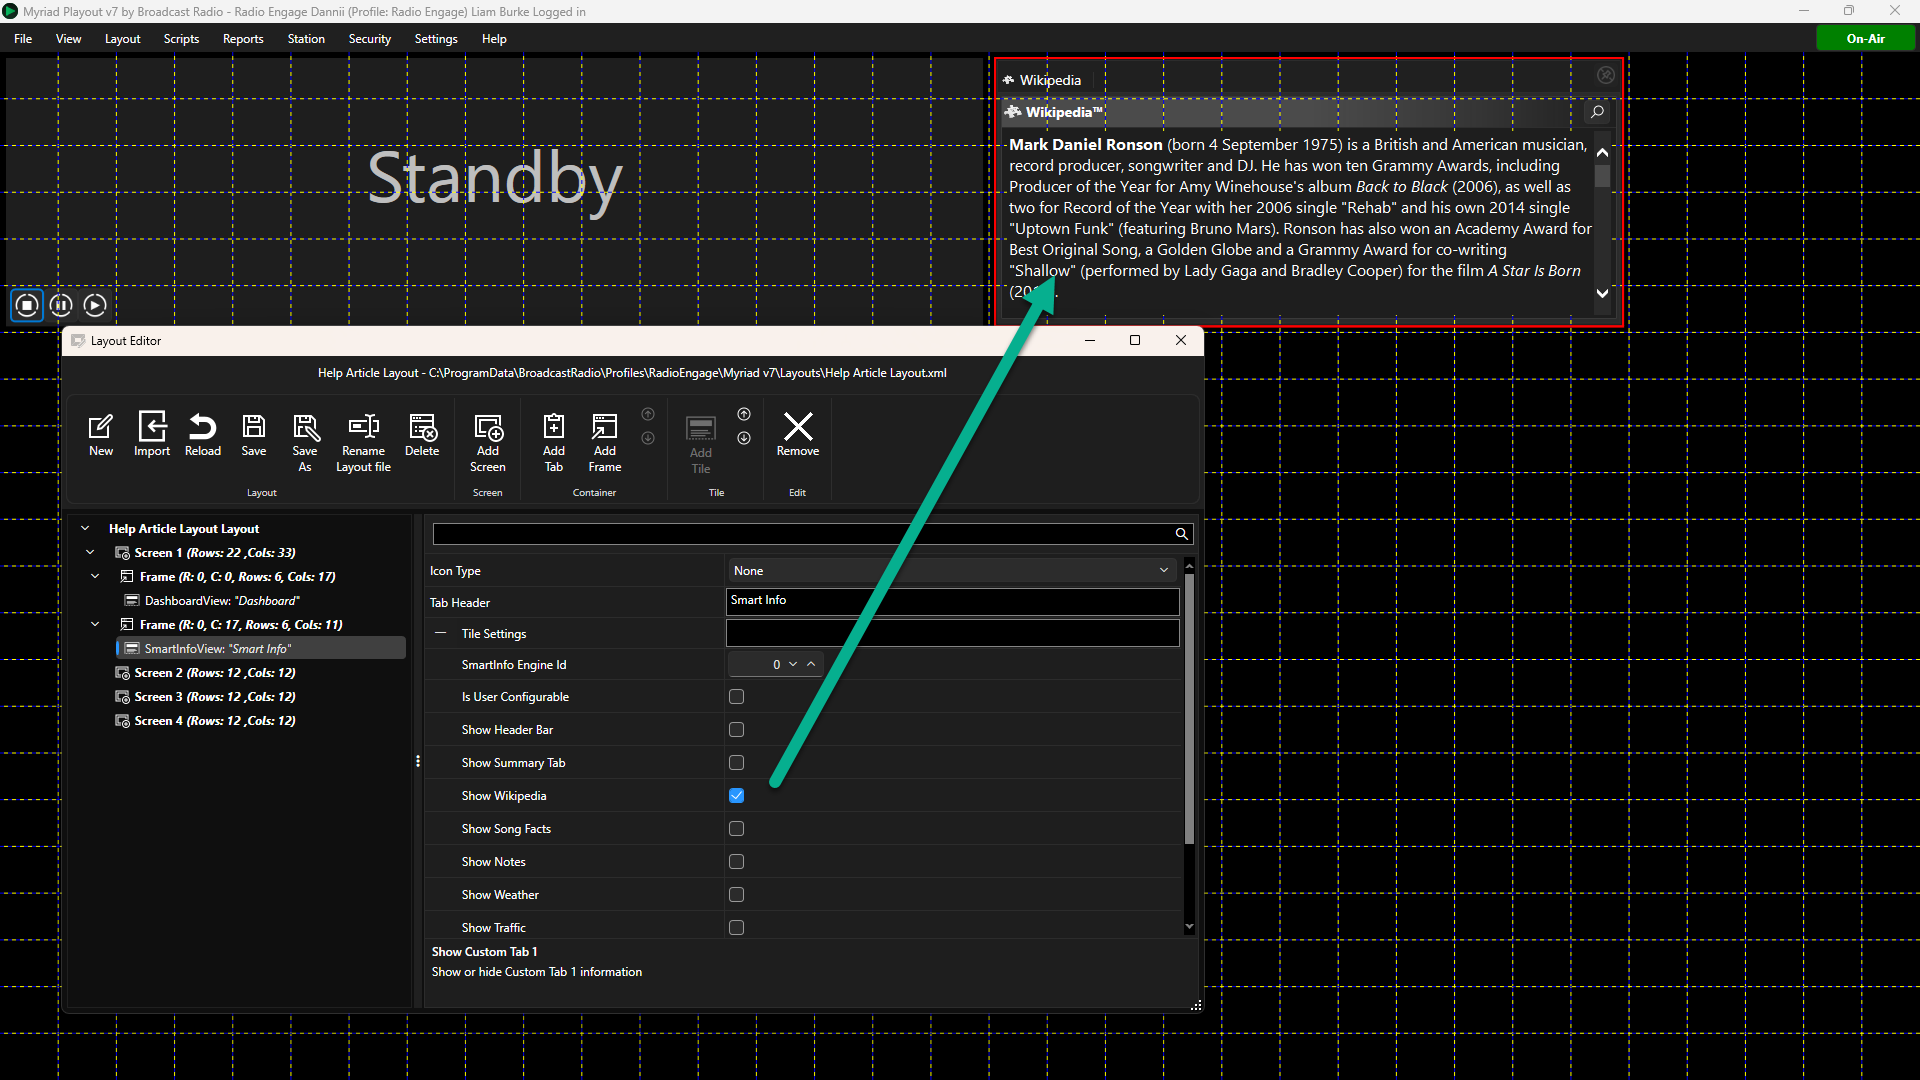
Click on the Save button on the ribbon to save your Layout so far.
Adding the Clock Tile
The Clock Tile can be used to show date and time information multiple configurations including:
- Digital clock
- Digital clock with seconds 'ticks'
- Time as words (ie quarter to four)
- Date (configurable format)
In our example layout, we will use the Digital Clock option the the 'second tick, display date and show station logo options to create the end design.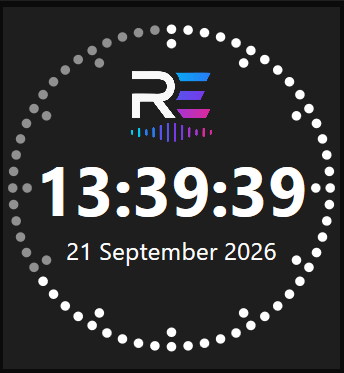
- With the correct Screen selected, click on the Add Frame button.
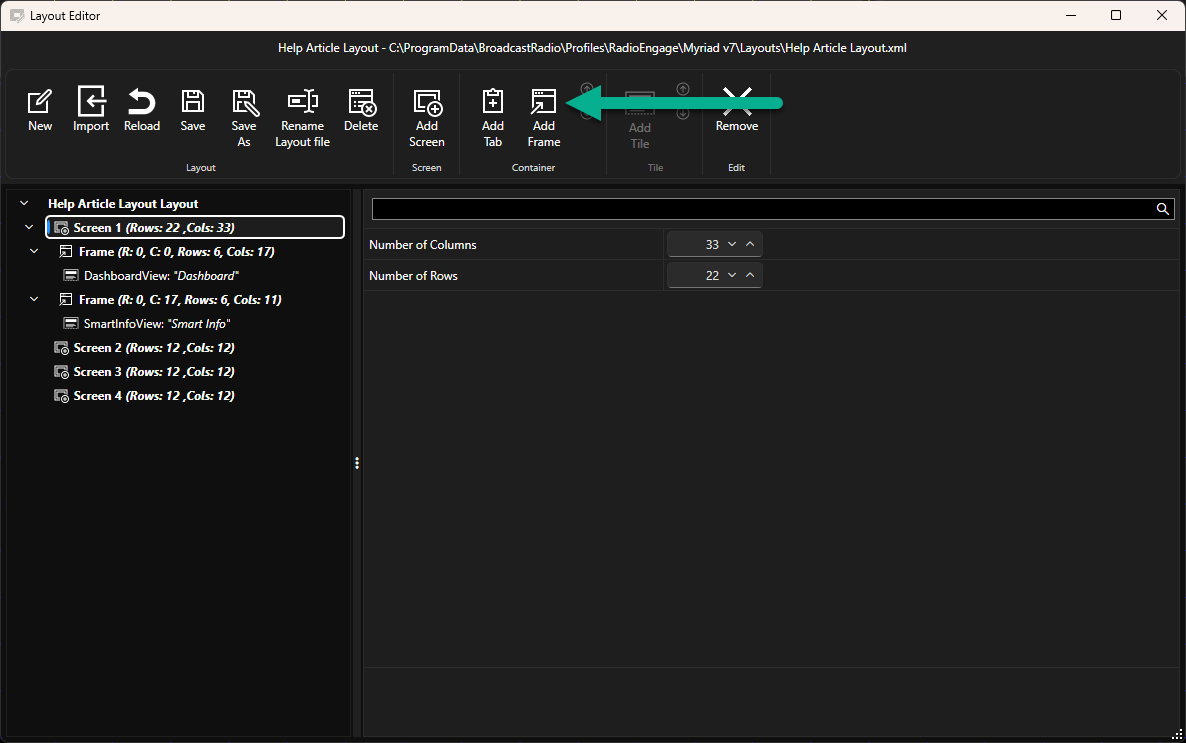
- Select the Clock Tile and click on OK.
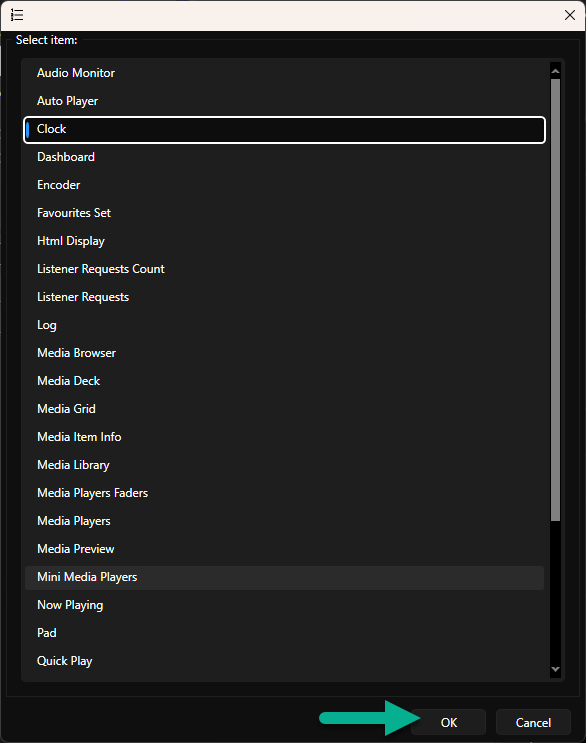
- There are a lot of options in the Clock Tile so we will focus just on the options we need to create our Clock design.
- First, click on the Frame Container containing the Clock and set the Row / Column settings to:
Column: 28
Column Span: 5
Row: 0
Row Span: 6
This will set the position and size for the Clock.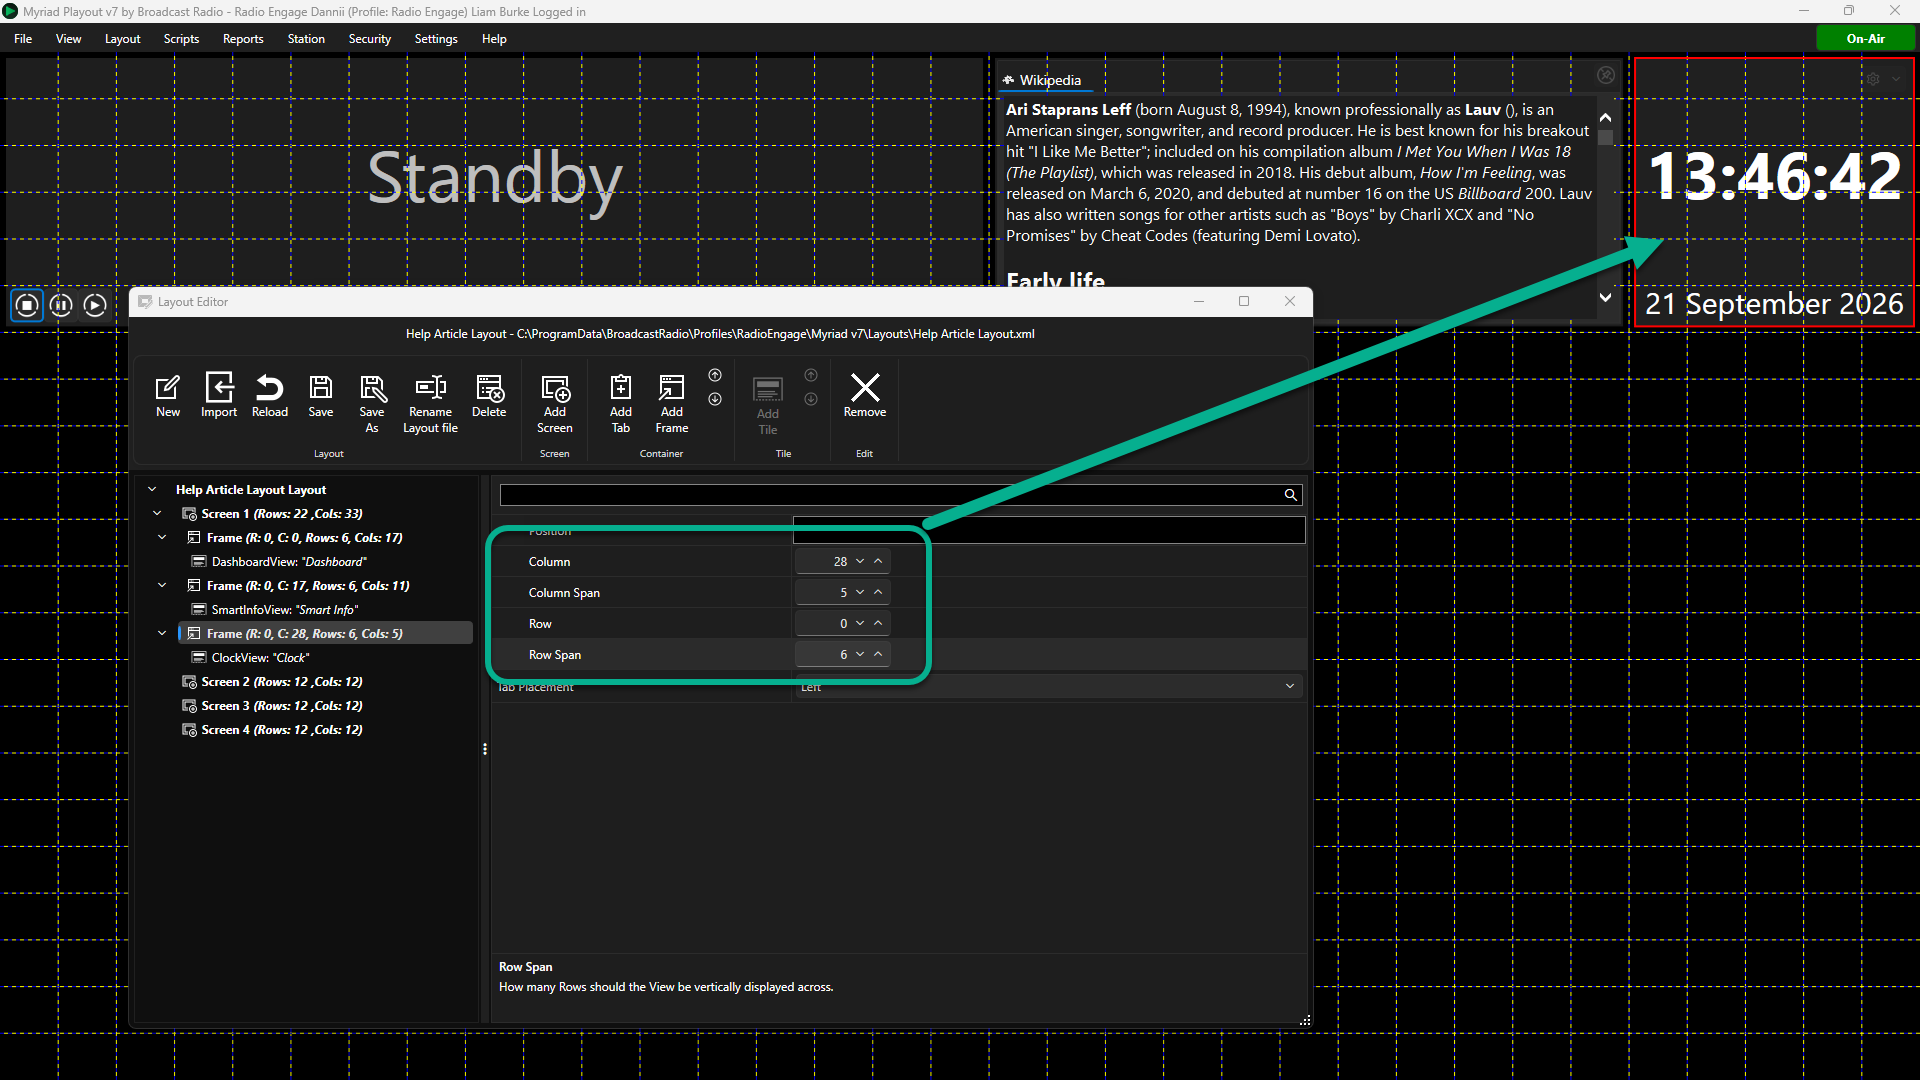
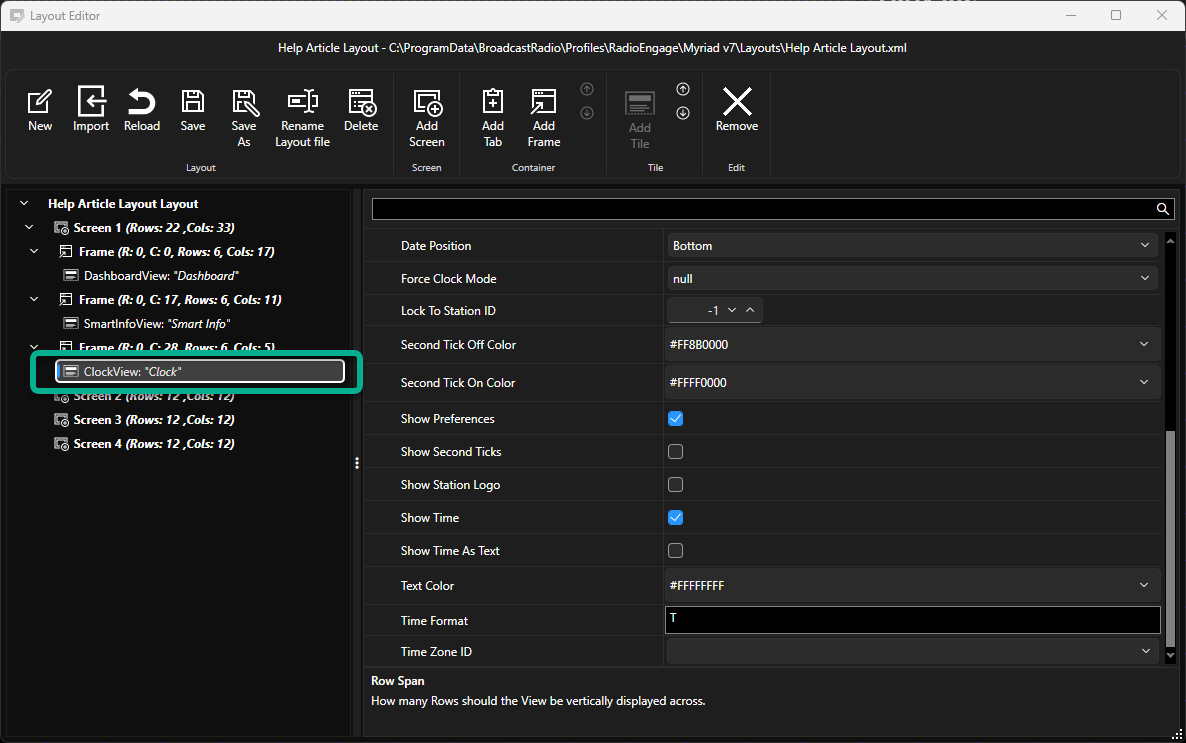
- Click back on the Clock View node to access the Clock properties and settings.
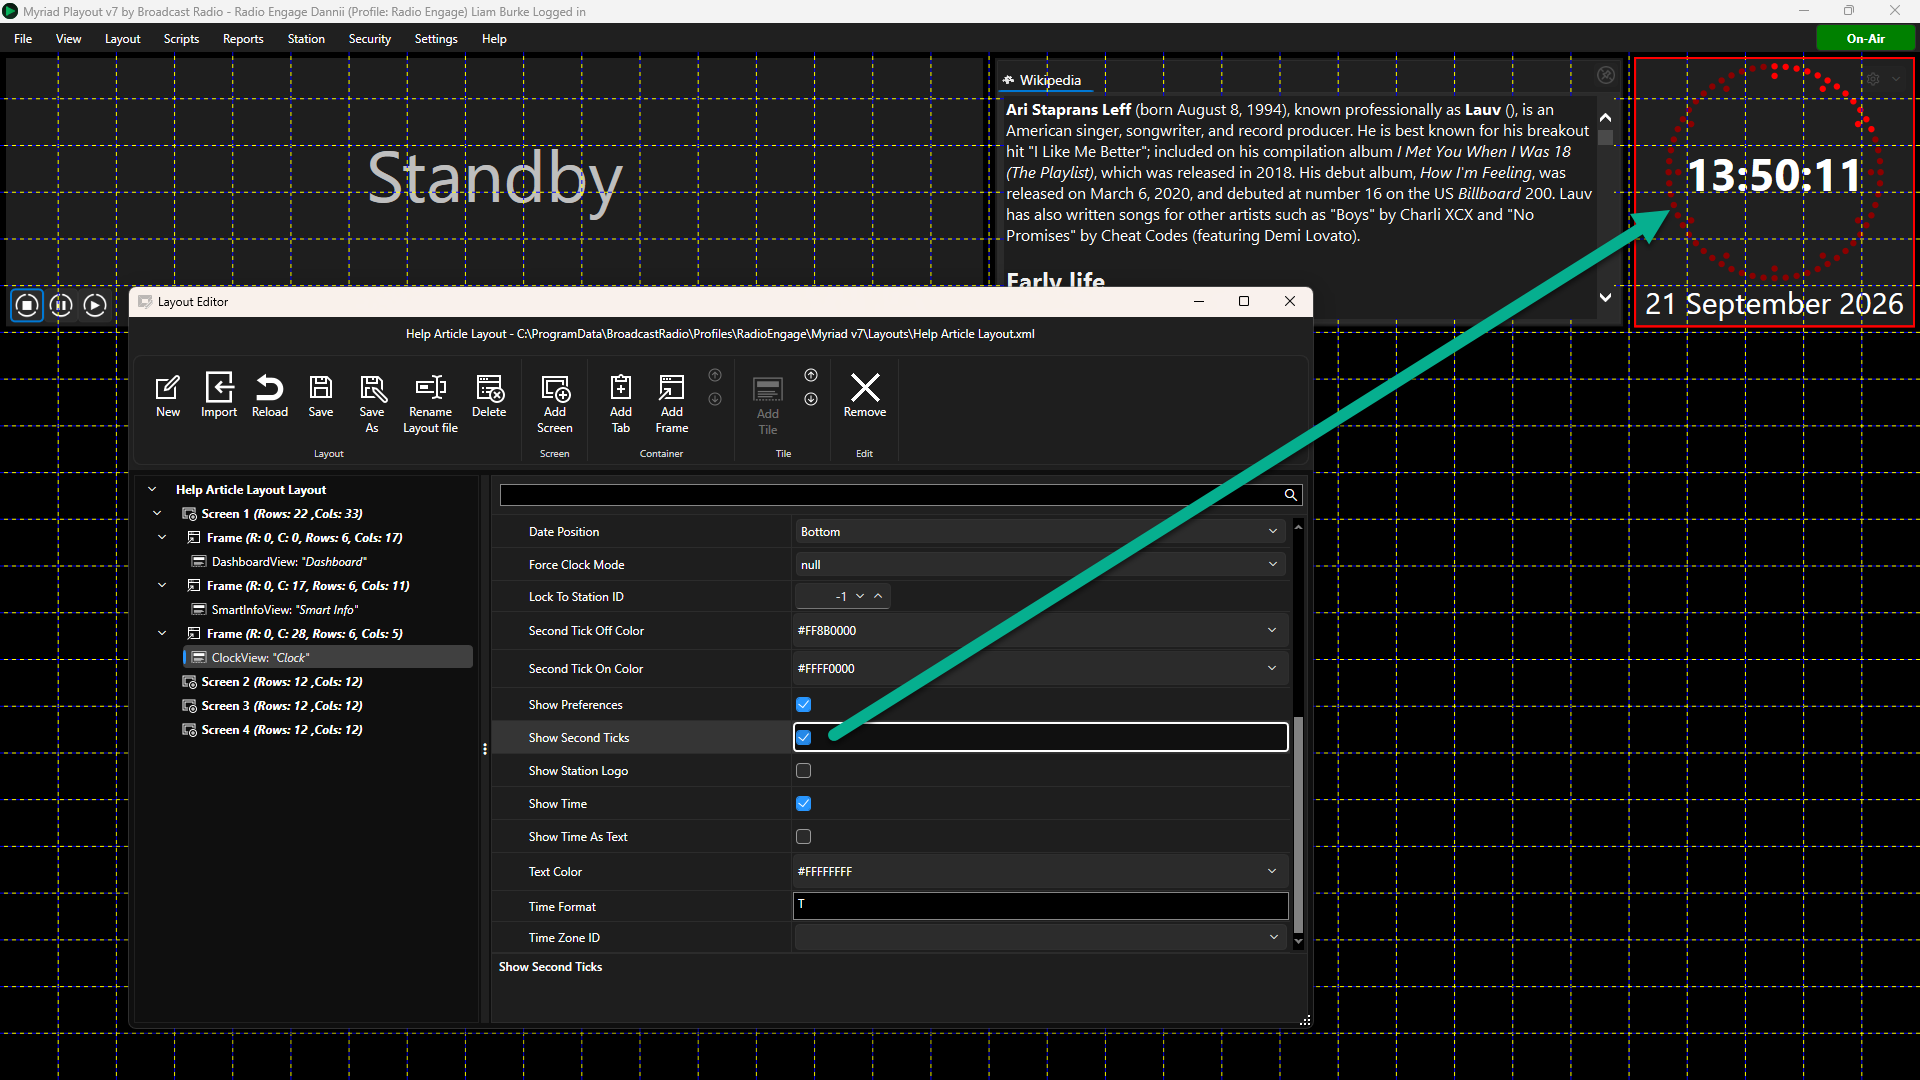
- Firstly, we will switch to the 'second tick' view for the Clock. Scroll down in the settings section until you see the Show Second Ticks option. Tick this option and the preview will change to show the second tick display.
- The default colours for the second ticks are bright or dull red but our design has white and dull grey ticks so we need to change the Second Tick Off Colour and Second Tick On Colours to be grey and white respectively.
You can either select a colour from the colour wheel or type in the Hex colour if you know it. In this example we will use:
Second Tick Off Colour: FF909090 (Grey)
Second Tick Colour On: FFFFFFFF (White)
As a side note, hex colours are normally 6 digits. In this the first two digits are alpha (transparency) with FF being opaque and 00 being transparent.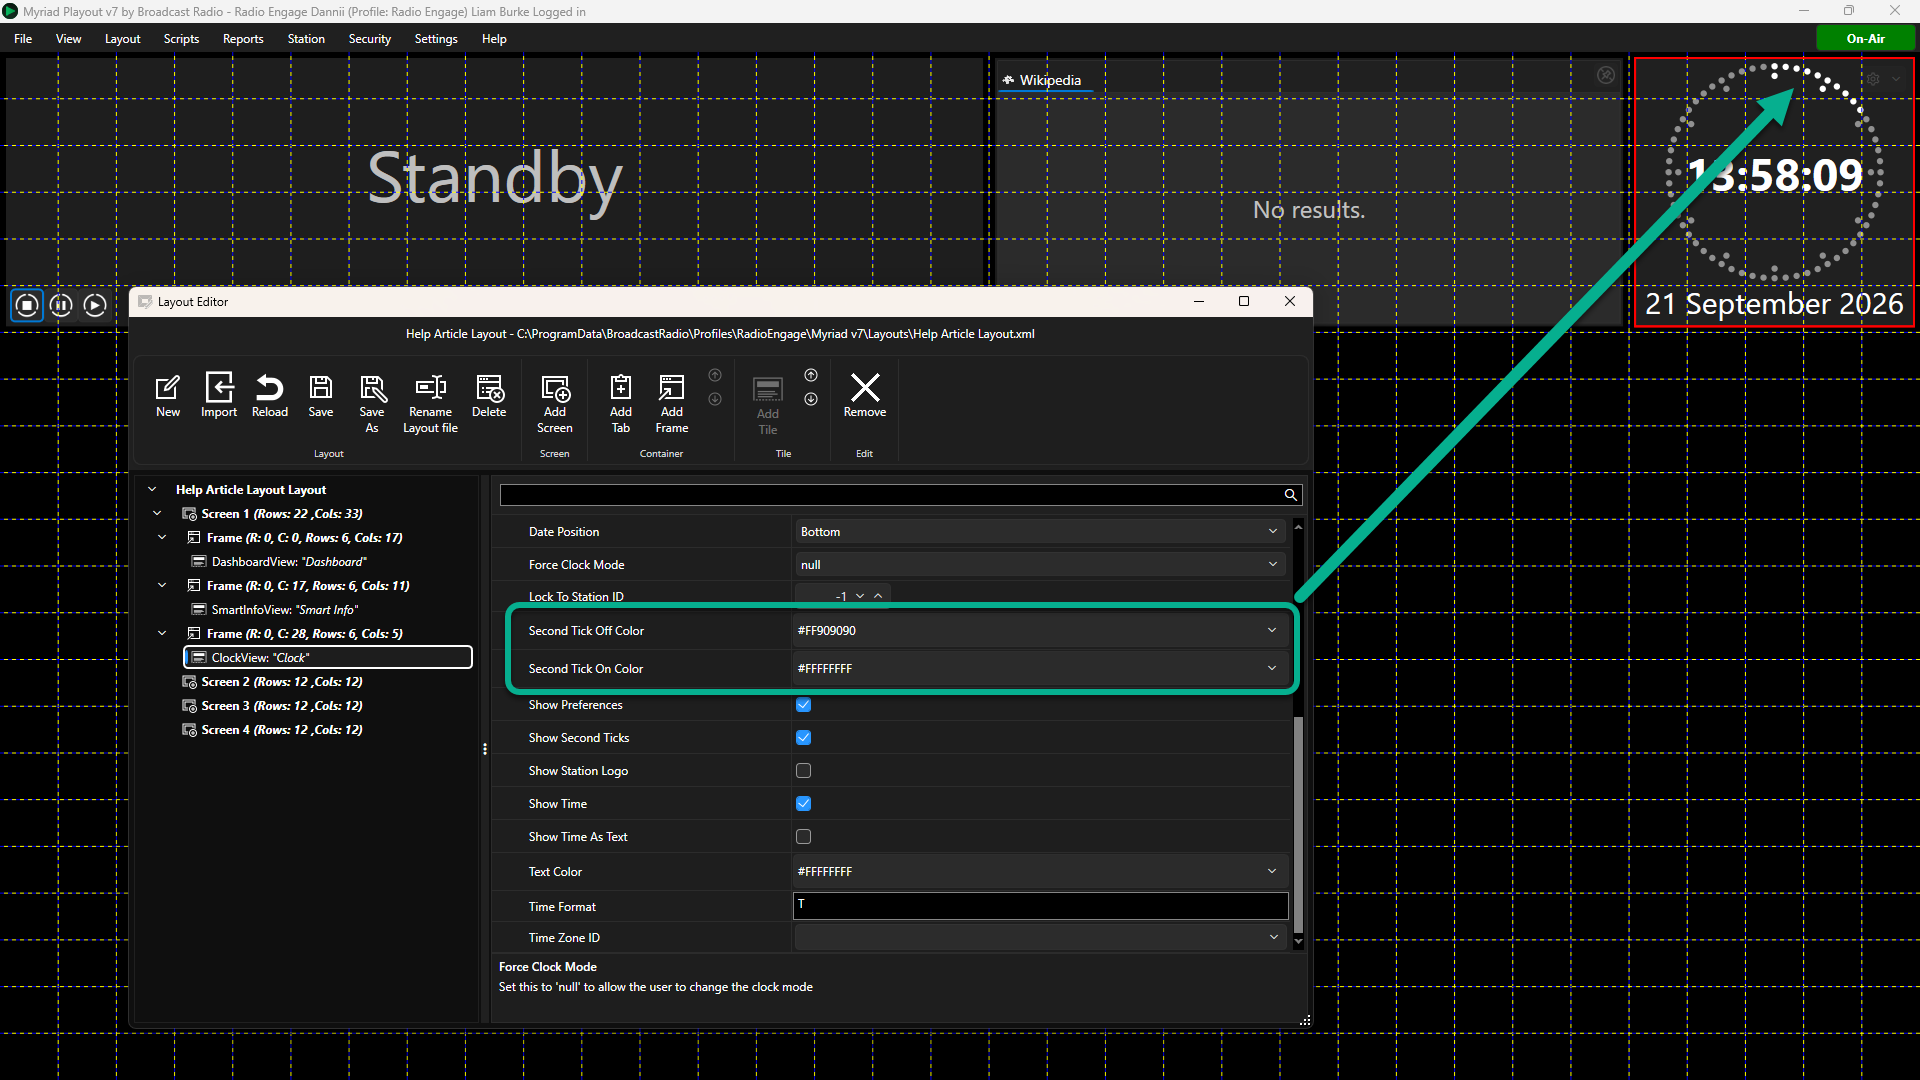
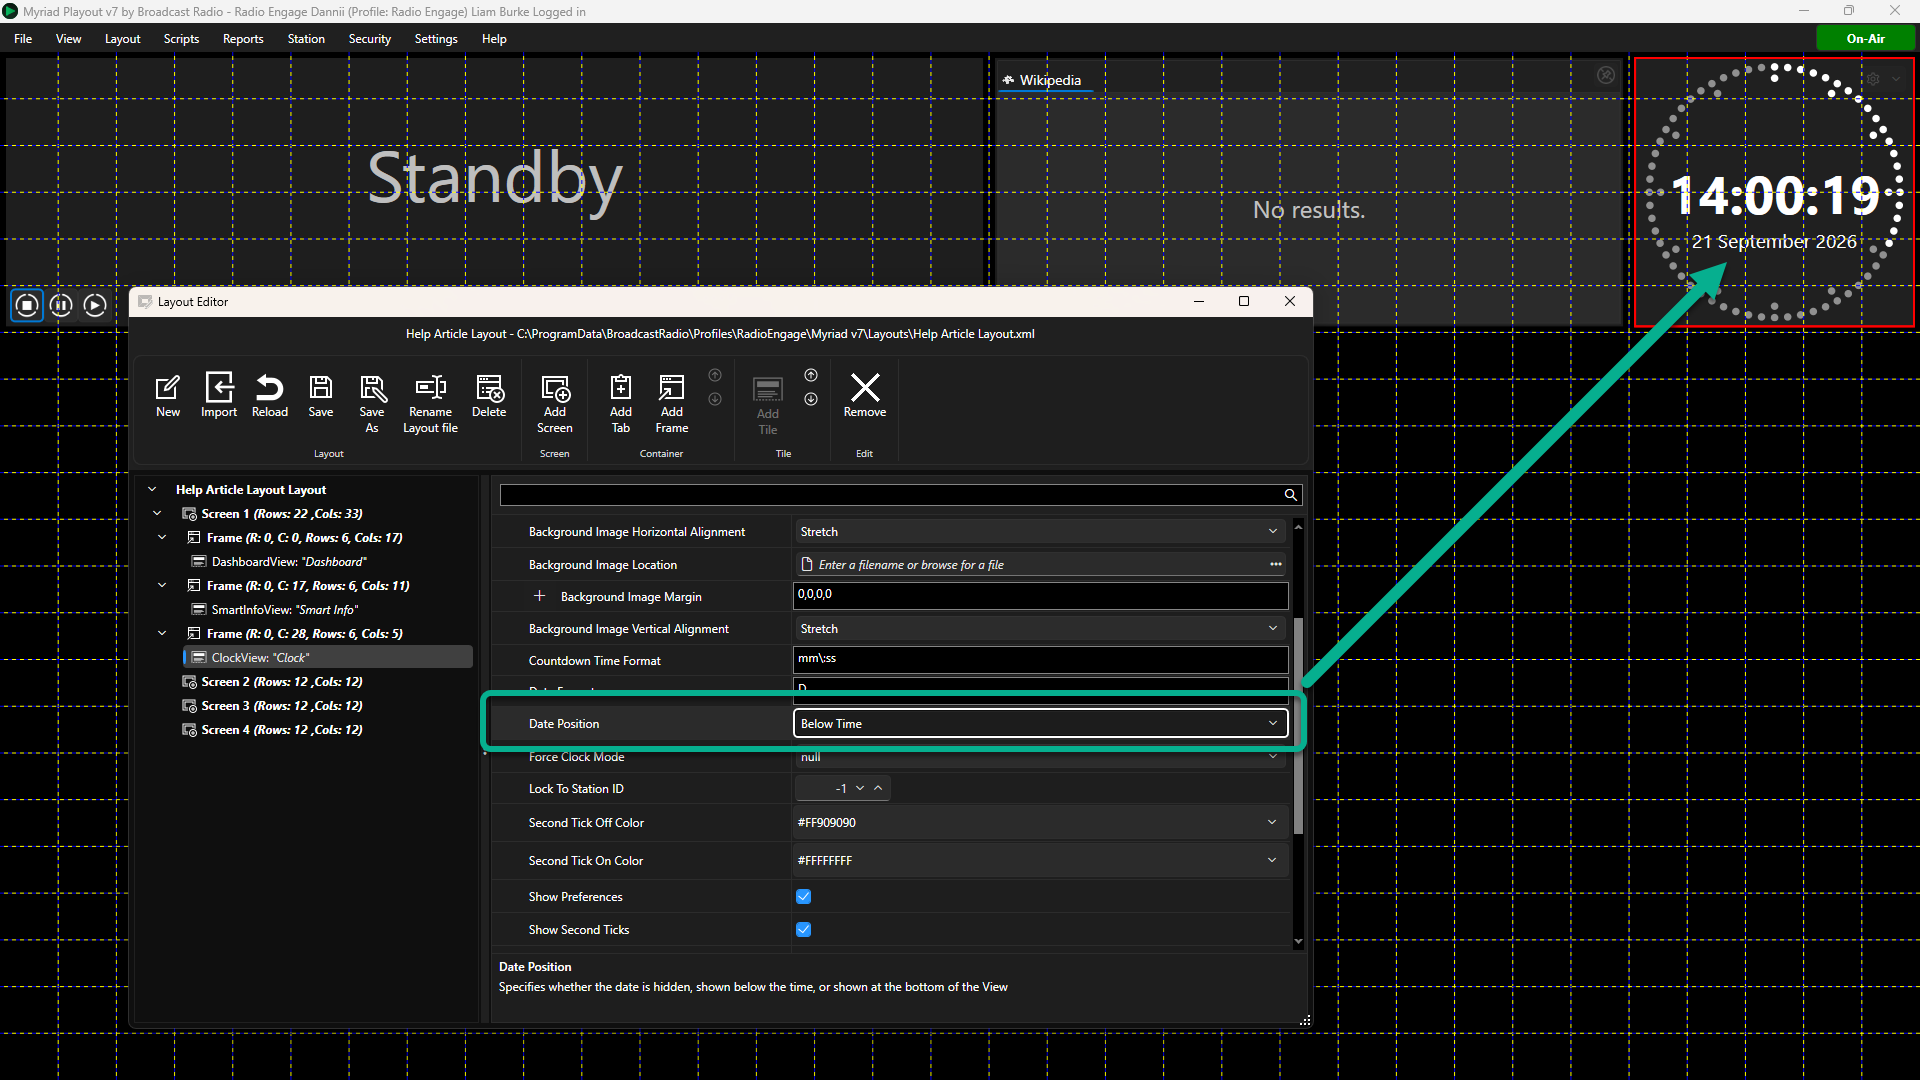
- The design also had the Date displayed inside the seconds tick circle so let's do that next. Scroll down to the Date Position setting and select Below Time from the drop down option.
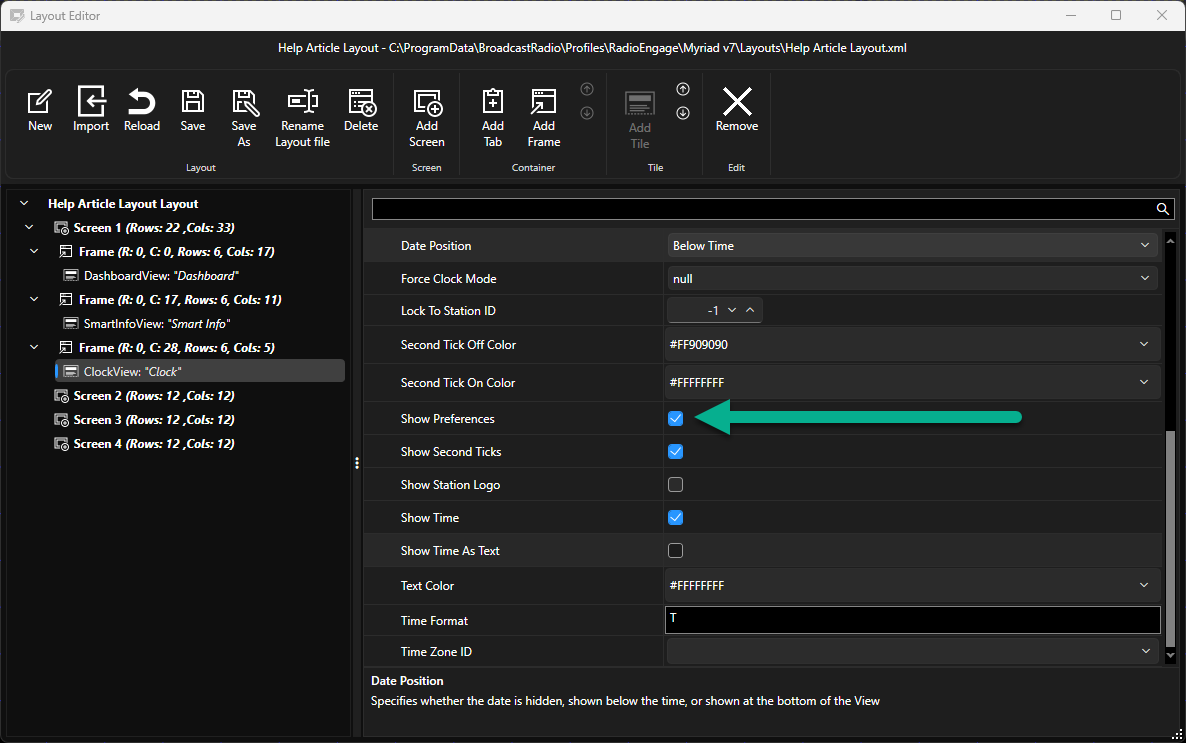
- Be default, the Clock allows the the User to a count-down view but our target design did not have that option. To disable the User Preference, un-tick the Show Preference option.
- Finally, we want to add the Station Logo to the Clock display. If you have already assigned a Station Logo to your Station in Myriad, the simplest option is to tick the Show Station Logo option.
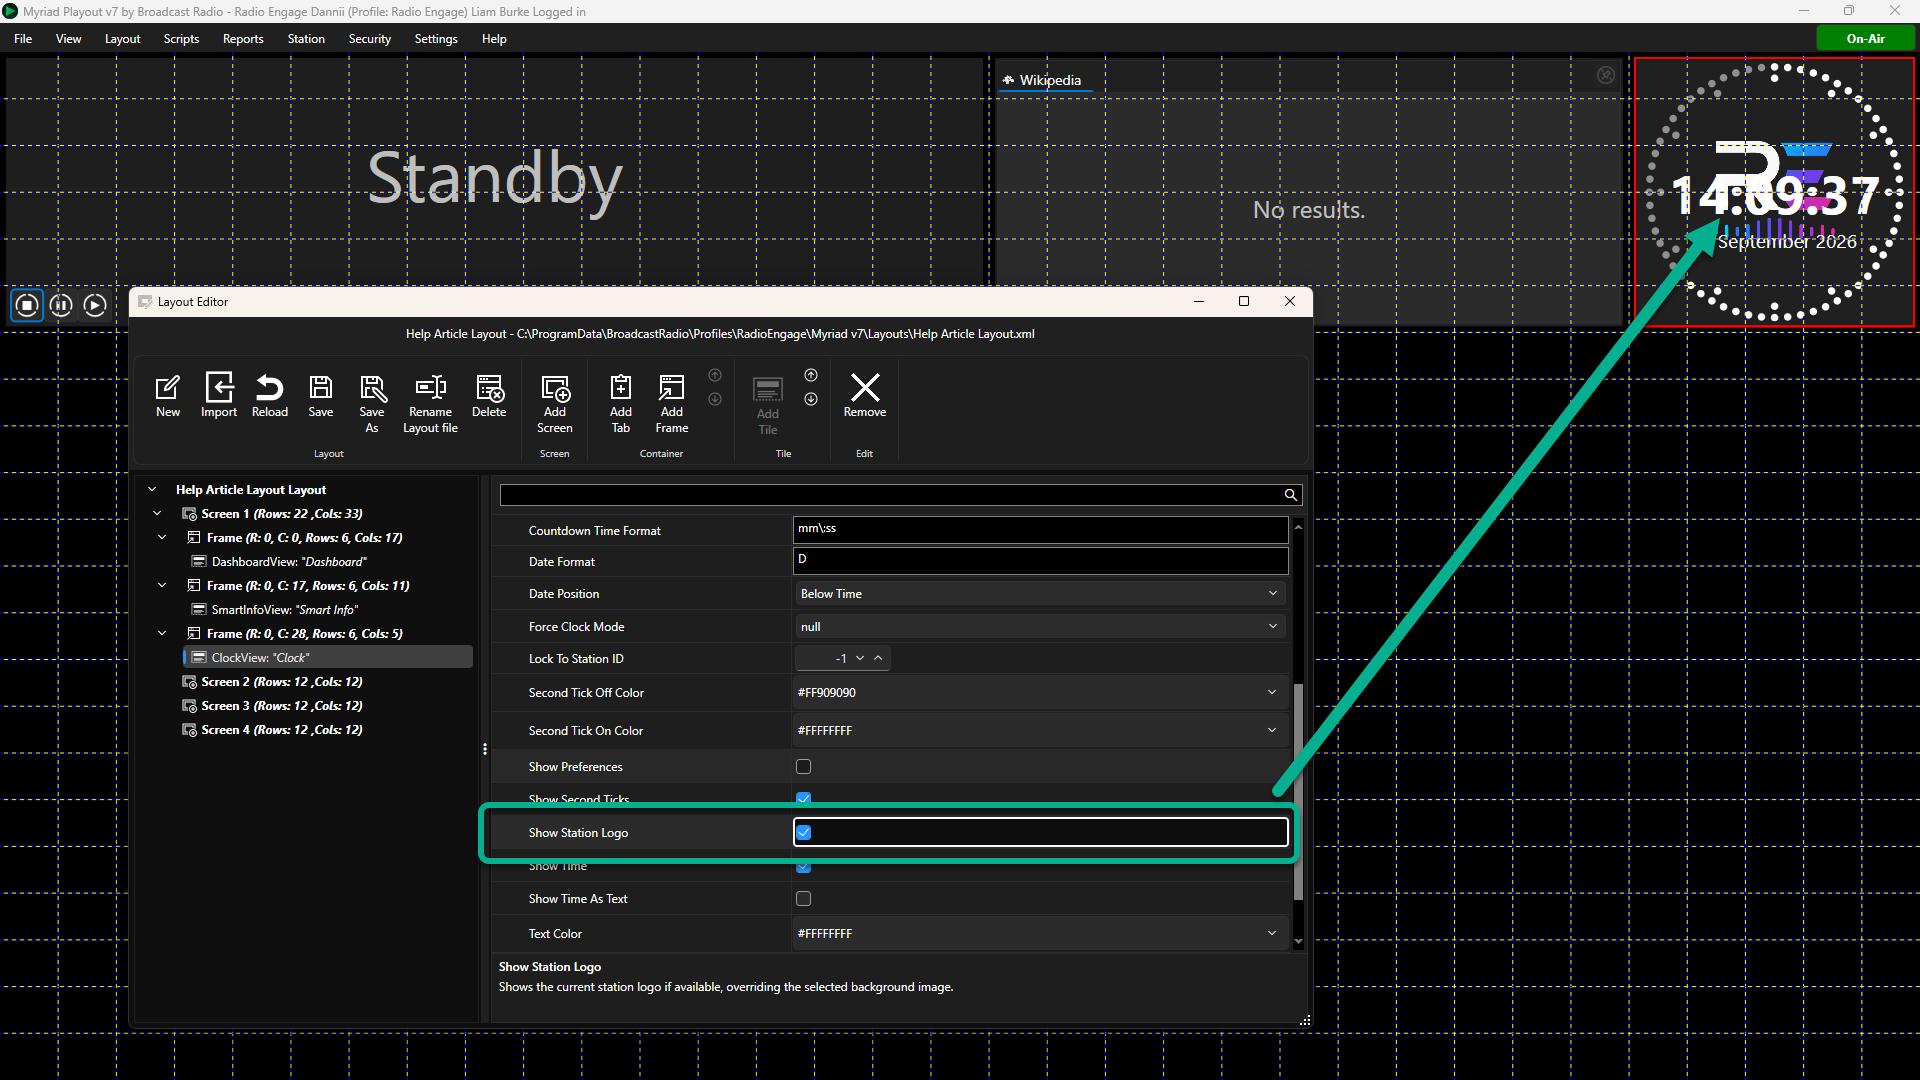
This has the advantage that the logo will change if you open a different Station on the same Myriad workstation.
If you have not setup the Station Logo (see Settings Menu > Database Settings > Stations Tab > Station Details & Features) , you can use the Background Image Location setting to browse for an image to display in the Clock.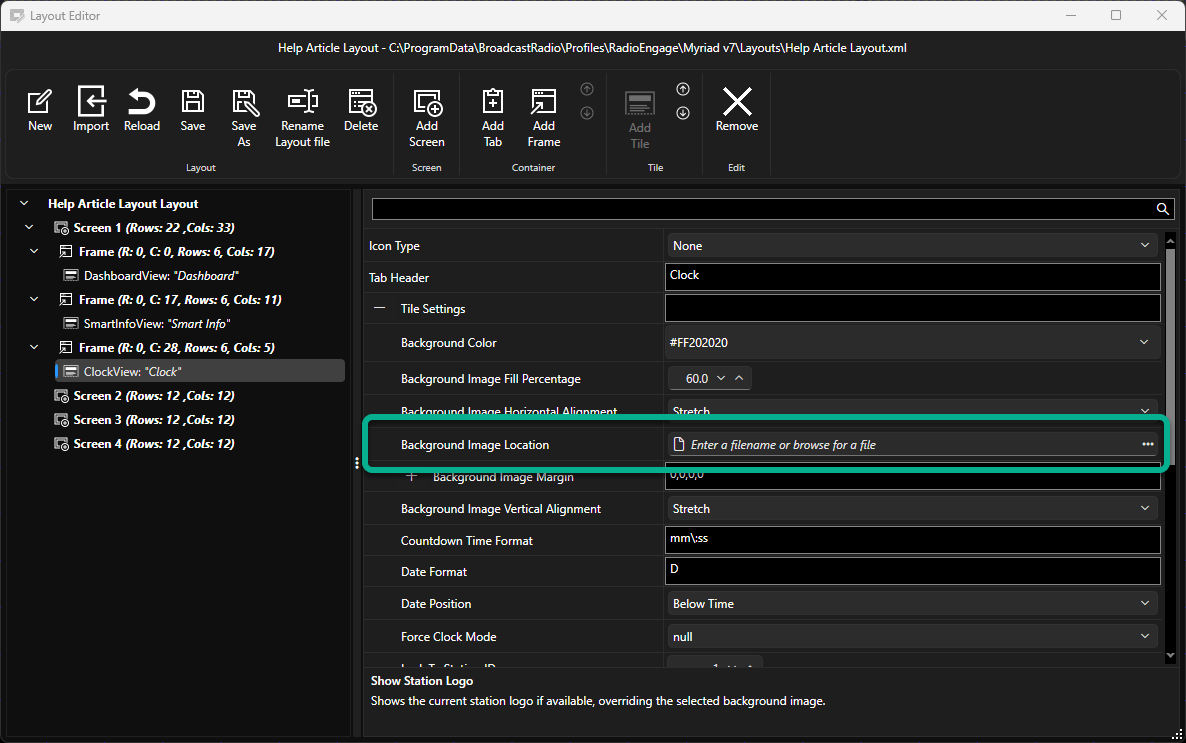
- The image is displayed in the center of the Clock by default but our design requires the logo to be smaller and displayed above the time. We can use the Background Image Fill Percentage setting to scale the image to be smaller on screen, and the Background Image Margin setting to set the position offset from the default central position.
Try these settings:
Background Image Fill Percentage: 35
Background Image Margin: 0,-120,0,0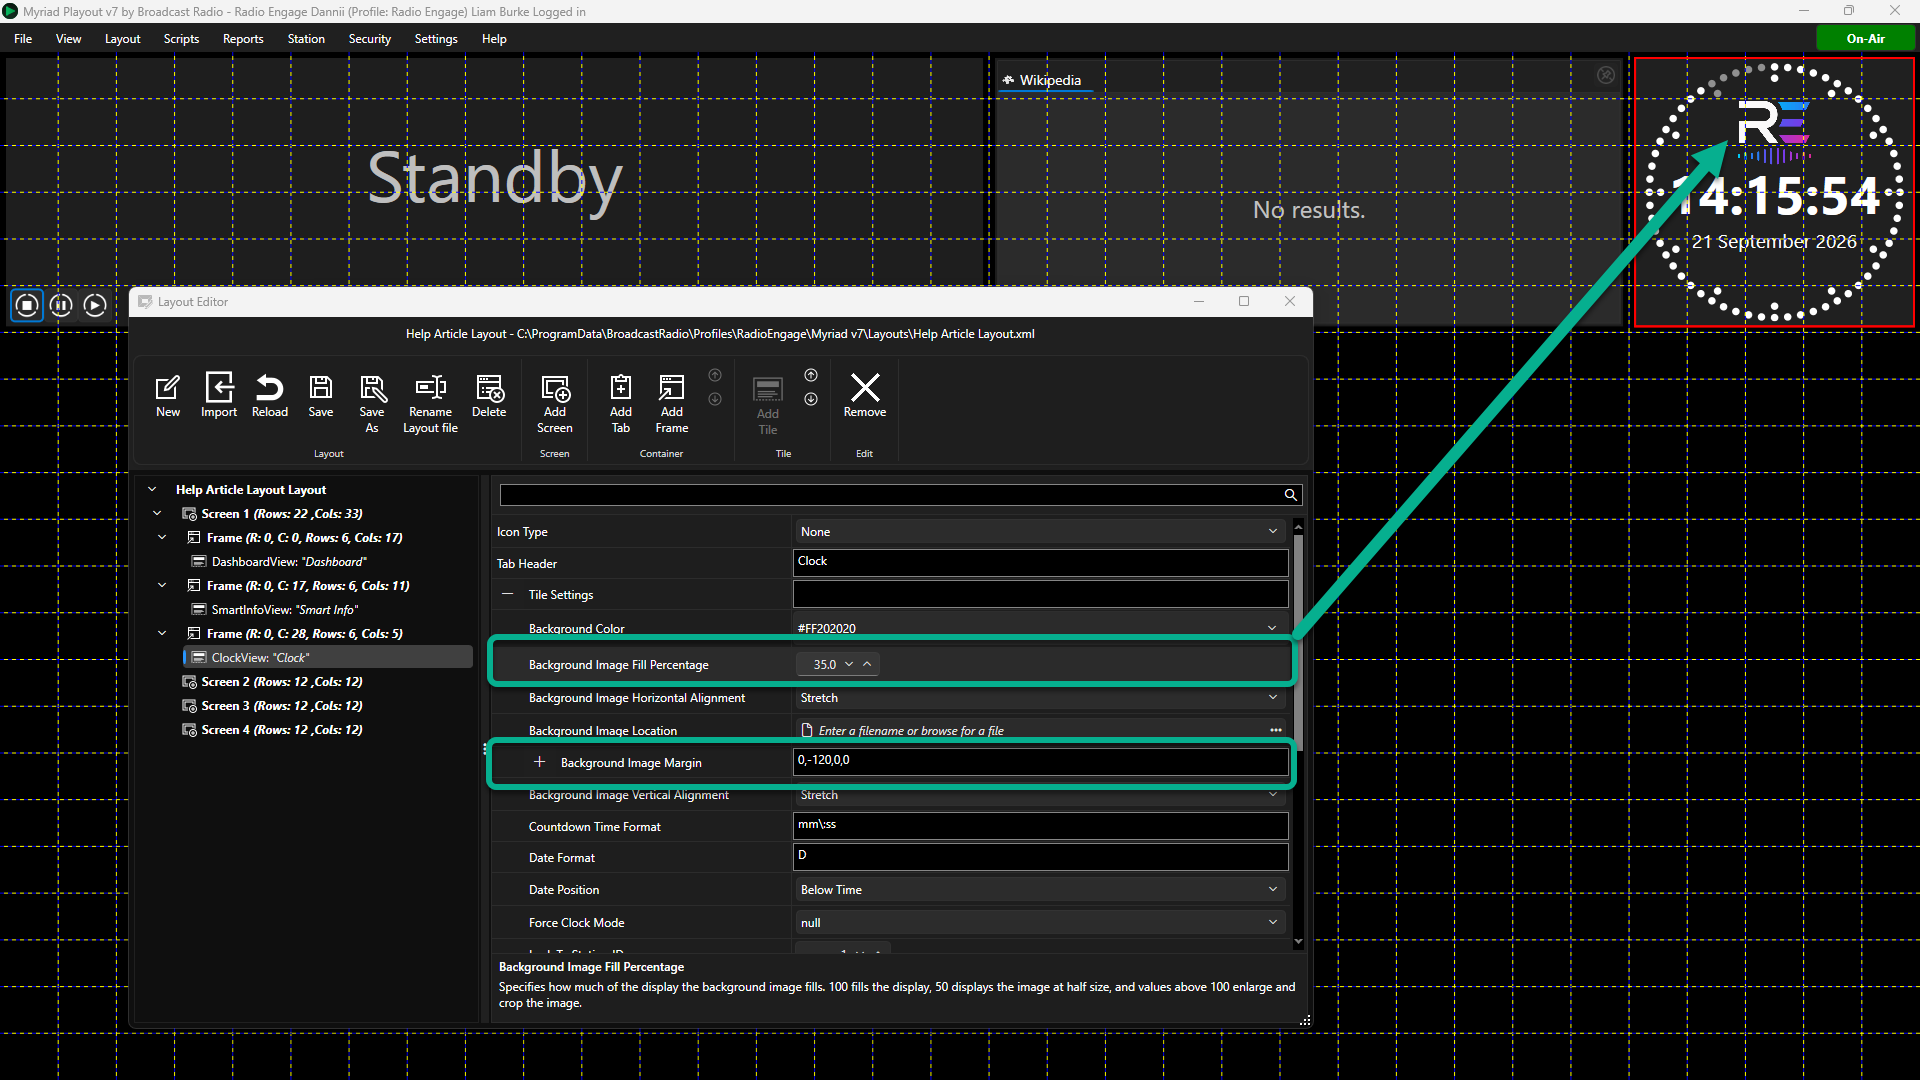
The exact setting we vary depending on the size and aspect ratio of your logo. - Click on the Save button to save the Layout so far.
Add the Log View Tile
Next we need to add the Log View Tile to the Layout.
- Select the correct Screen and then click on the Add Frame button.
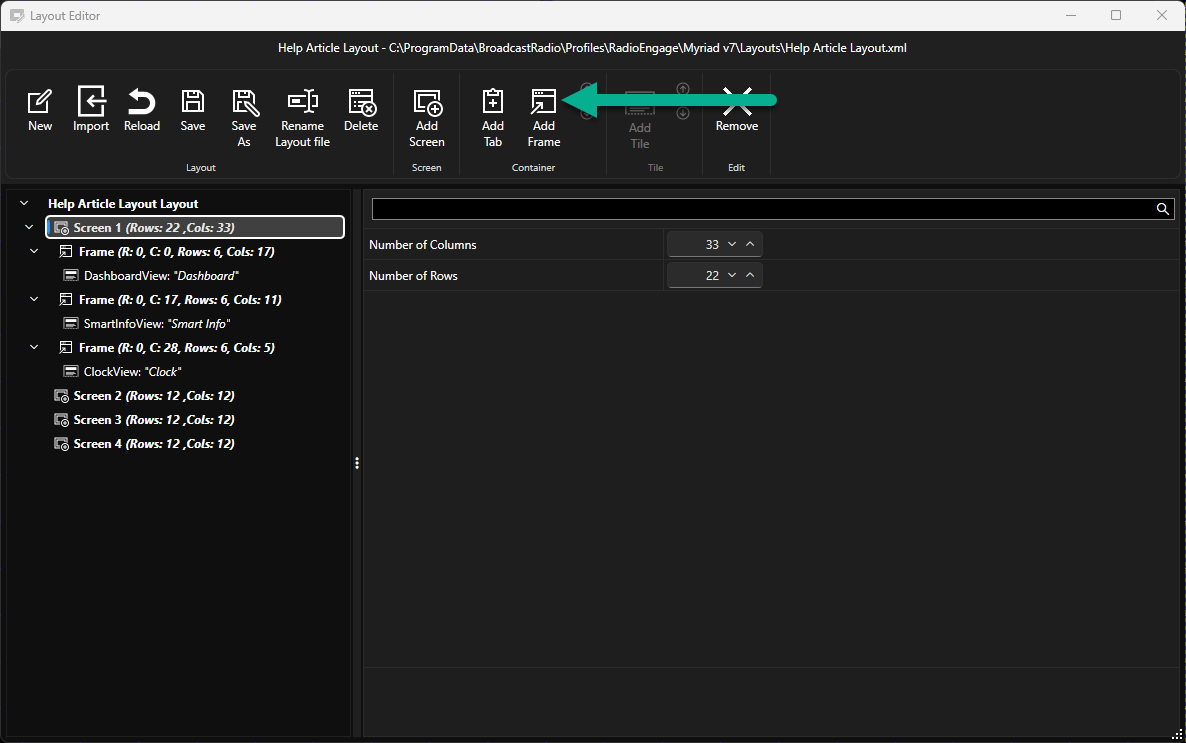
- Select the Log Tile option and click on Ok.
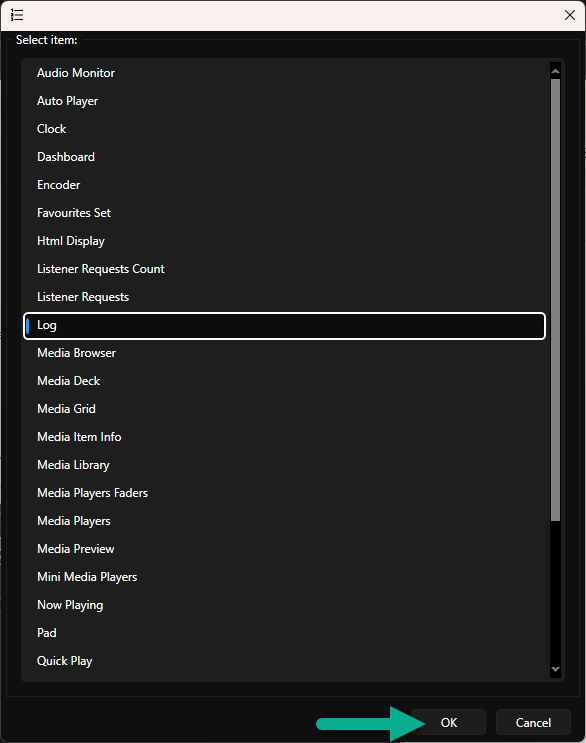
- In previously, select the Frame Container that contains the Log Tile so that we can set the position and size.
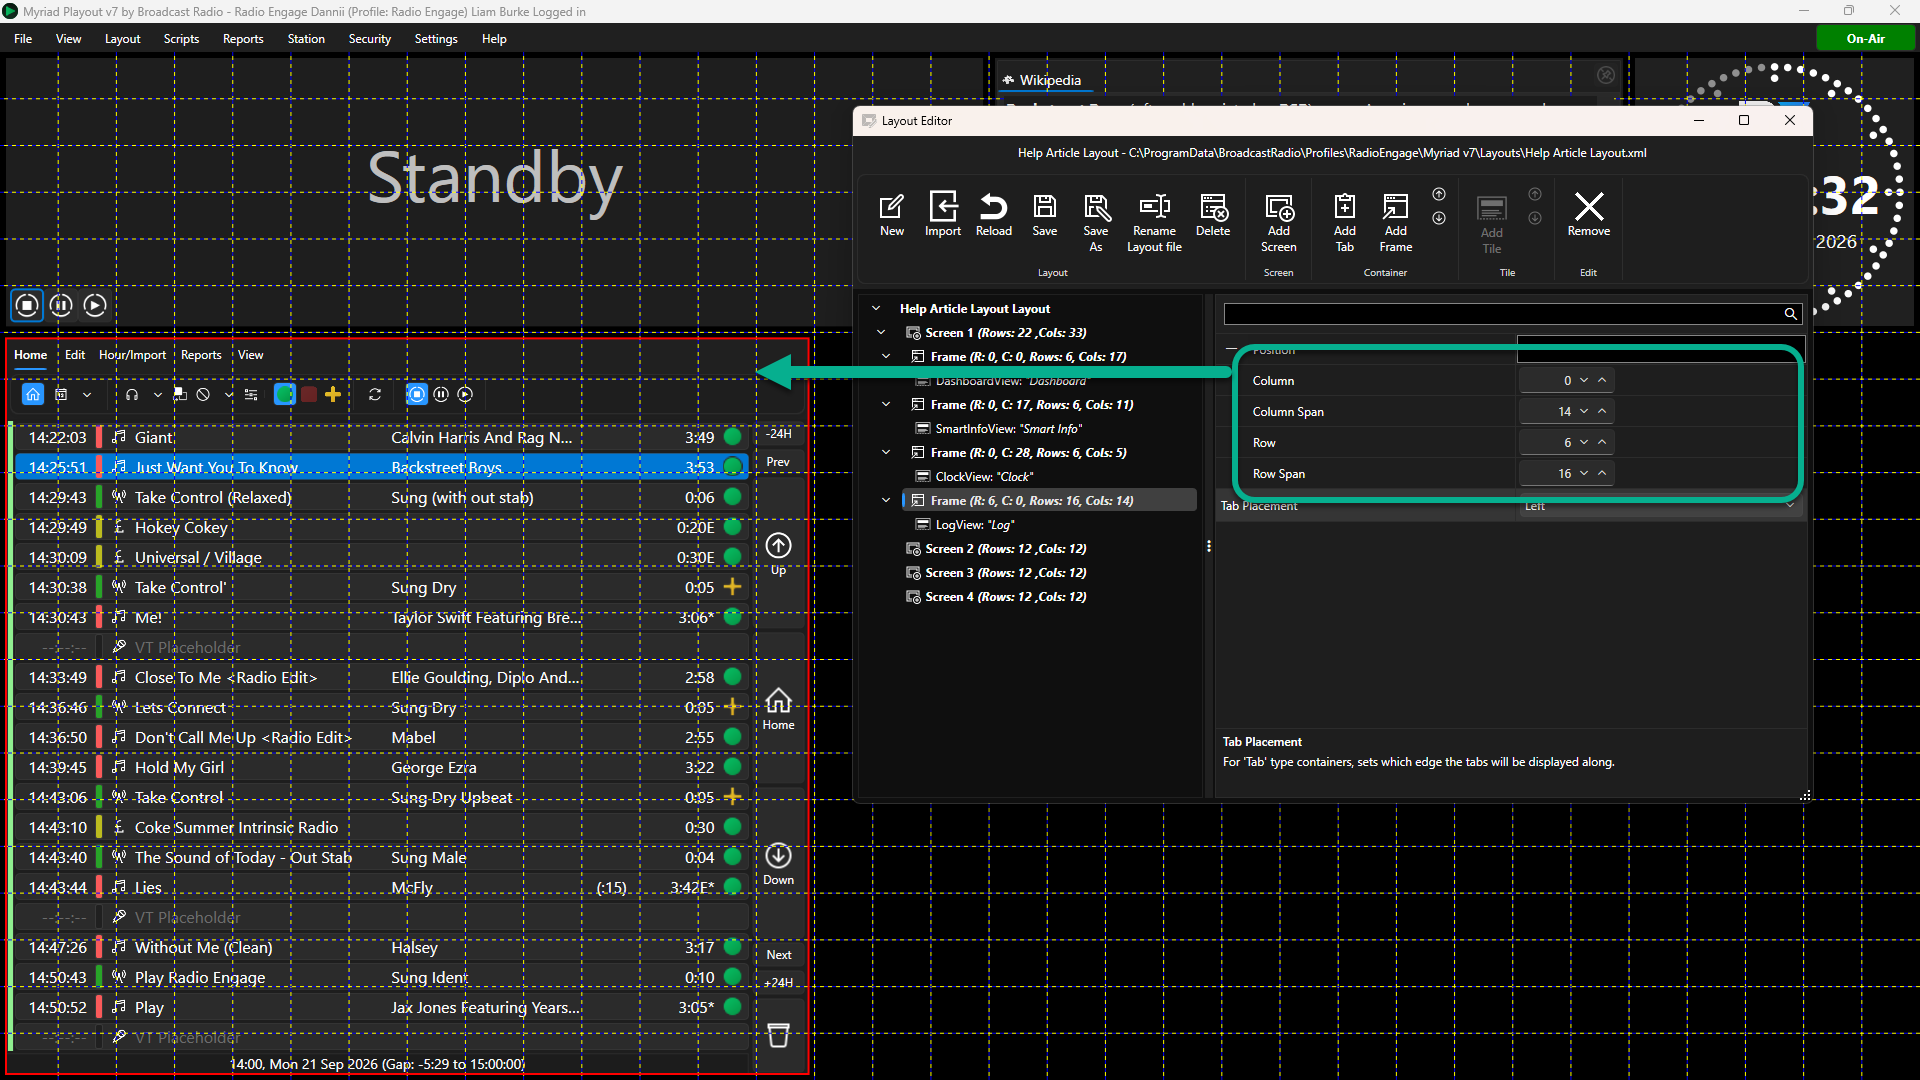
Set the Column / Row settings to:
Column: 0
Column Span: 14
Row:6
Row Span: 16
This will position the Log to the left of the window below the Dashboard. - There are not many properties on the Log Tile as most are actually User Preferences. One thing to check is that the Ribbon Minimised option is un-ticked. If you tick this option, the ribbon is not displayed until the User click on the ribbon drop down, but the new compact ribbons on Myriad 7 (View Menu > Shows Large Ribbons) make this option redudant.
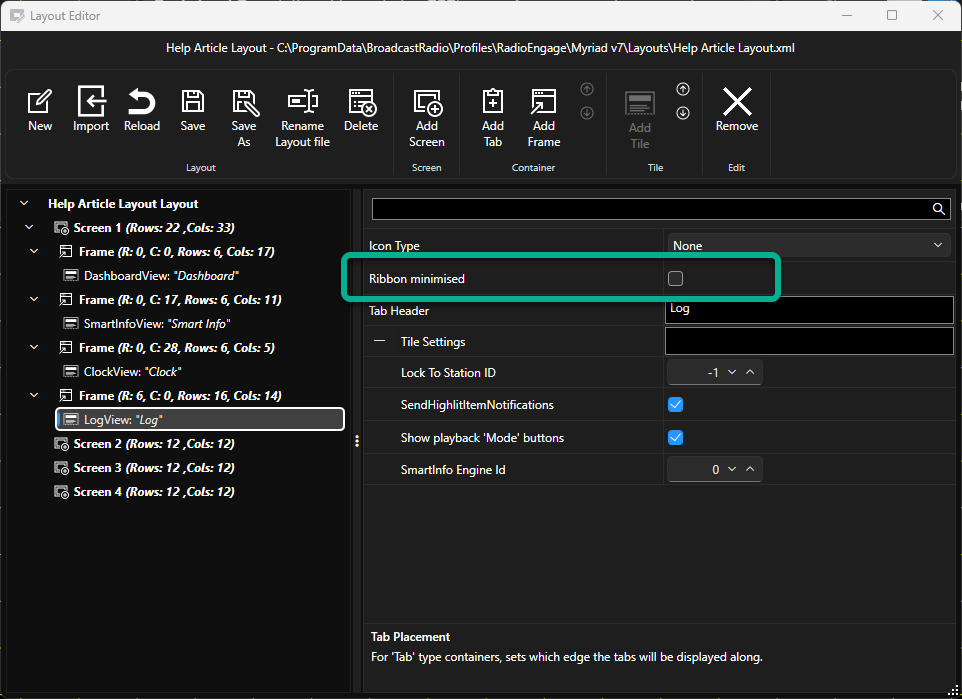
- Click on Save to save your progress.
Adding the Tabbed Container (Favourites, Listener Requests, Library, MediaWall & SmartInfo)
The next section is a little different to the previous sections in that we will add a Tabbed Container that hosts multiple Tiles to allow the User to switch between Favourites, Listener Requests, Library, MediaWall and SmartInfo.
- Select the correct Screen and then click on the Add Tab button to add the Tabbed Container.
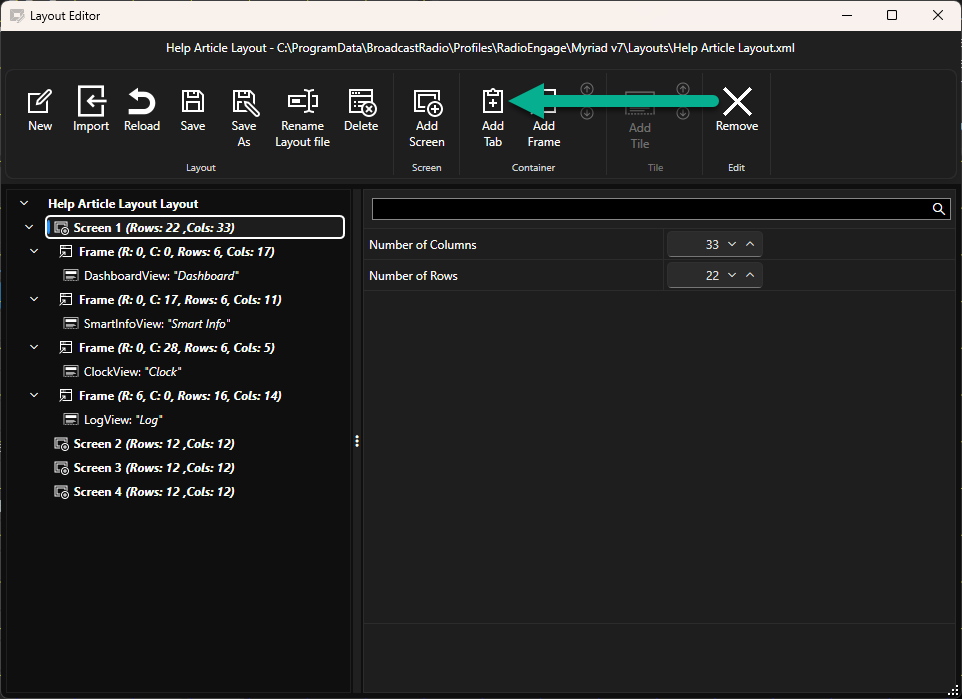
- Select the Favourites Sets tile from the list and click OK. This will add the Tabbed Container and create the first Tab within the Container which will host a Favourites Tile.
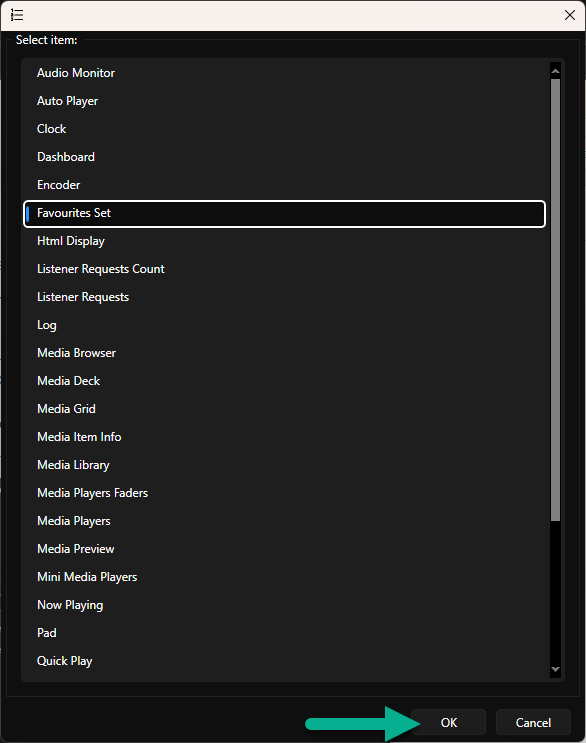
- As with the previous Tiles, start by selecting the Tab Container node in the Navigation panel to set the position and size of the tabbed container. As we will have multiple tabs, the Tab Placement option is also relavent.
Column: 14
Column Span: 15
Row: 6
Row Span: 17
Tab Placement: Top
This will position the Tabbed Container in the correct place in the Layout and at the correct dimensions. It will also set the Tabs to be displayed along the top of the Container.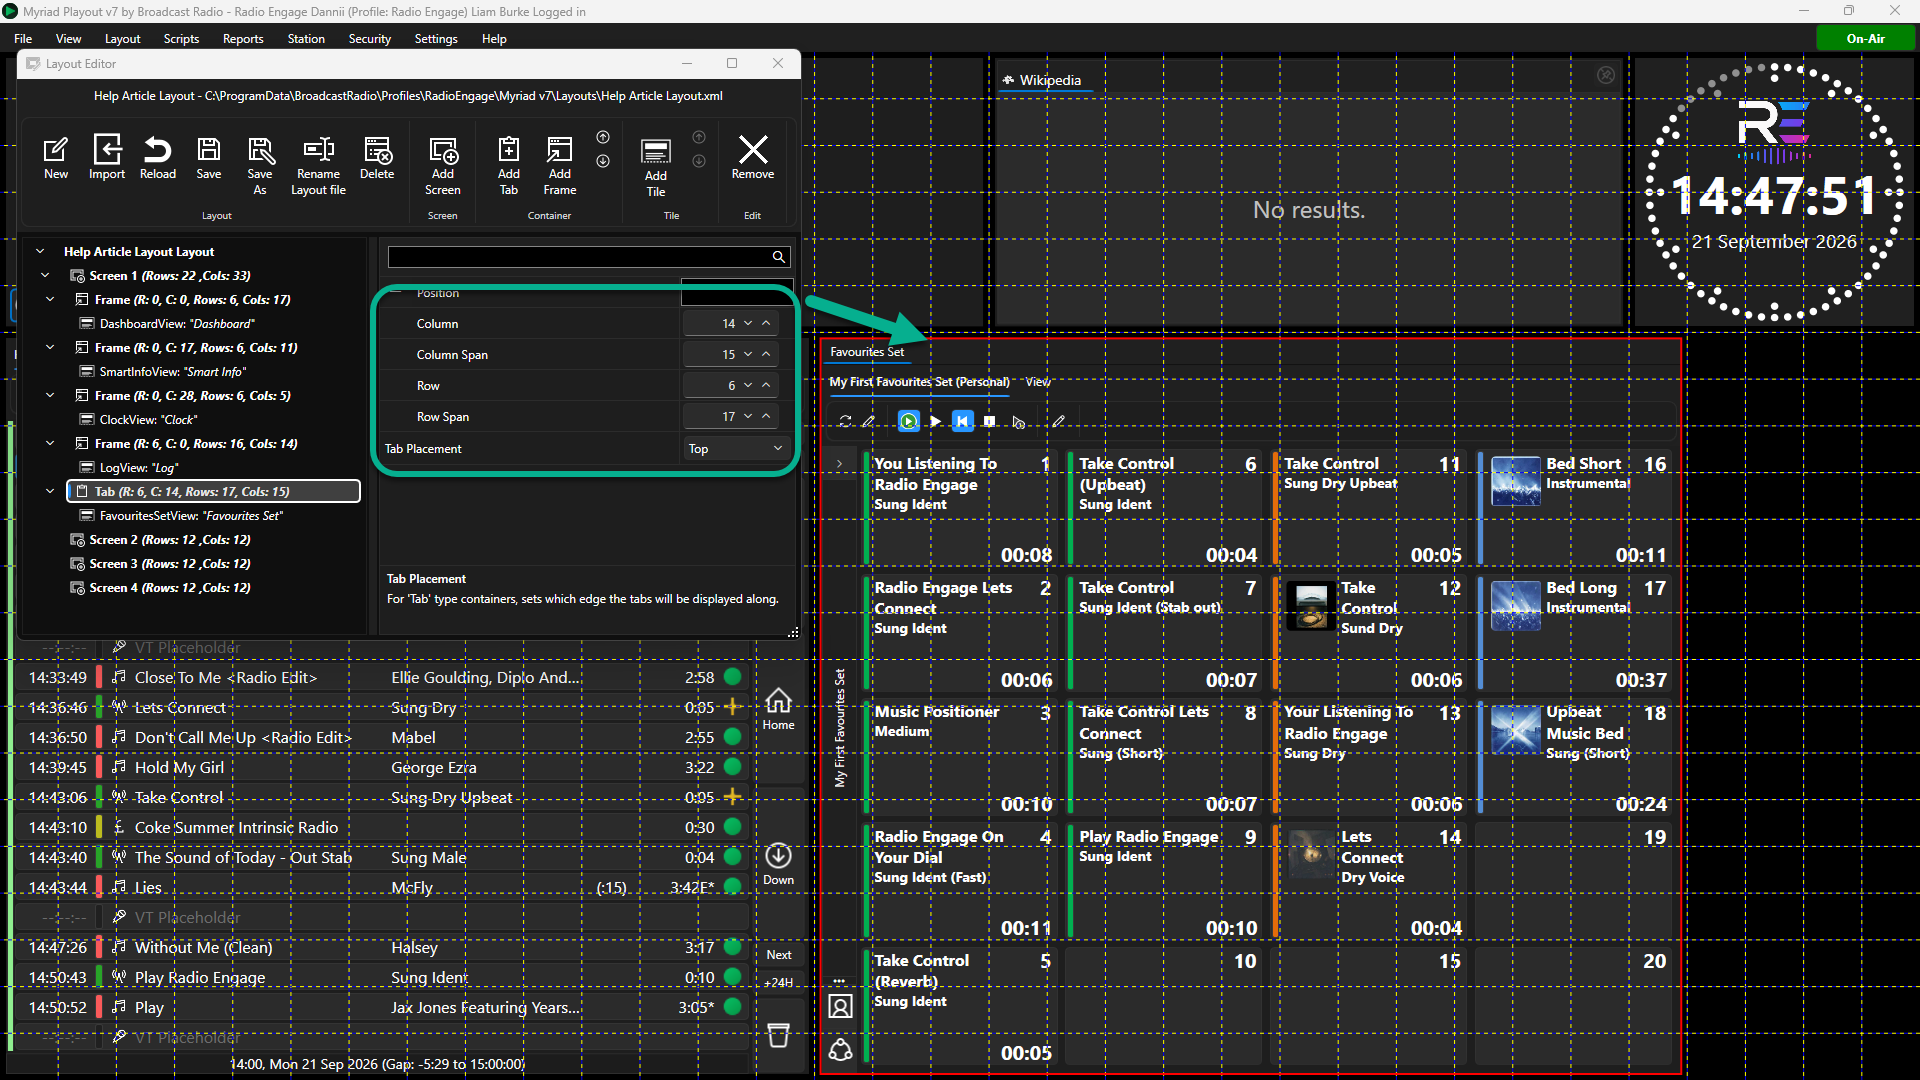
- You can not select the Favourites Tile and alter settings such as Station ID and Ribbon settings. As with the Log Tile, there are not many settings on the Favourite, Media Wall, and Library Tiles as most settings at available via the ribbons and saved as User Preferences.
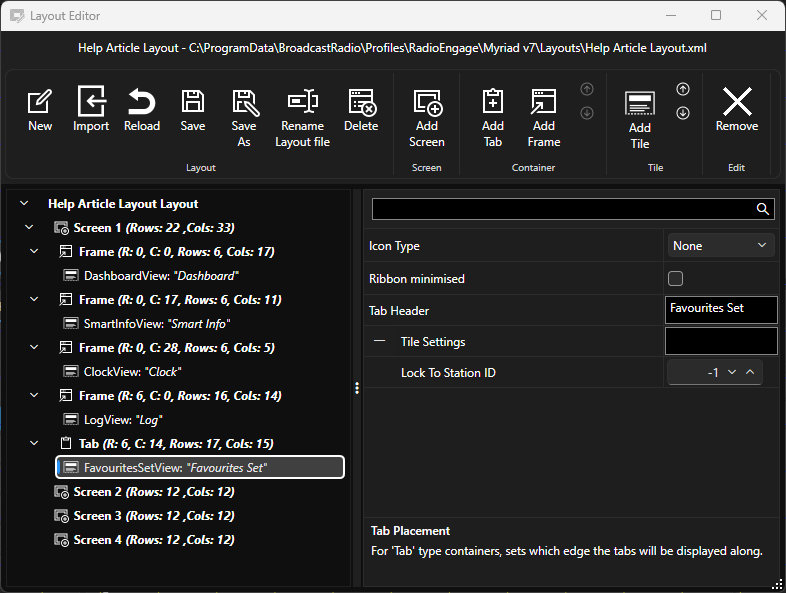
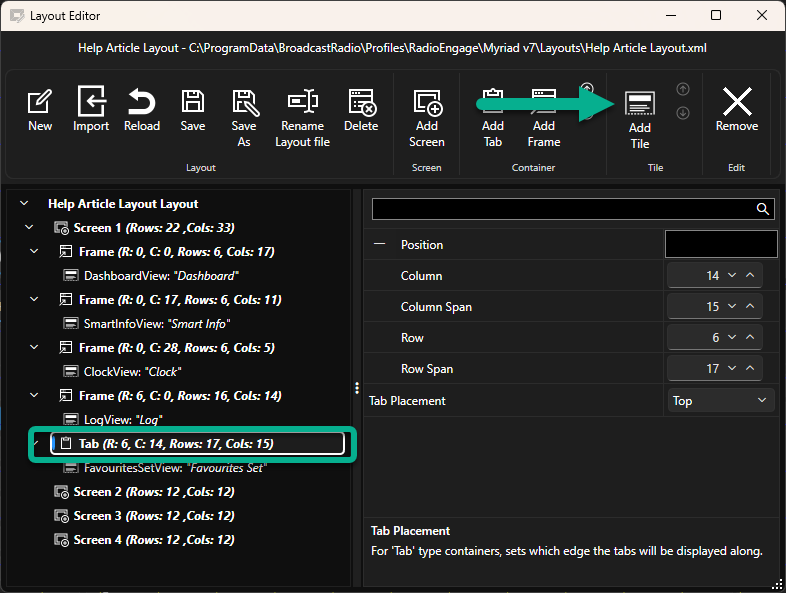
- Next we need to add the Listener Request Tile as a second tab with the the same Tabbed Container. Select the Tabbed Container and then click on the Add Tile button.
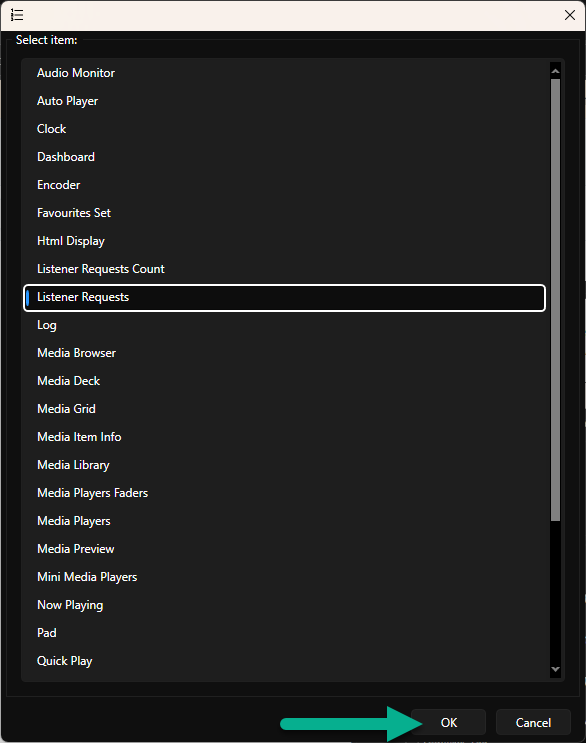
- Select the Listener Request tile and click on OK.
- You will now see that the Listener Request Tile has been added inside the Tabbed Container along with the Favourites Tile we added in the previous step.
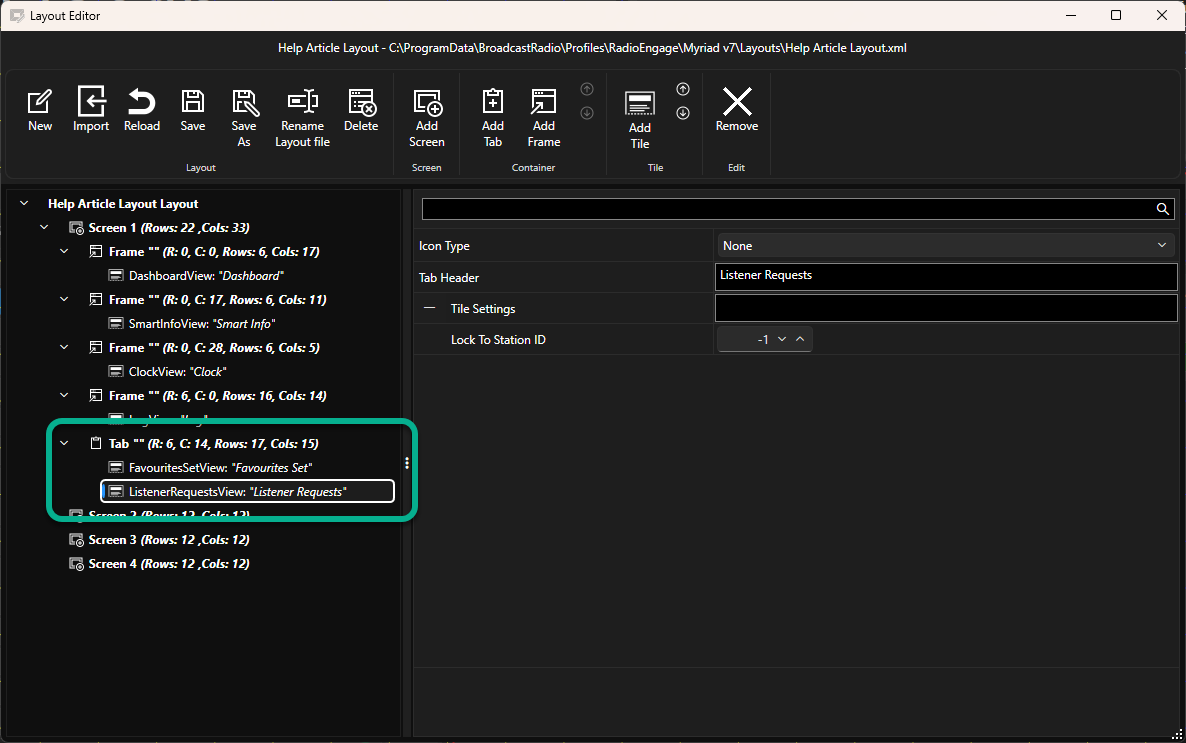
The grid preview will also show the two tabs within the same Tabbed Container in the Layout.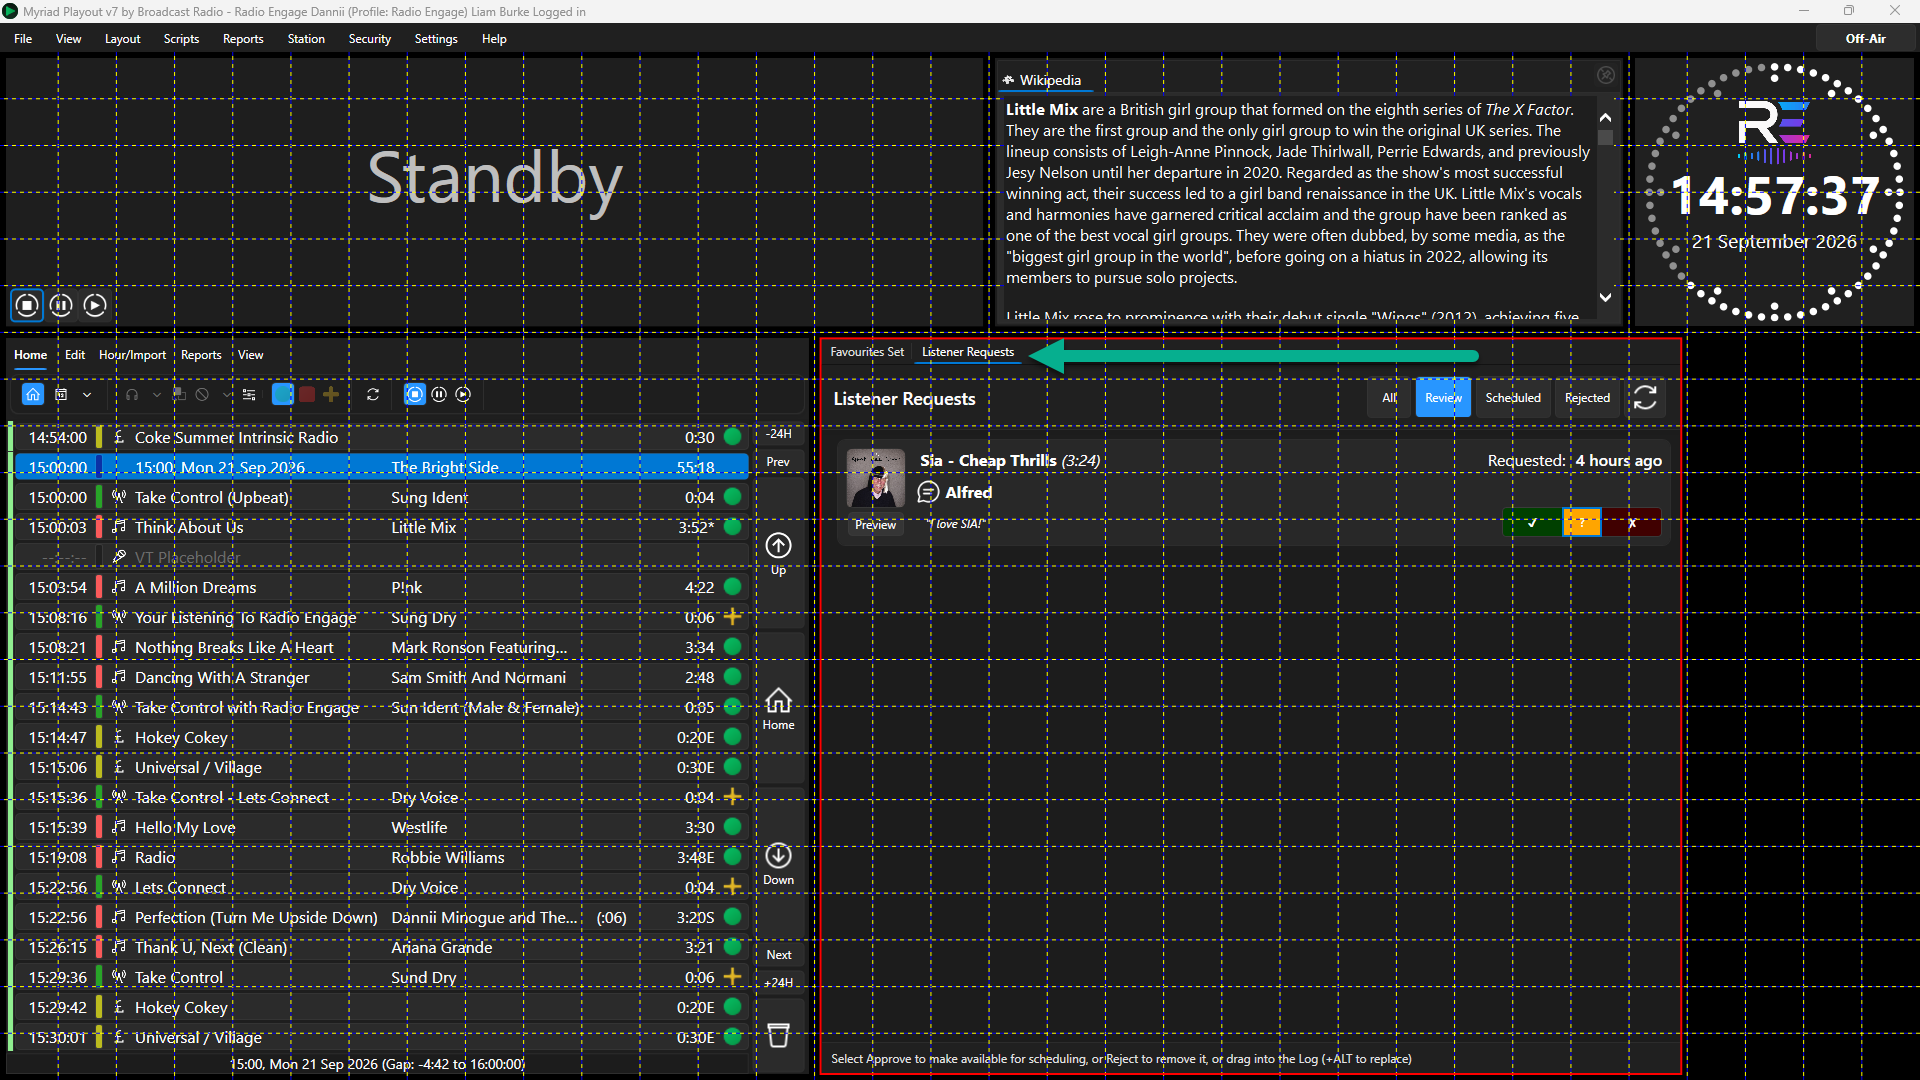
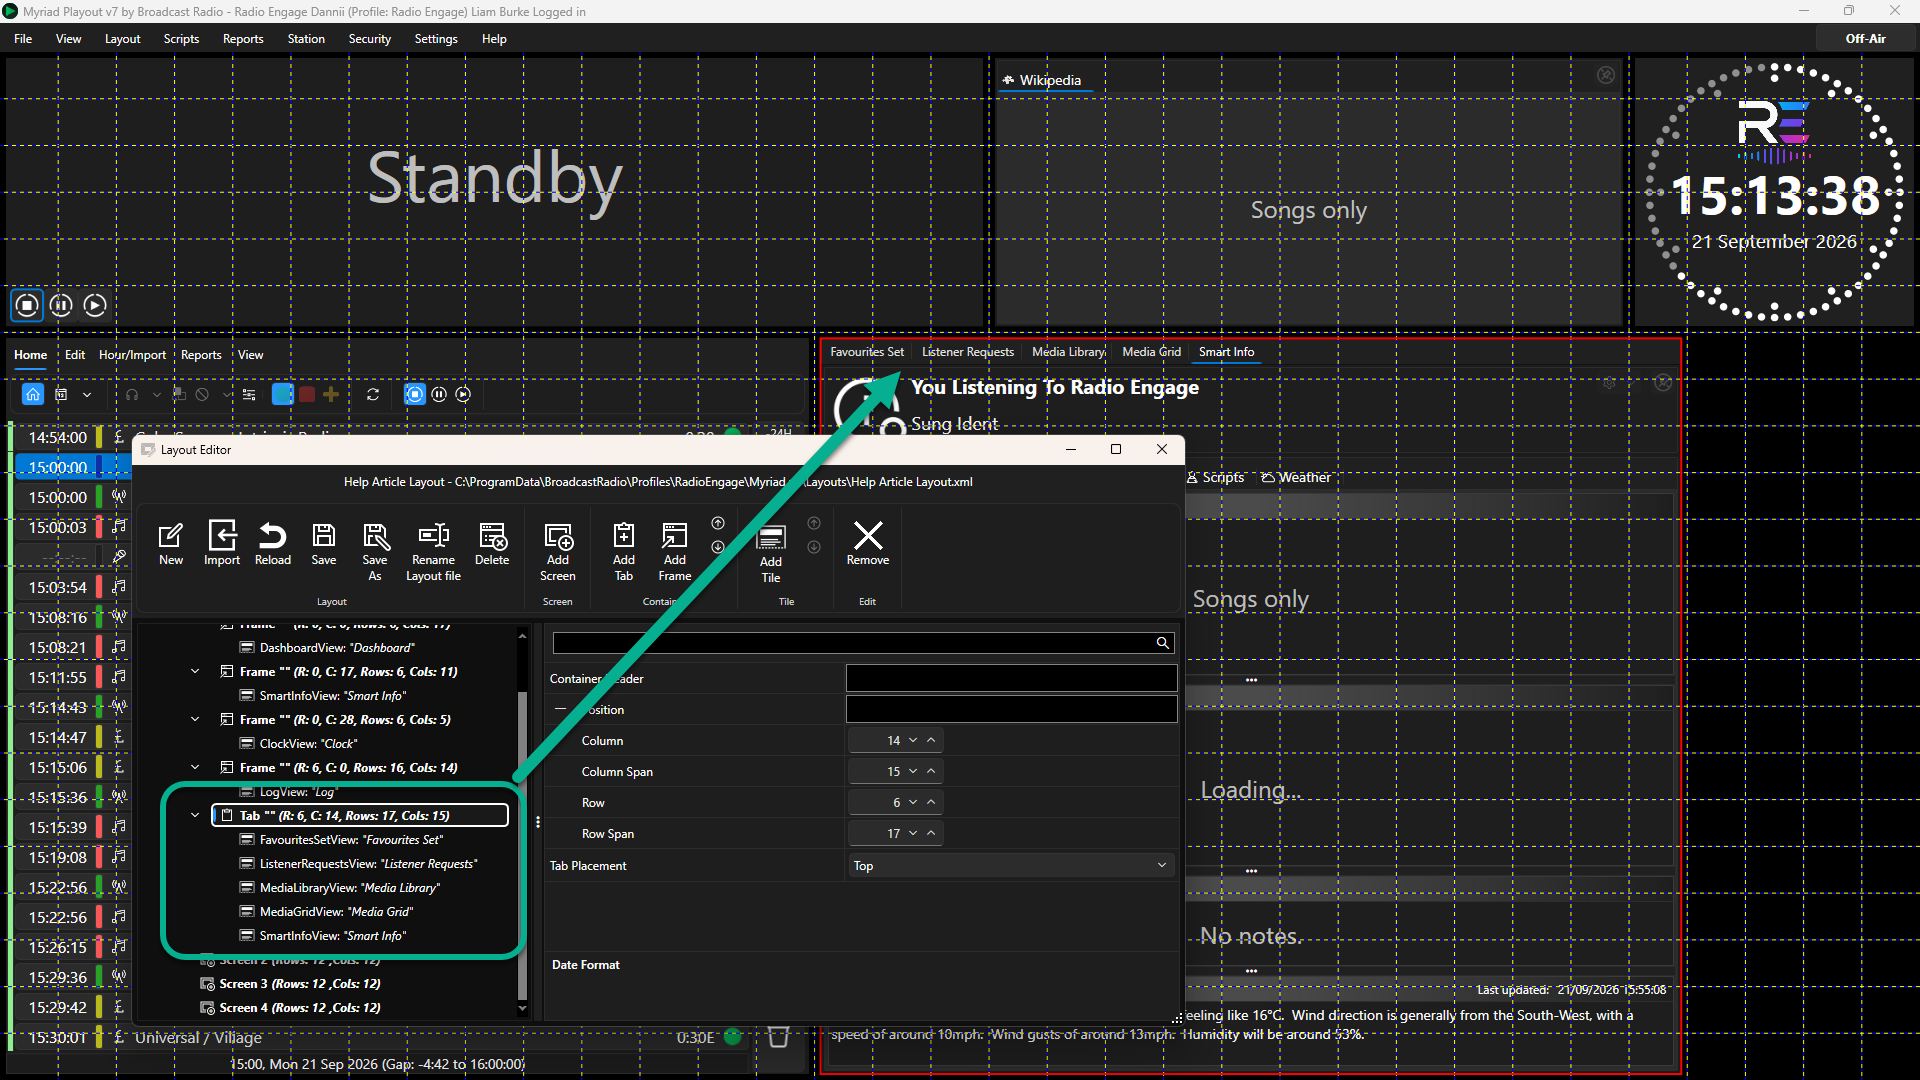
- Repeat step 7 until tabs have been added for the Media Library, MediaWall (MediaGrid) and SmartInfo. We can use the default settings for each of these tiles.
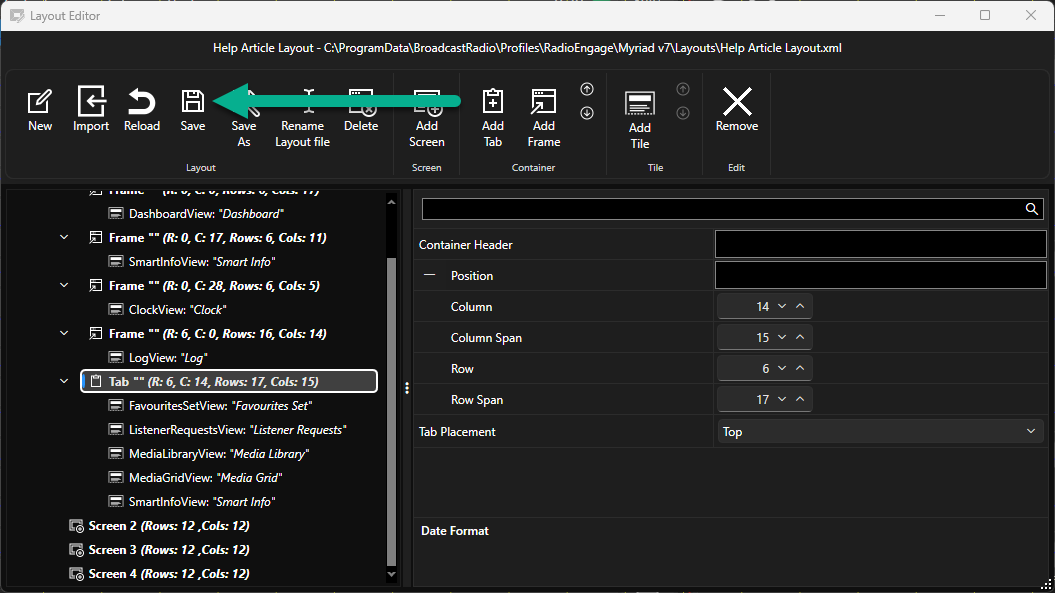
- Click on Save to save the Layout.
Adding the Listener Request Count Tile
The Listener Request Count Tile is a new Tile for Myriad 7 which displays the current number of Listener Requests in the Listener Request queue.
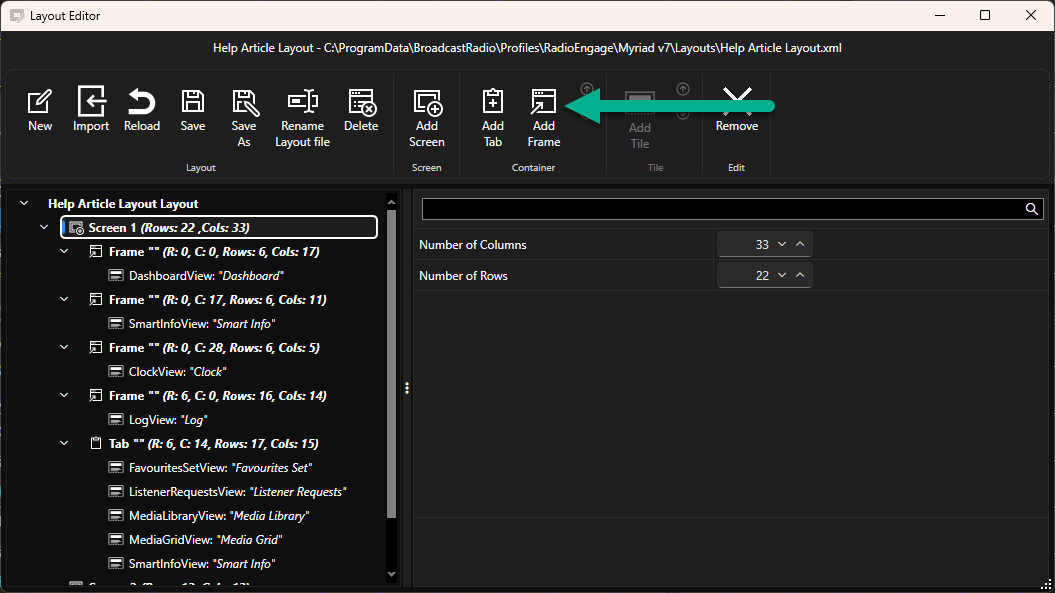
- Select the correct Screen and click on the Add Frame button to add the Frame Container.
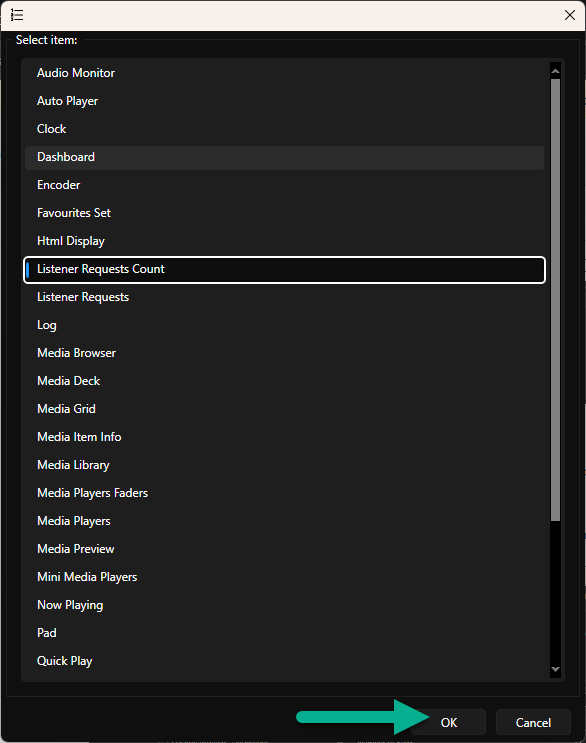
- Select the Listener Request Count Tile option and click on OK.
- Click on the Frame Container node in the Navigation panel and use the Column, Column Span, Row and Row Span settings to set the size an position of the Listener Request Count tile on screen.
Column: 29
Column Span: 4
Row: 6
Row Span: 2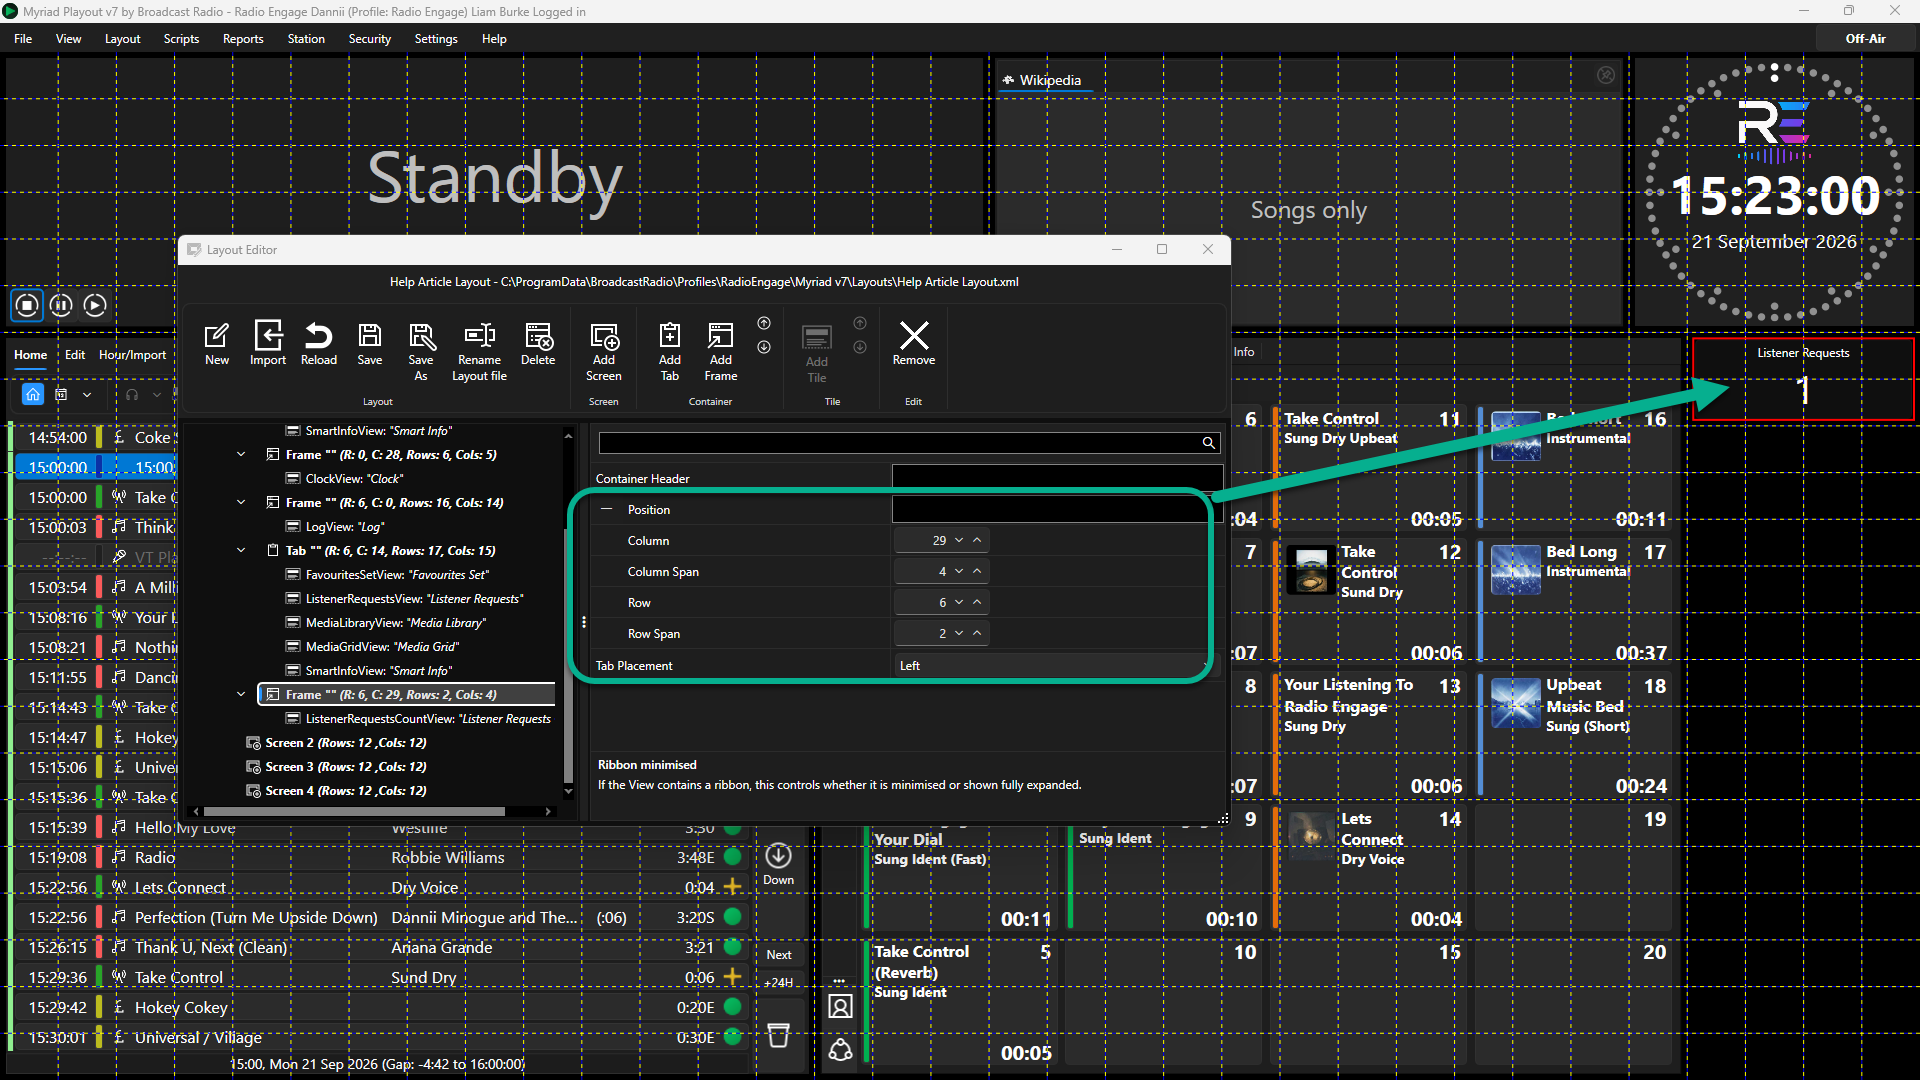
- There are no settings on the Listener Request Count Tile we need to change, so you can click on Save to save the Layout.
Adding the Mini Media Player Tile
The Mini Media Player Tile provides a cut down version of the full Media Players found on most Layouts. In this example we will stack them vertically and also exclude the Record option. We will add the Recorder in a separate Frame Container.
- Select the correct Screen and click on the Add Frame button to add the Frame Container.
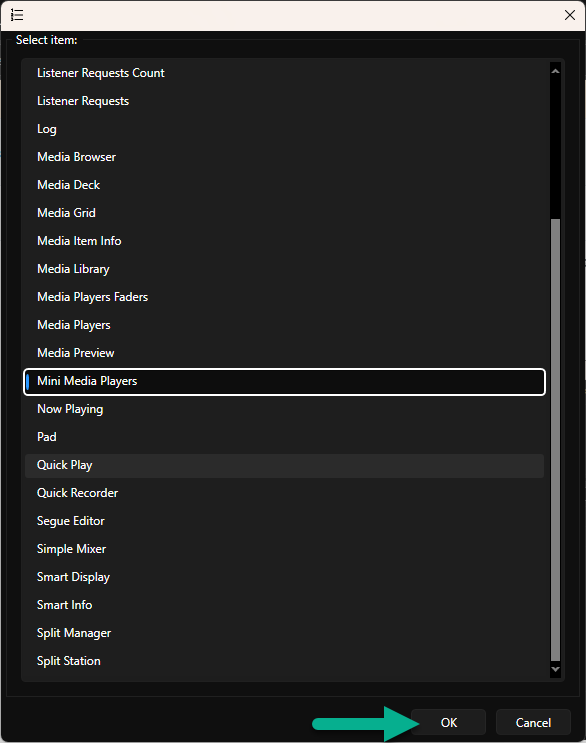
- Select the Mini Media Players Tile option and click on OK.
- Click on the Frame Container node in the Navigation panel and use the Column, Column Span, Row and Row Span settings to set the size an position of the Mini Media Players tile on screen.
Column: 29
Column Span: 4
Row: 8
Row Span: 12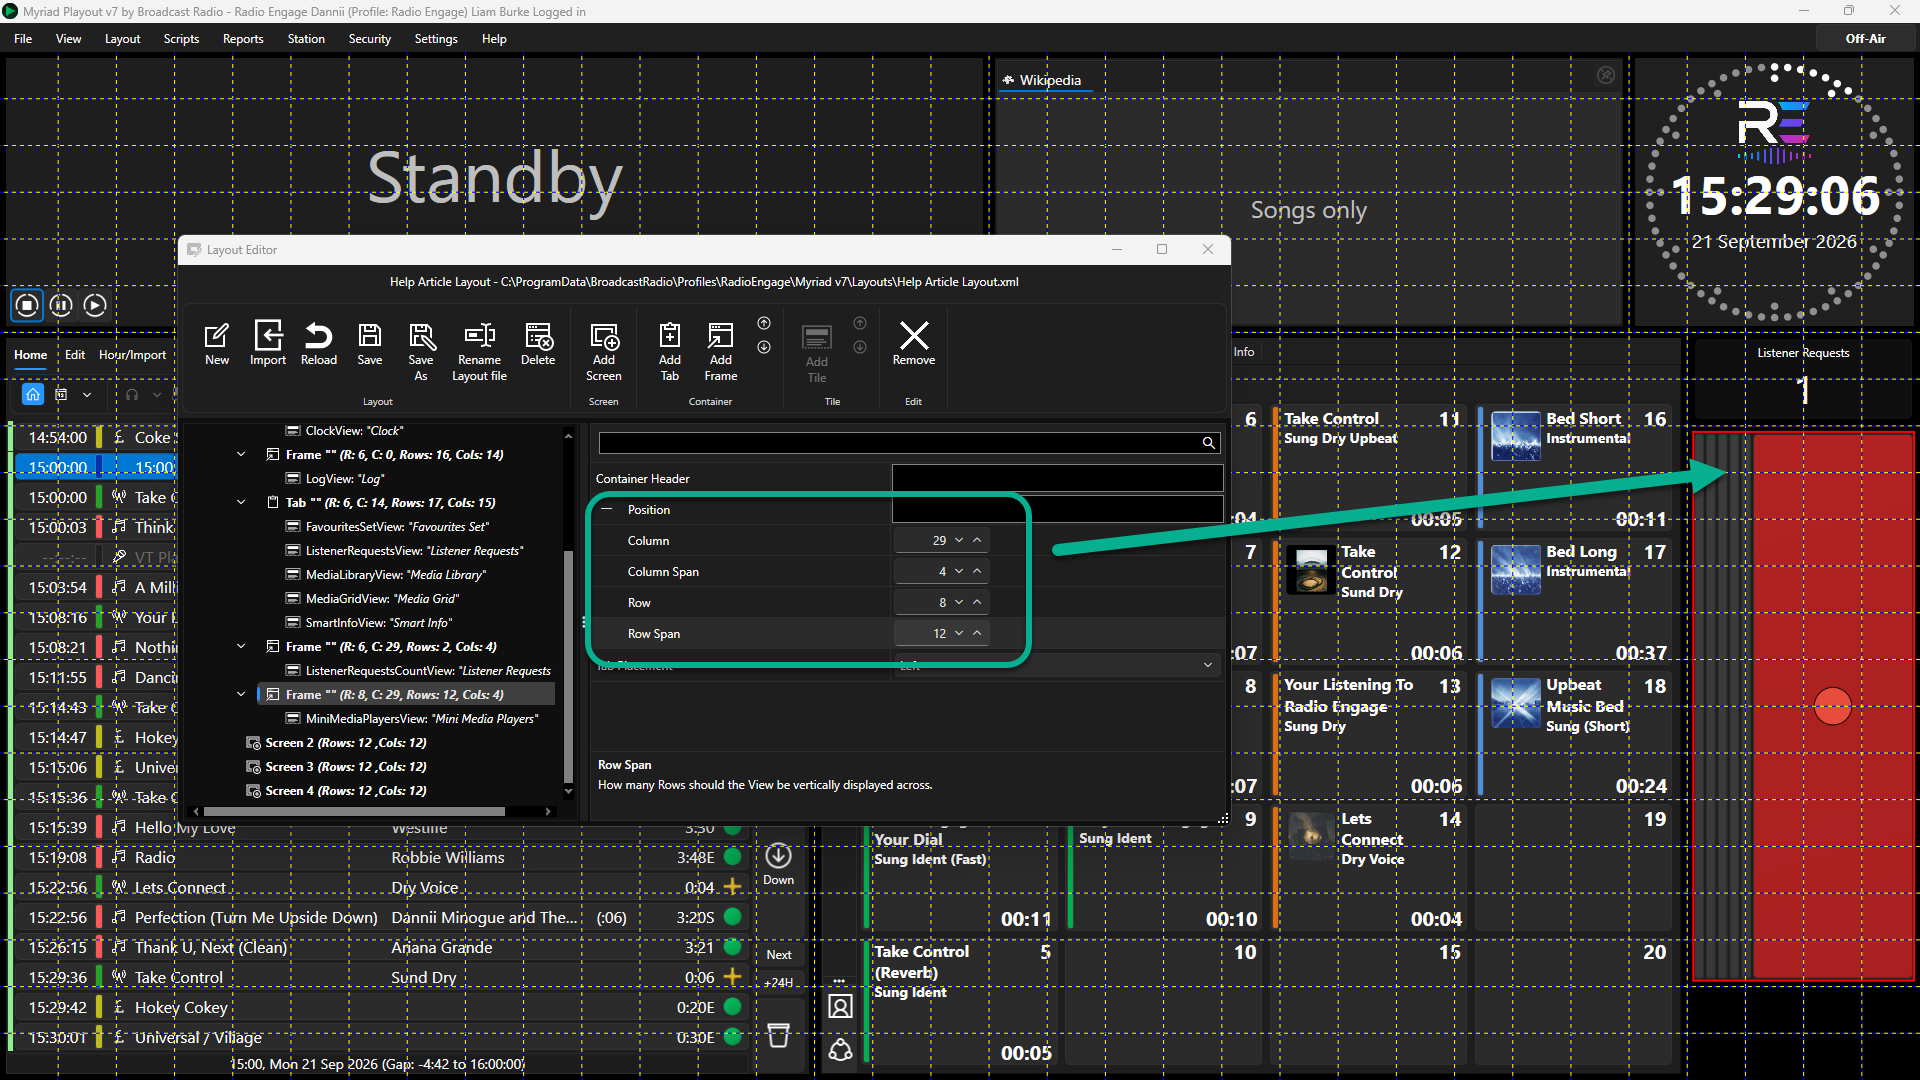
- Click on the Mini Media Player Tile node in the Navigation Panel to access the settings for the Mini Media Players. Use the following settings:
KnobSize: 25
Lock to Station ID: -1
Orientation: Vertical
Show Players: Ticked
Show Recorder: Un-ticked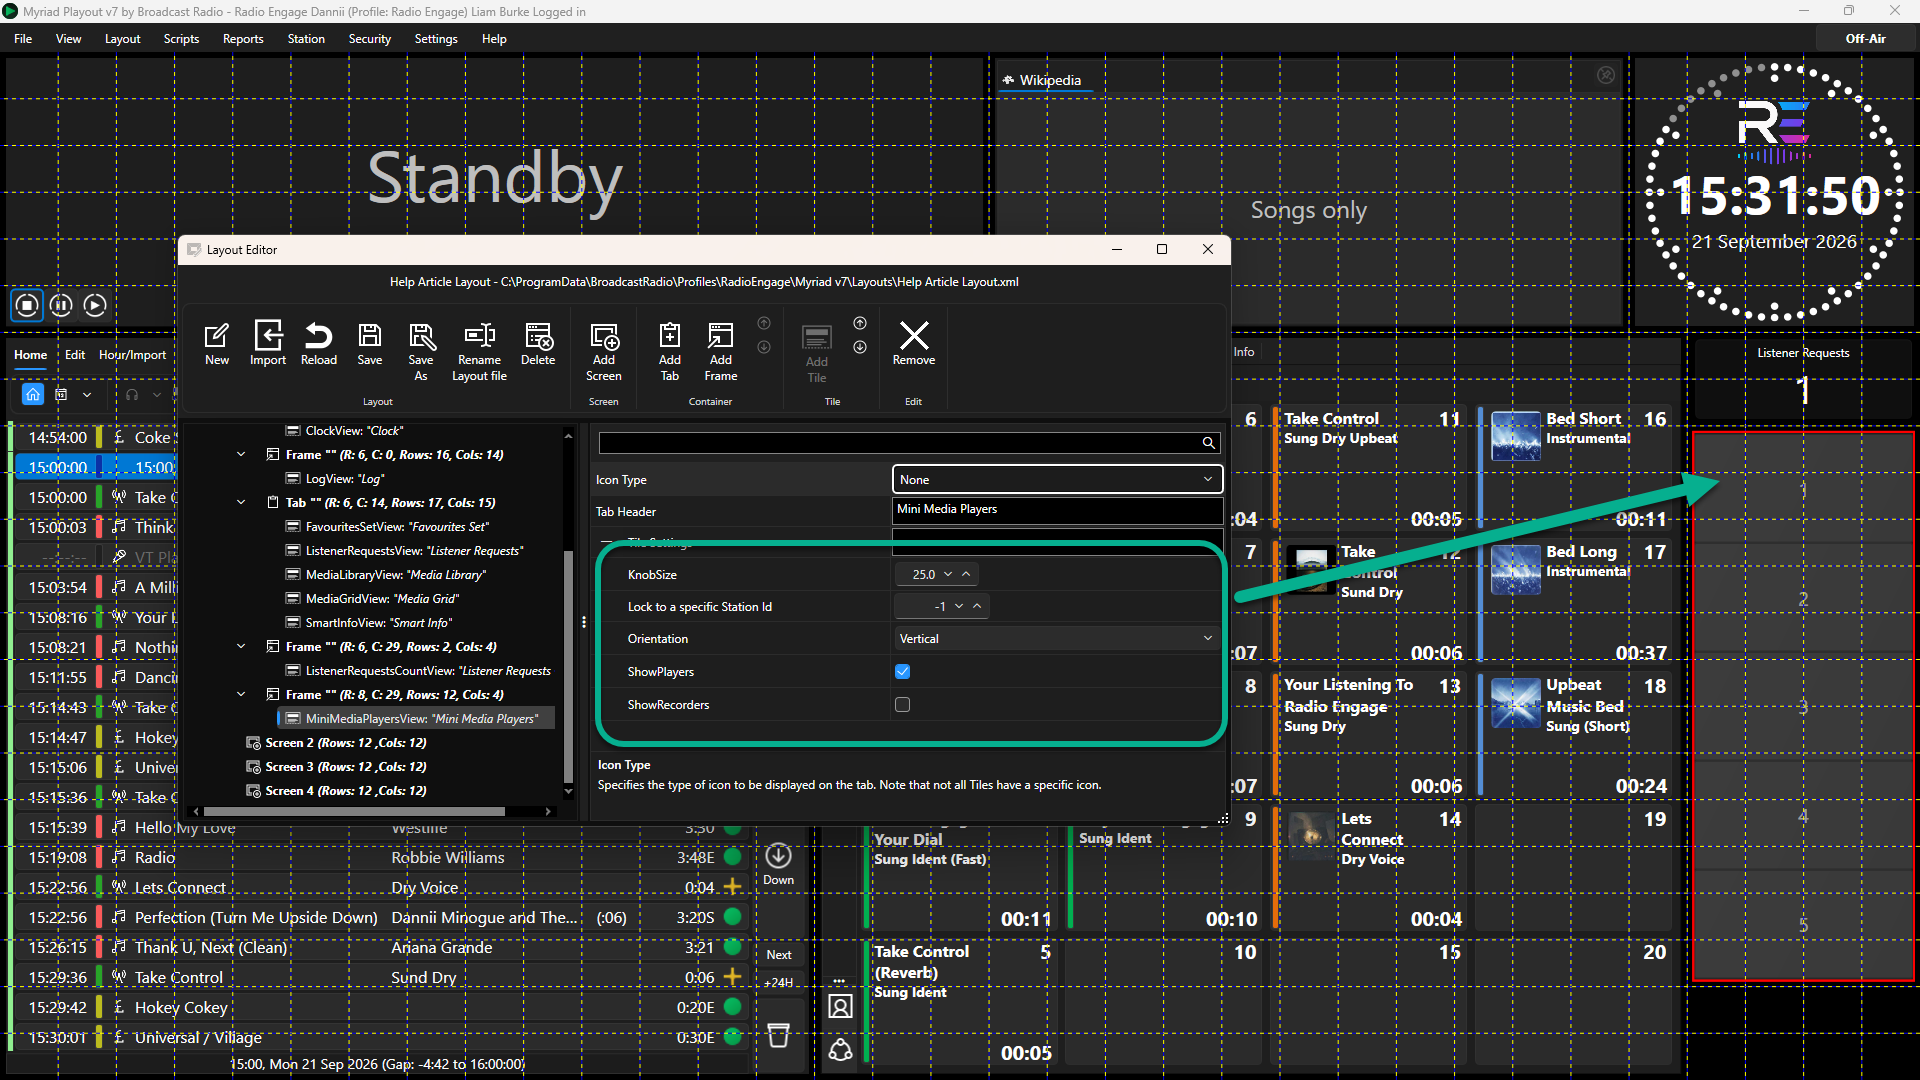
- Click on the Save button on the ribbon to save the Layout.
Adding the Recorder Tile
In our target Layout, the Recorder is actually a Mini Media Player Tile with the options set to not display Media Players and only display the recorder.
- Select the correct Screen and click on the Add Frame button to add the Frame Container.
- Select the Mini Media Players Tile option and click on OK.
- Click on the Frame Container node in the Navigation panel and use the Column, Column Span, Row and Row Span settings to set the size an position of the Mini Media Players tile on screen.
Column: 29
Column Span: 5
Row: 20
Row Span: 2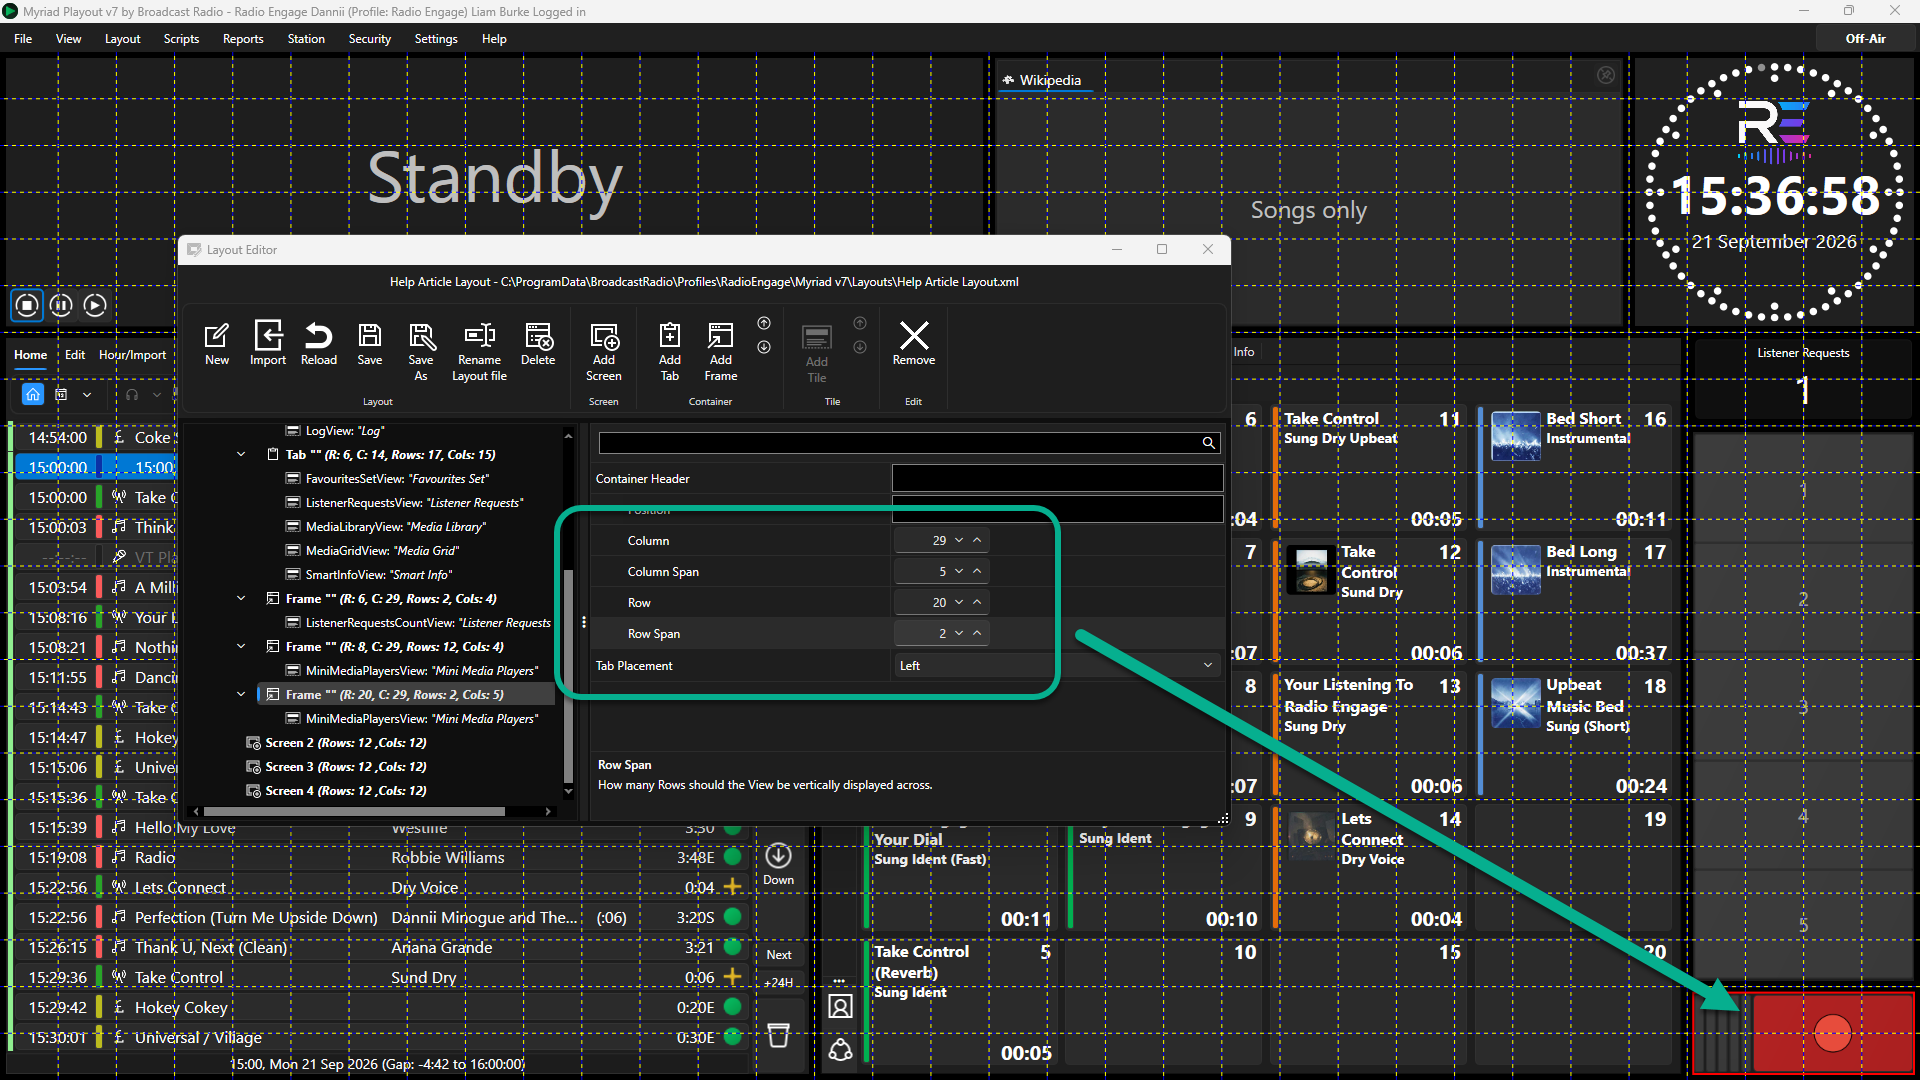
Remember, you can add a Container Header which is only displayed in the Layout Editor to help you locate the correct nodes in the Navigation panel.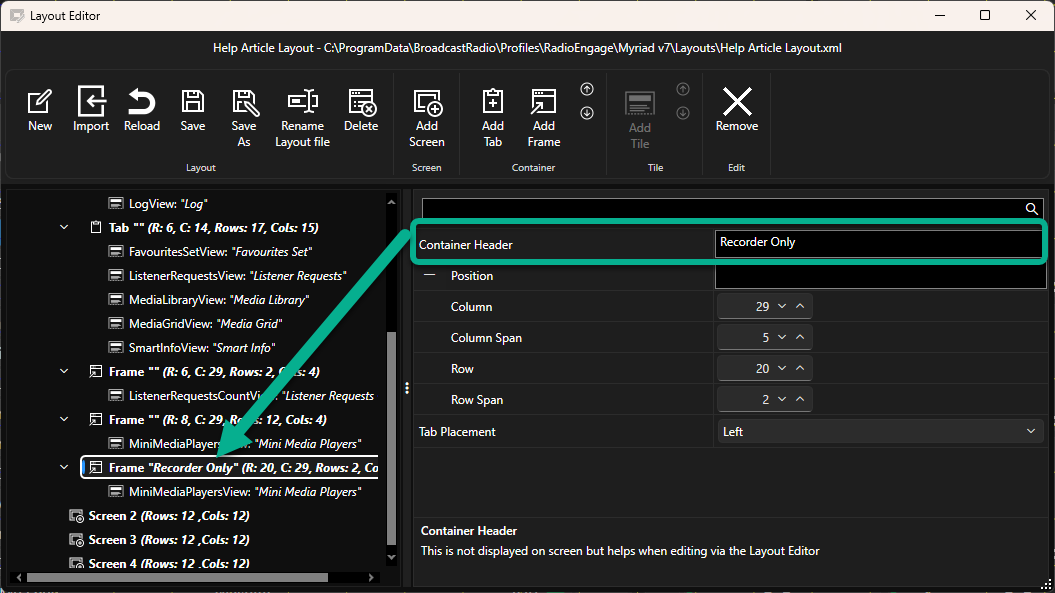
- Click on the Mini Media Player Tile node we just created (not the one we created for the Media Players in the previous section). Use the follow settings to hide the regular Mini Media Players and only display the Recorder.
KnobSize: 25
Lock to Station ID: -1
Orientation: Vertical
Show Players: Un-ticked
Show Recorder: Ticked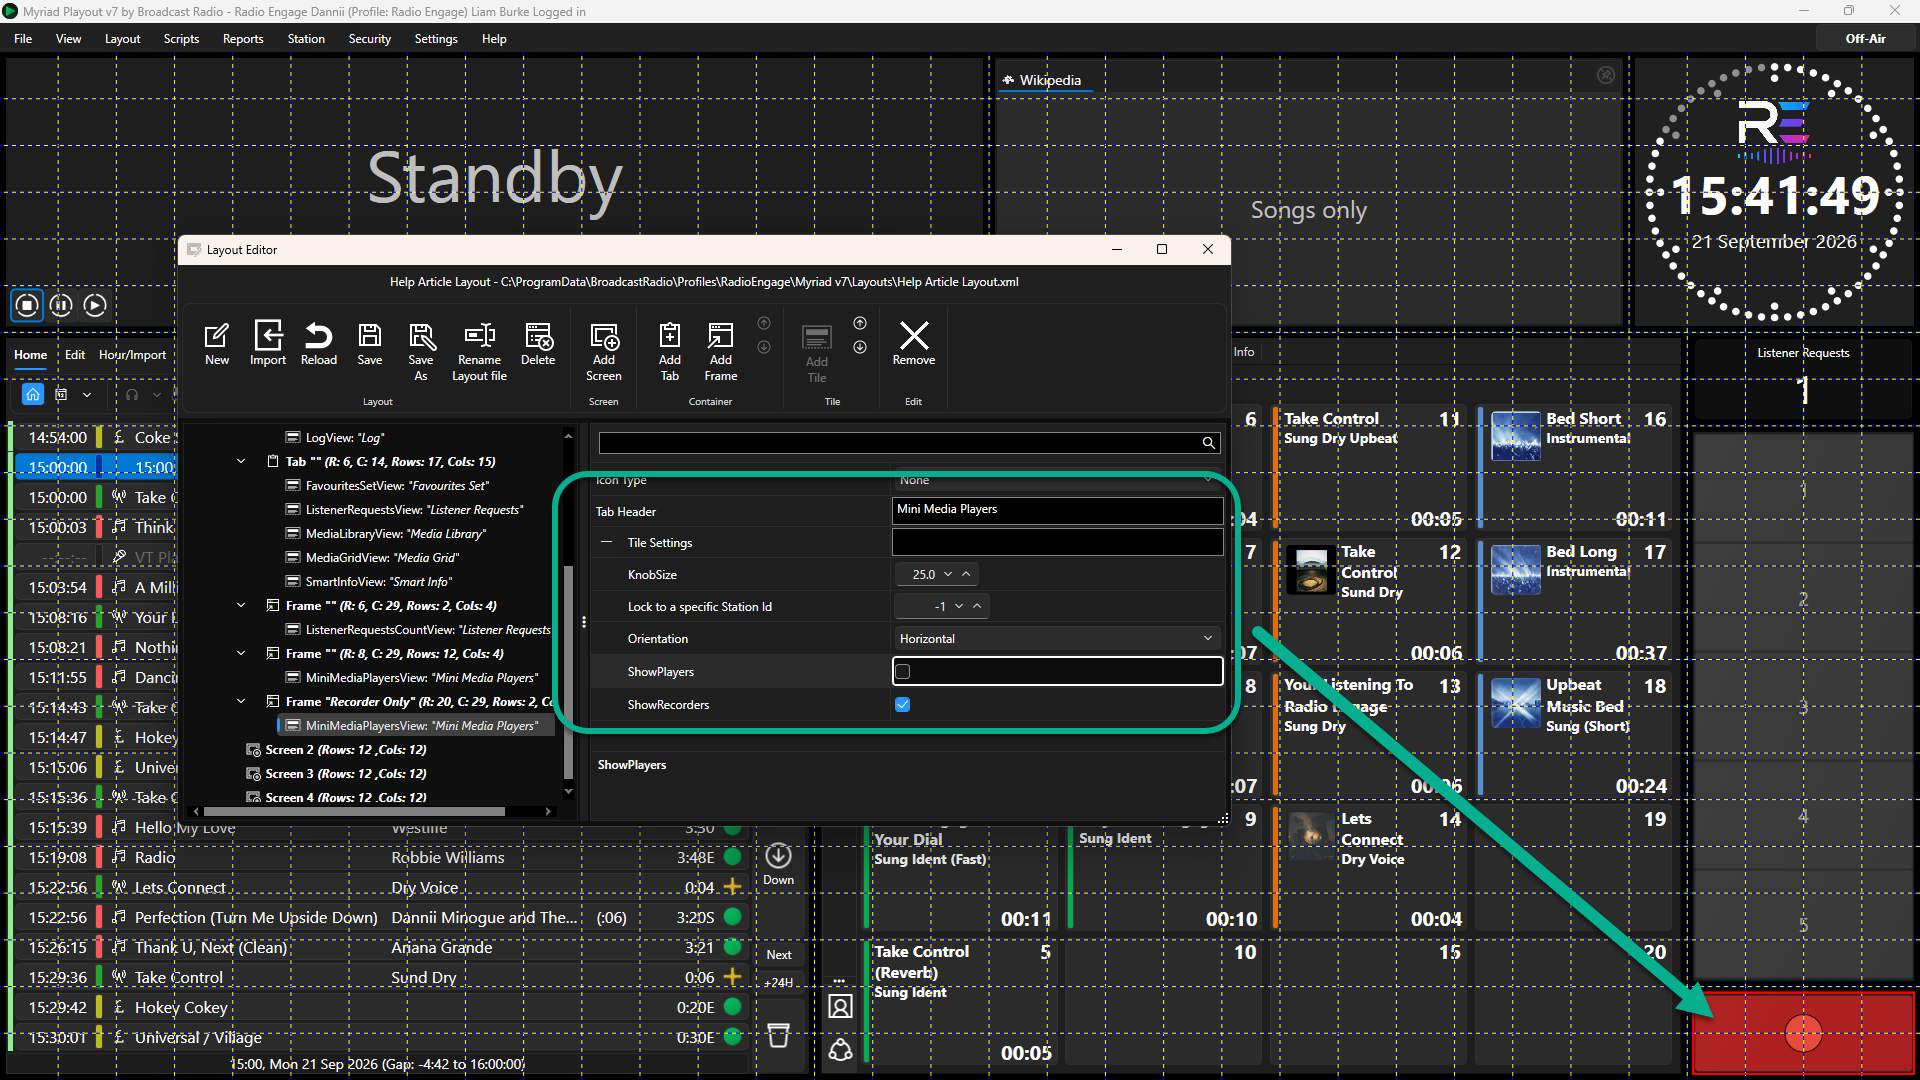
- Click on the Save button on the ribbon to save the Layout.
The Dynamic Layout is now complete. Make sure you have Saved the Layout using the Save button.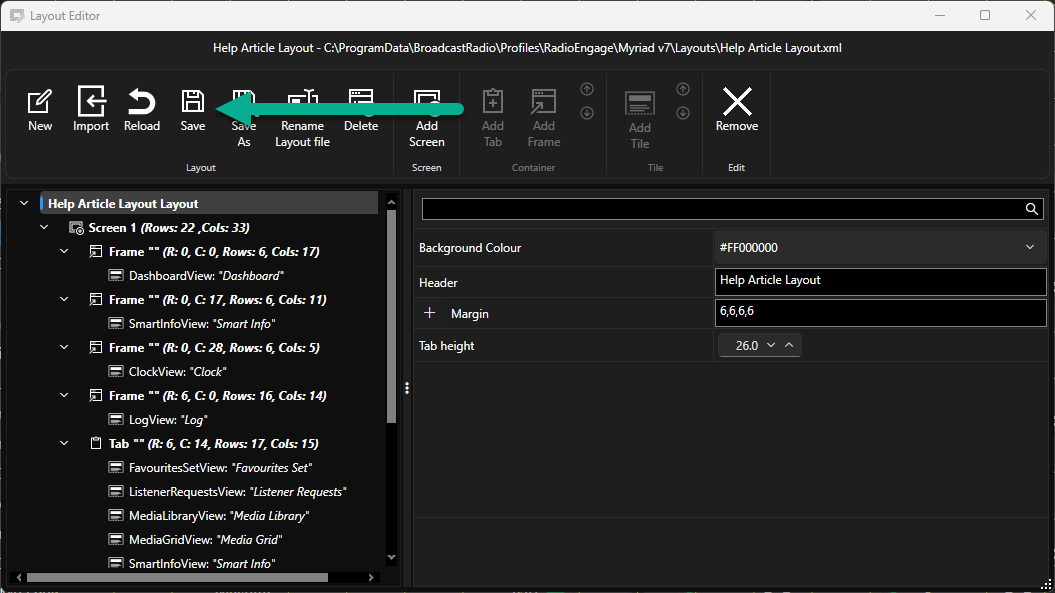
Confirm you wish to save the Layout.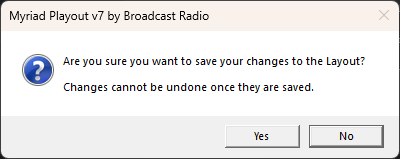
Once saved, you will recieve confirmation.
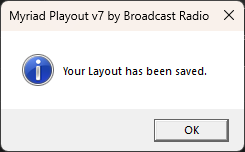
You can now Close the Layout Editor.
Your custom Layout is now ready for use.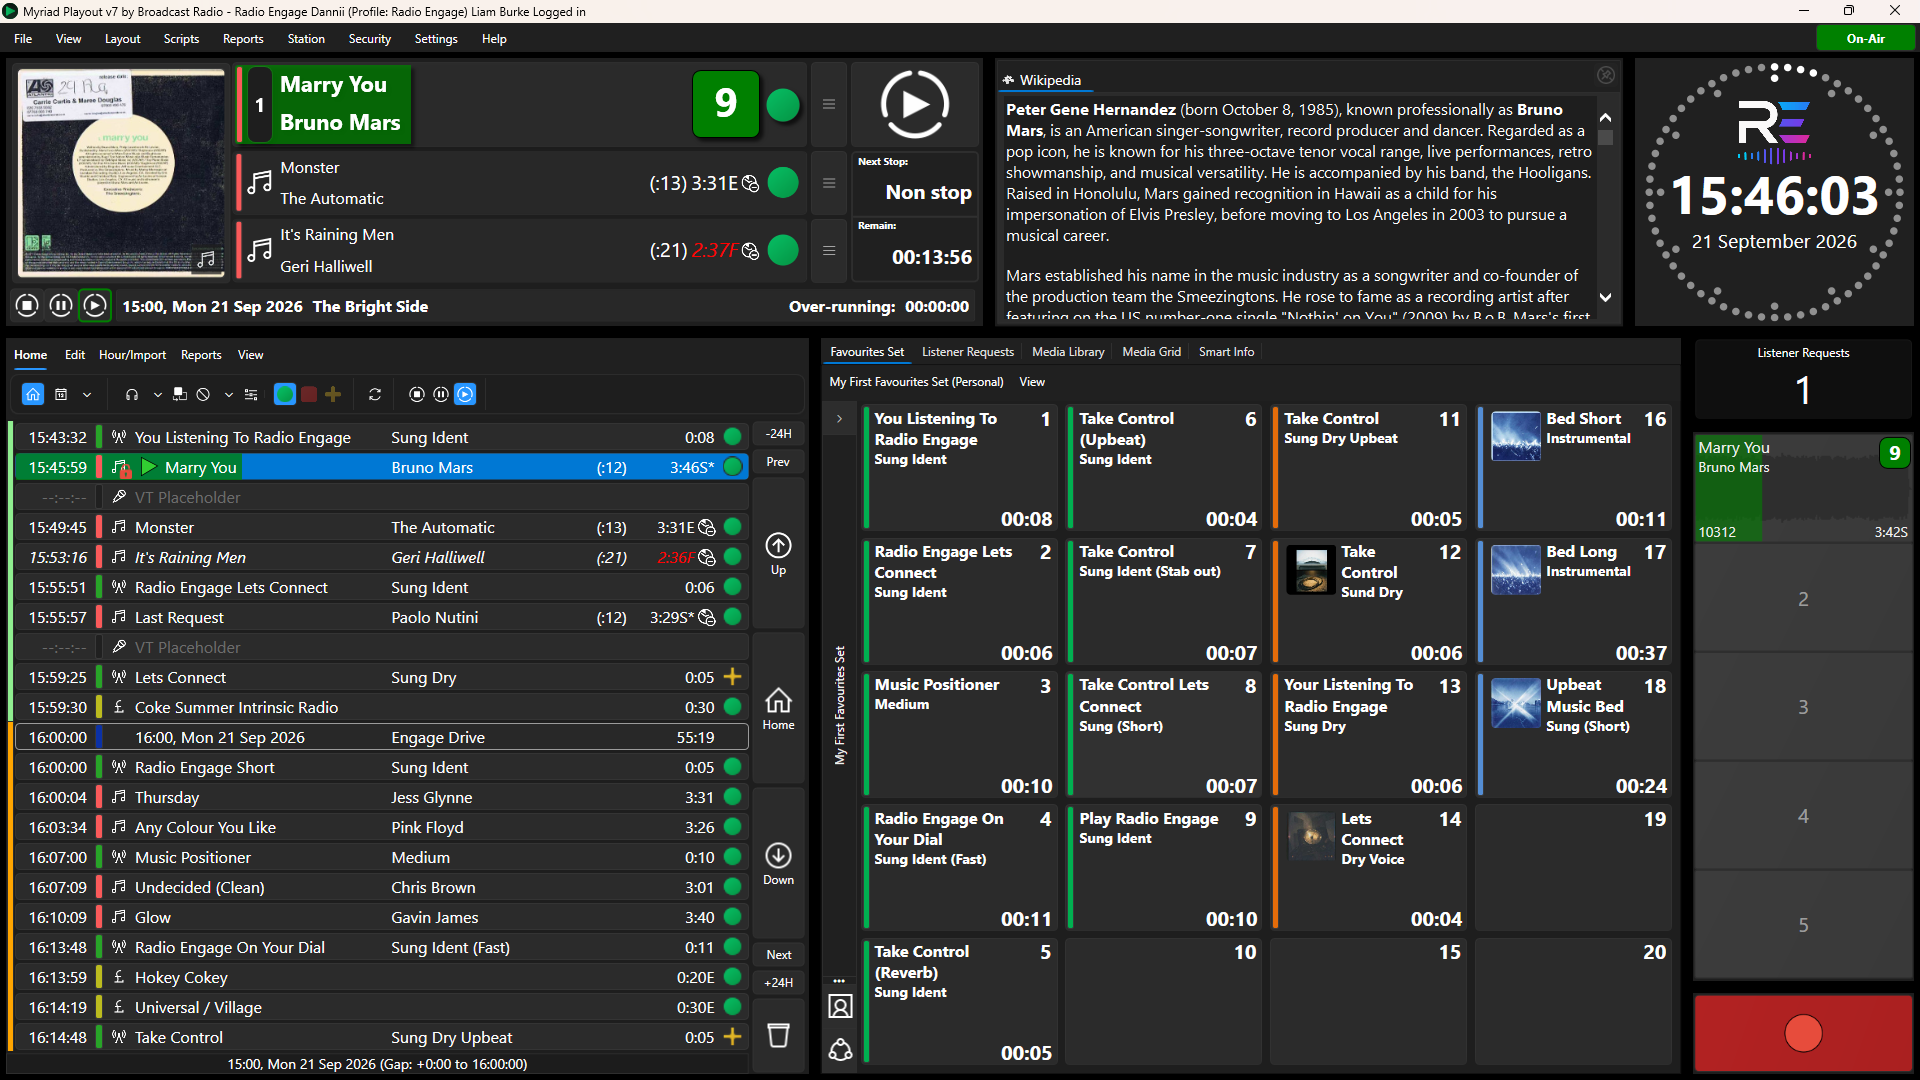
Users can switch to the Layout using the Layouts Menu.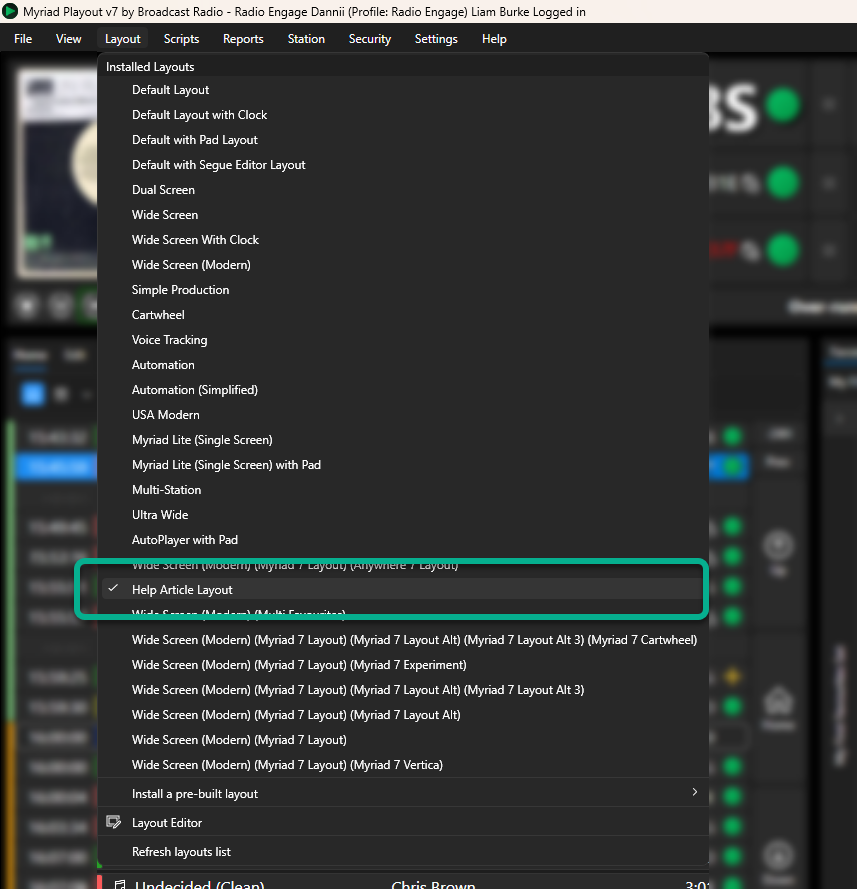
Was this article helpful?
That’s Great!
Thank you for your feedback
Sorry! We couldn't be helpful
Thank you for your feedback
Feedback sent
We appreciate your effort and will try to fix the article