TABLE OF CONTENTS
Introduction
You can add Voice Tracks to the Log using the Segue Editor tool (see Editing Segues). Voice Tracks can be added using specific VT Place Holders that can be included in the Clocks (new to Myriad 7) or on an ad-hoc basis if you do not want to specify the VT position in the Log.
The VT process is the virtually the same for each method but there are some minor differences in the interface between the two methods because VT Place Holders include enhanced elements such as presenter notes, jump to next VT etc.
Add VT Using VT Place Holders
To add Voice Tracks to a Log using VT Place Holders, follow these steps:
- Us the Goto button on the Log Home ribbon and select the date and hour you want to add Voice Tracsk to.
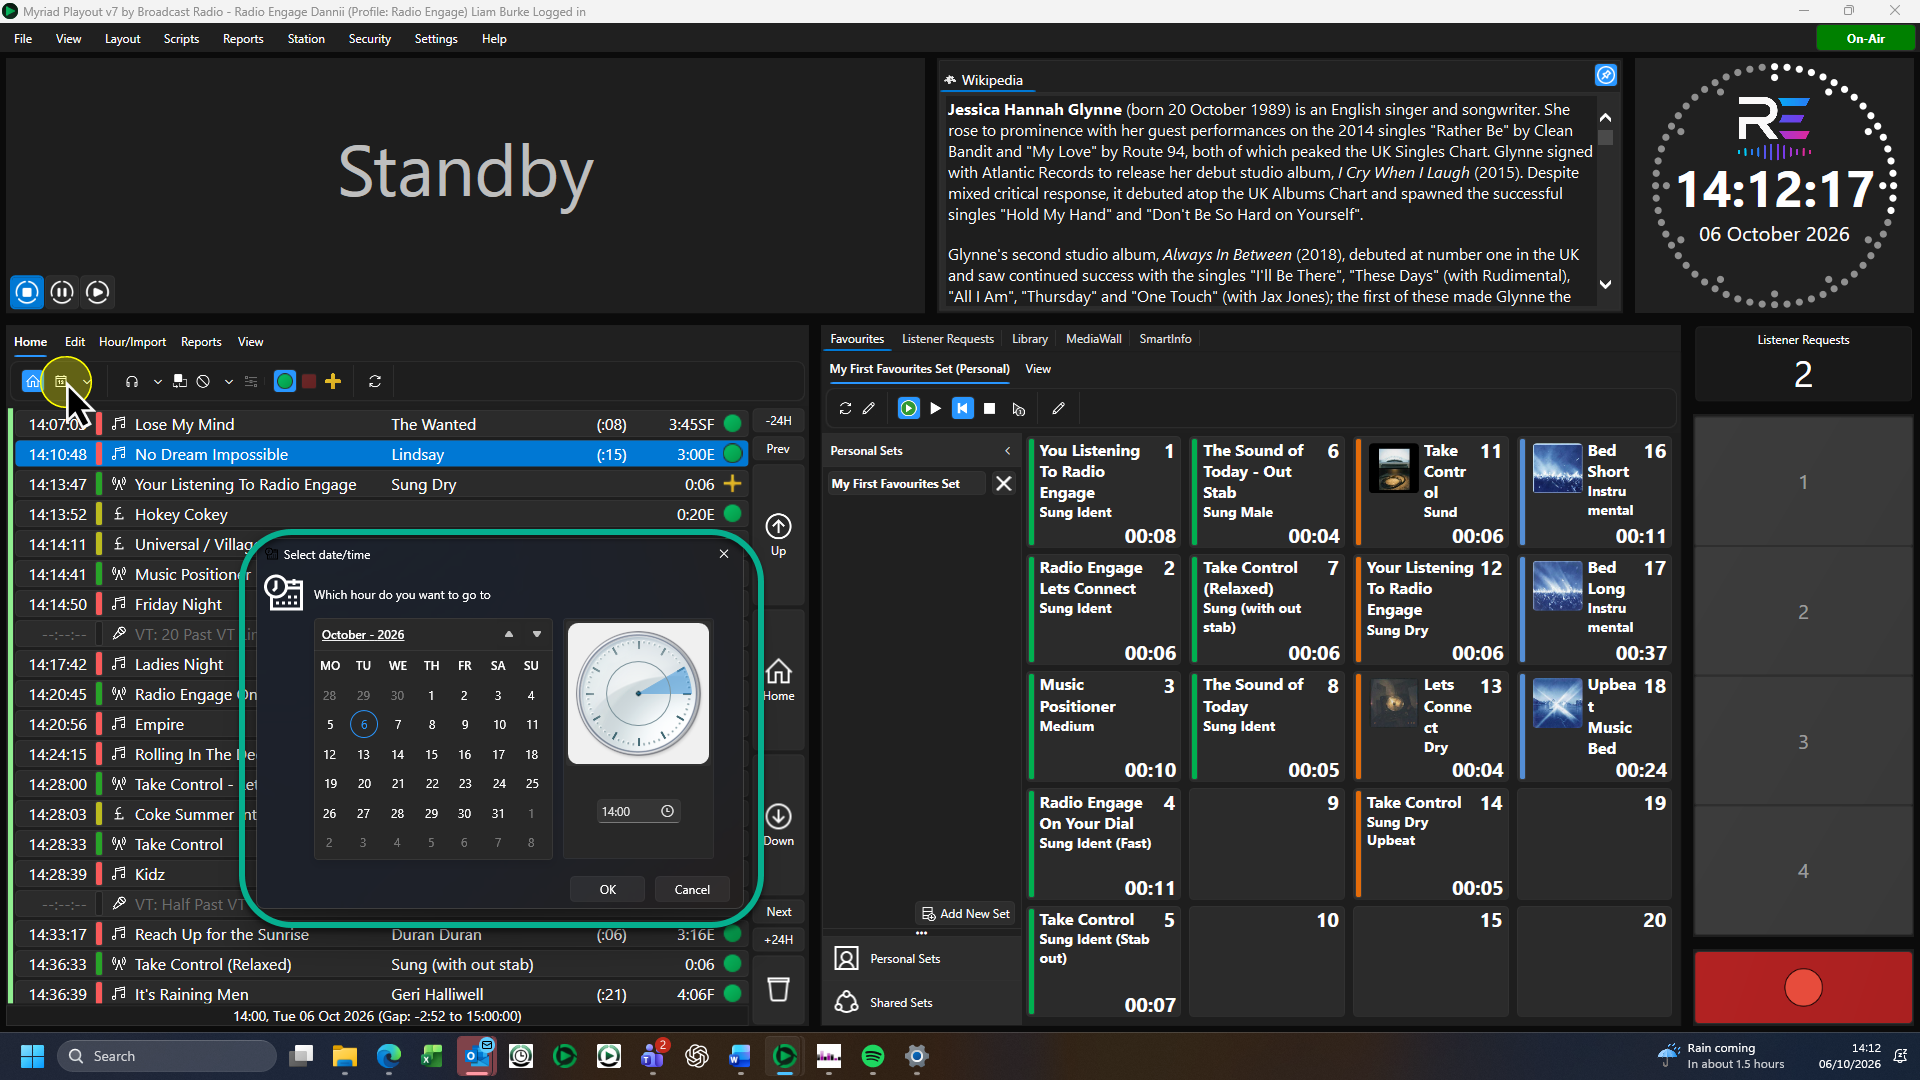
- Select the first VT Place Holder in the Log.
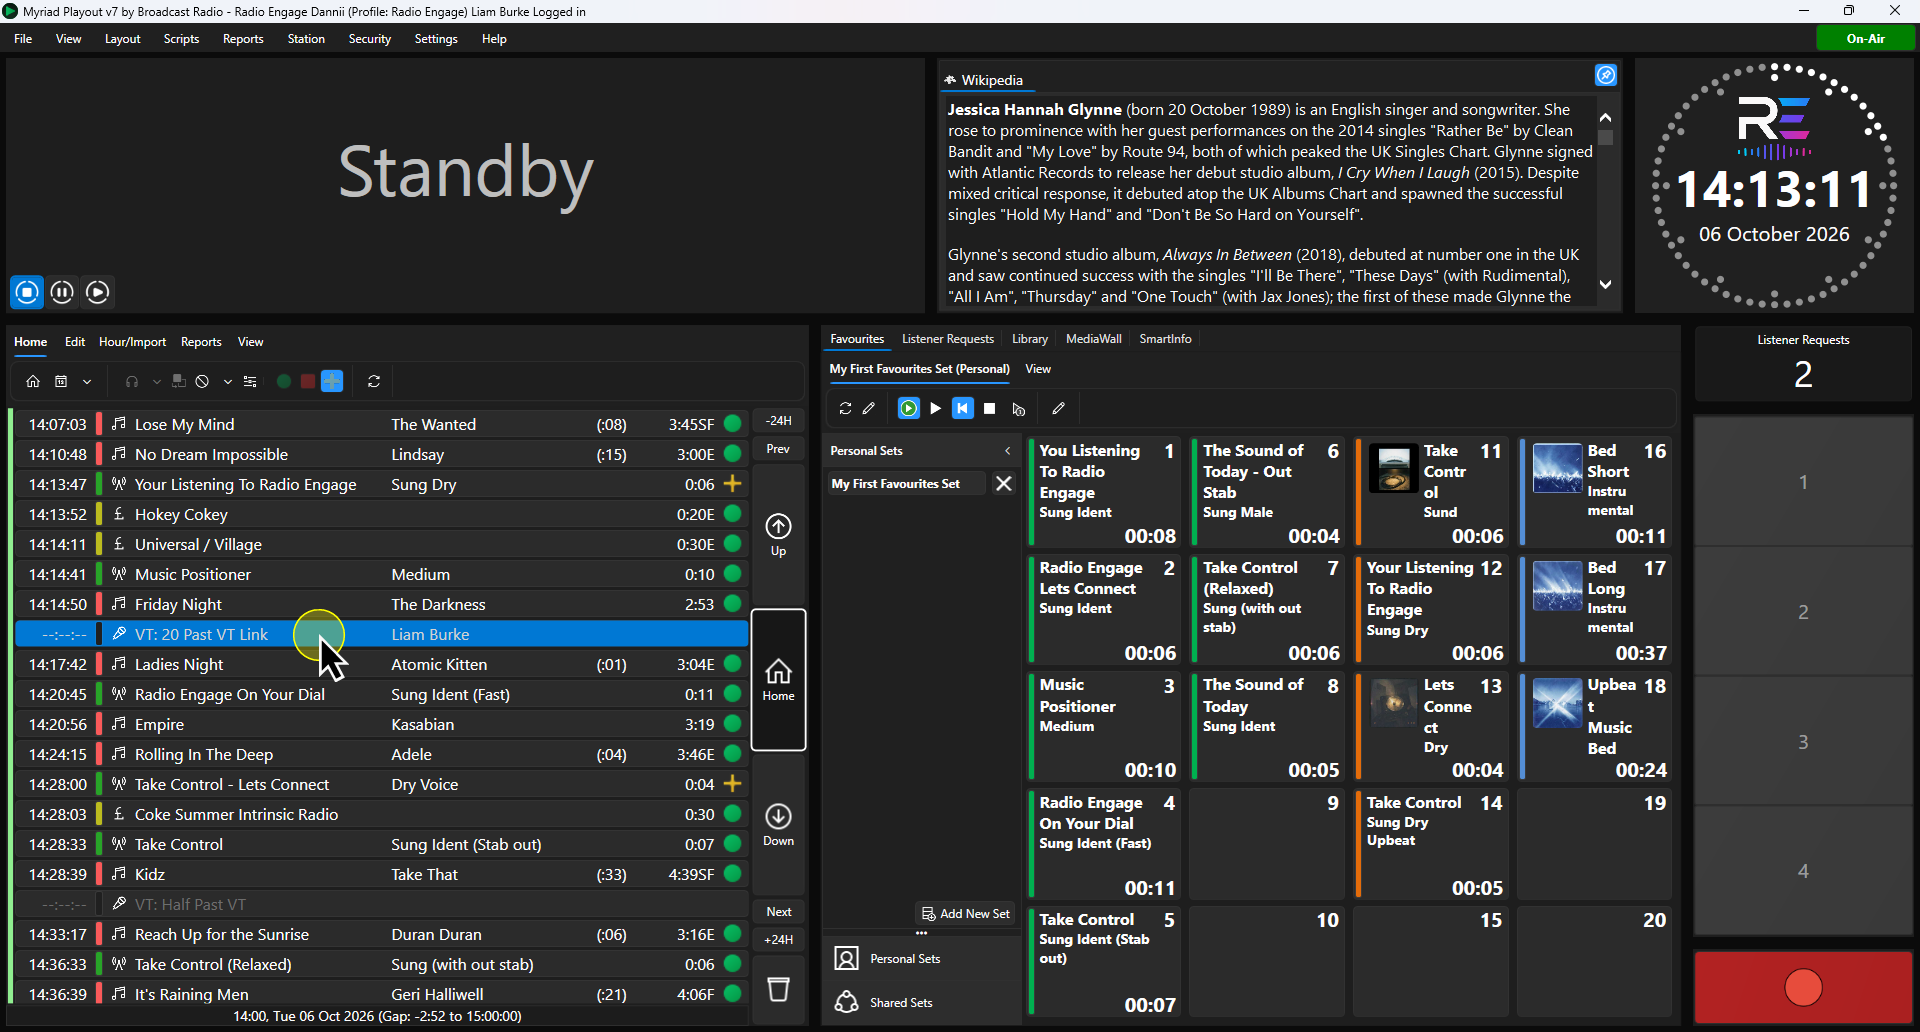
- Click on the Segue Editor button on the Home Tab of the ribbon, or double click on the VT Placeholder.
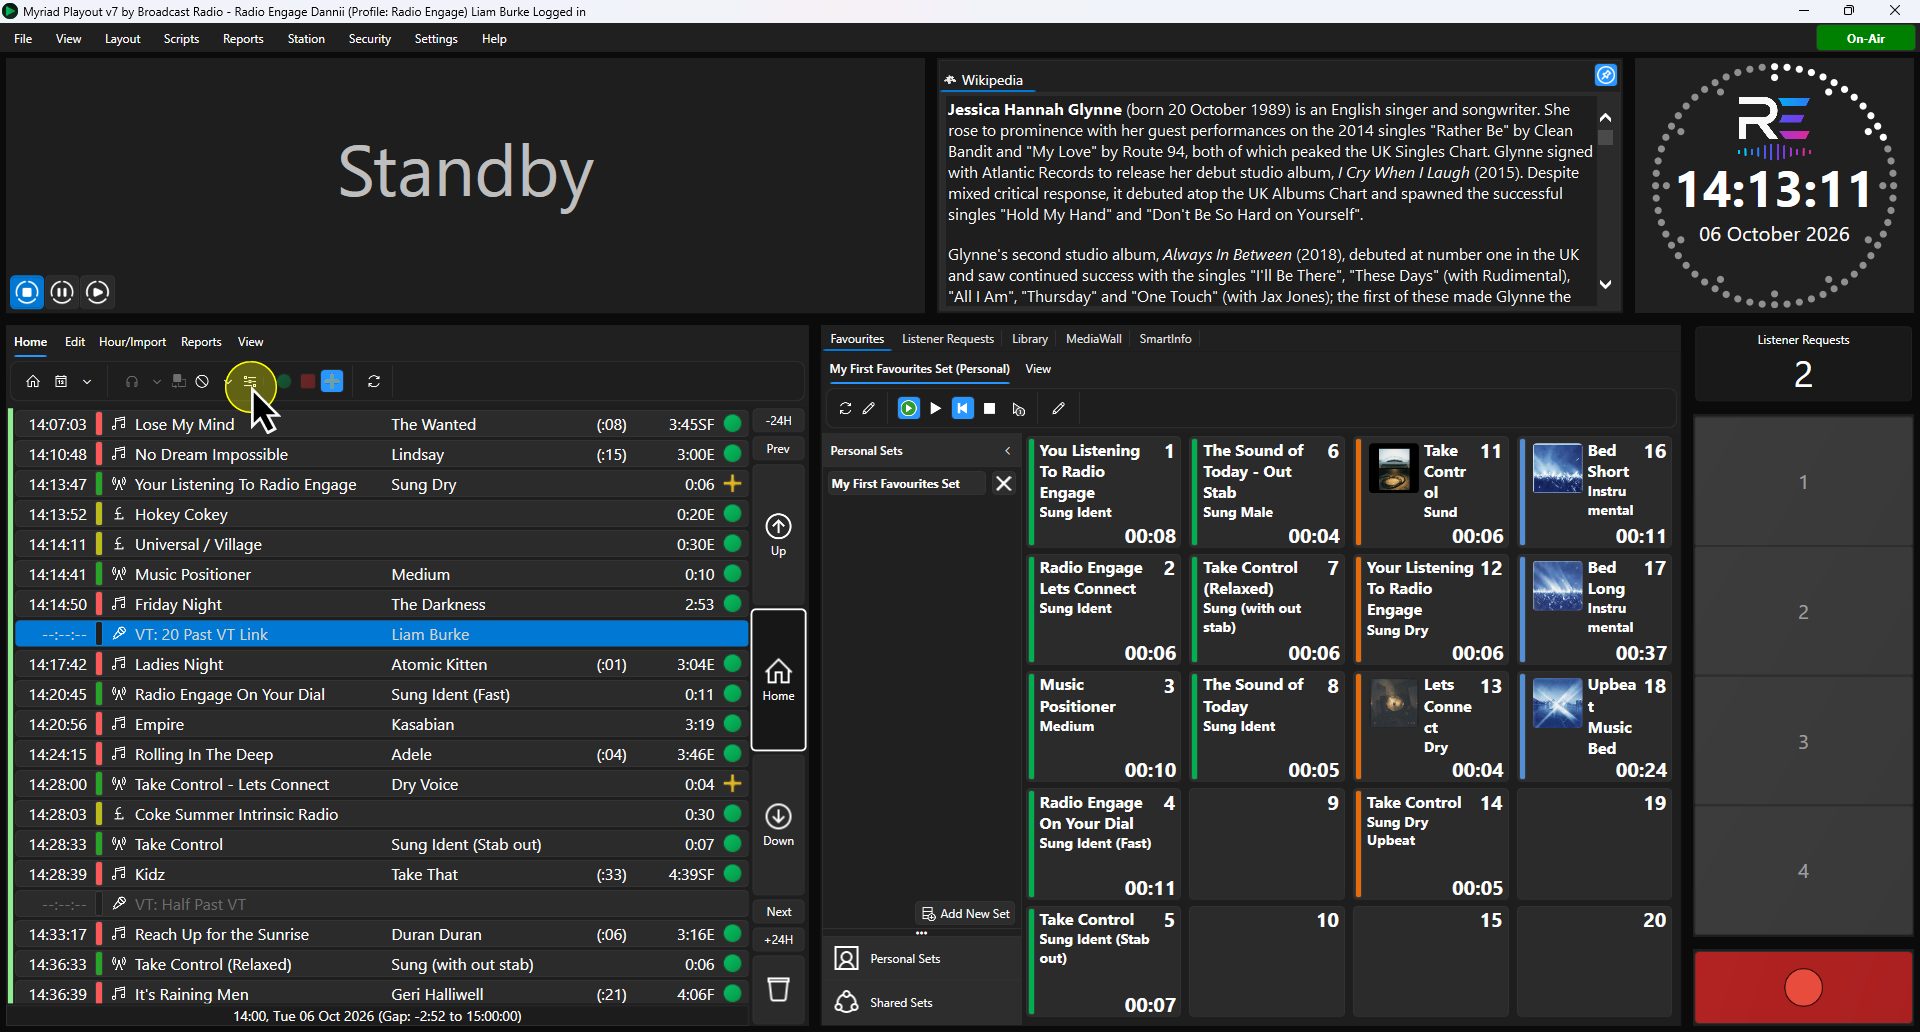
- This will open the enhanced Segue Edit window.
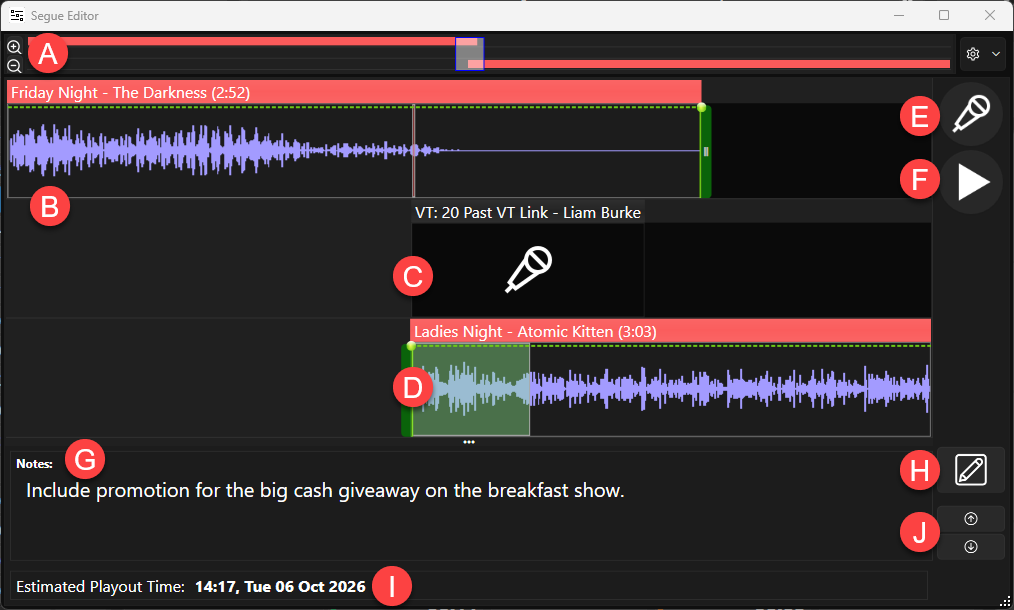
- Time Line - Use this to move the view across the segue. You can also use the +/- buttons to zoom the view in or out.
- Media In Track - Shows the tail end of the Media Item playing just before the Voice Track.
- VT Place Holder Track - The VT will be recorded onto this track.
- Media Out Track - This shows the beginning of the Media Item that will be playing by the end of the VT.
- Start / Step Button or <spacebar> - This button is used to step through the VT process.
Typically the process will be:
Start VT (end of Media In Track will start playing automatically) > Start Record (can be triggered by button press or audio level) > Start Media Out (start of Media Out will play) > Stop Recording > Save VT.
The function of the Start / Step button changes to match each of steps in the sequence.
You can also use the <spacebar> on your keyboard to advance through each step of the VT sequence. - Preview Button - Allows you to review a segue or a Voice Track.
- Notes - Notes can be added to the VT Place Holder in the Clock or bu editing a VT Place Holder in the Log.
- Edit Notes Button - Click to add or edit notes in a VT Place Holder.
- Jump To Previous / Next Buttons - These buttons allow you to quickly jump to the next VT Place Holder or the previous VT Place Holder in the Log.
- Estimated Play Time - Displays the estimated date and time this VT will be played.
- Click on the Start / Step button to begin the Voice Tracking sequence.
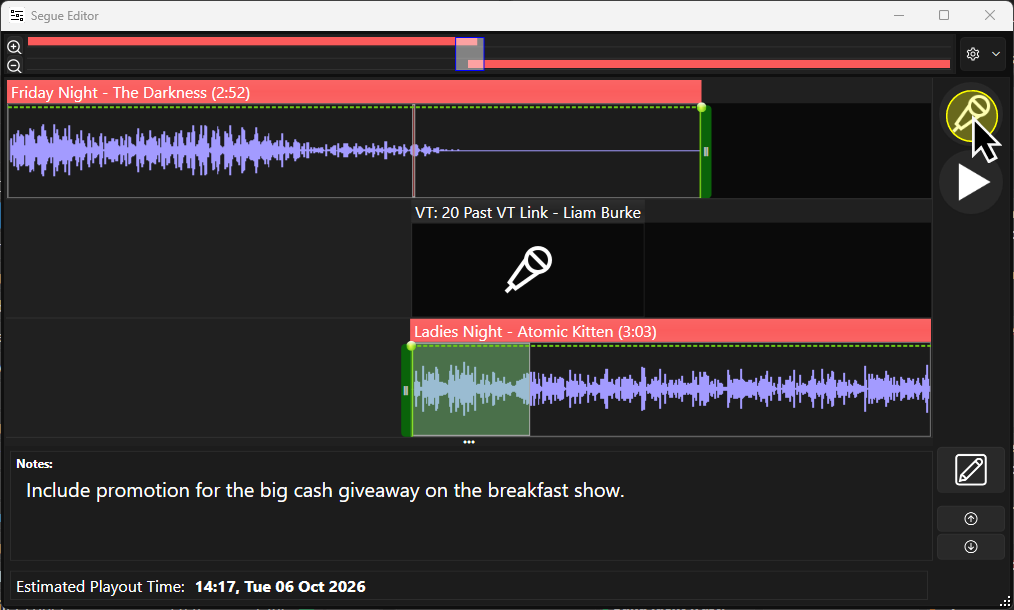
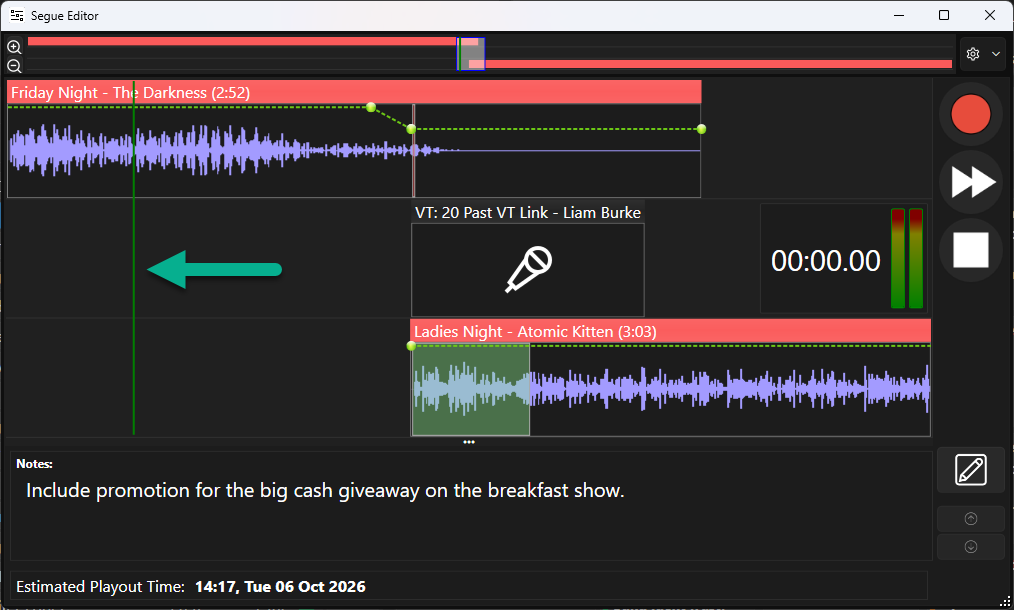
- The last few seconds of the Media Item in the Media In Track will play. The play position is indicated by a green line moving from left to right.
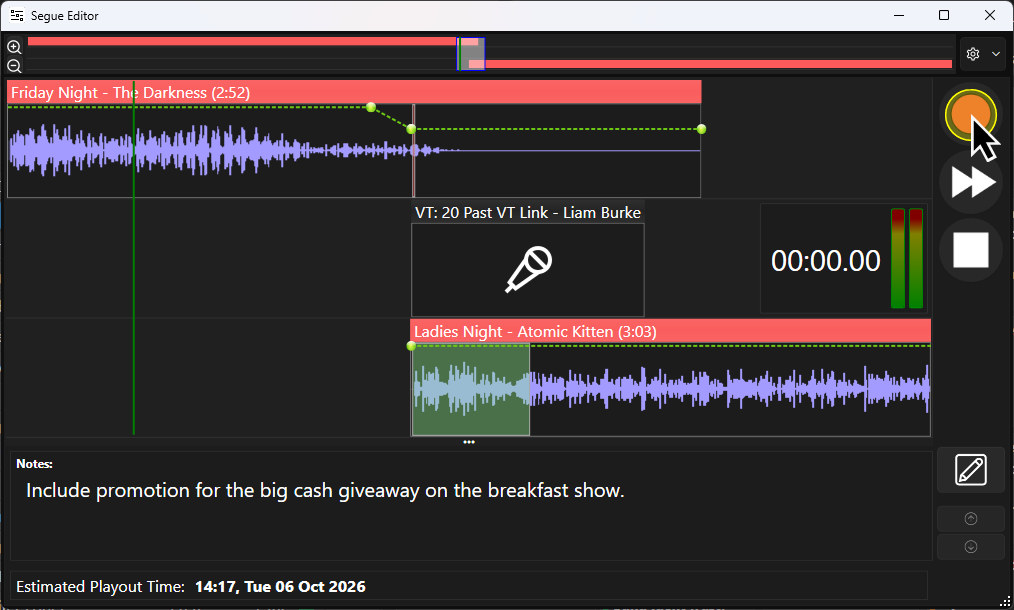
- To start recording your VT, either click on the Start / Step button (or <spacebar>) - which is showing the record button, or you can speak into your microphone if you have audio level triggering configured (which it is by default).
- The recorded audio will be displayed in real time in the VT Place Holder Track.
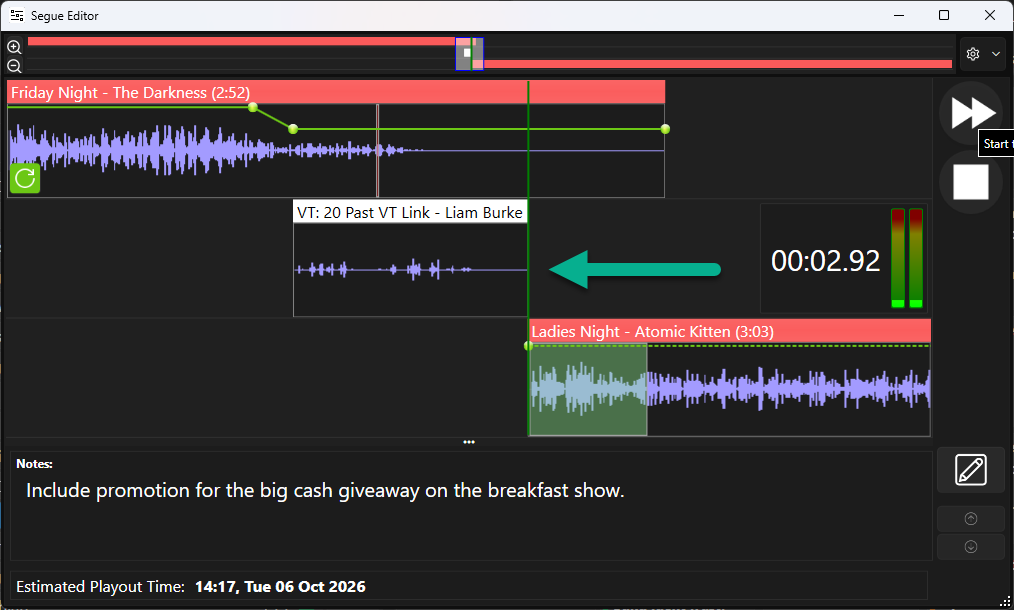
- To start the Media Item in the Media Out Track, click on the Start / Step button (or <spacebar>) - the icon has changed to >>.
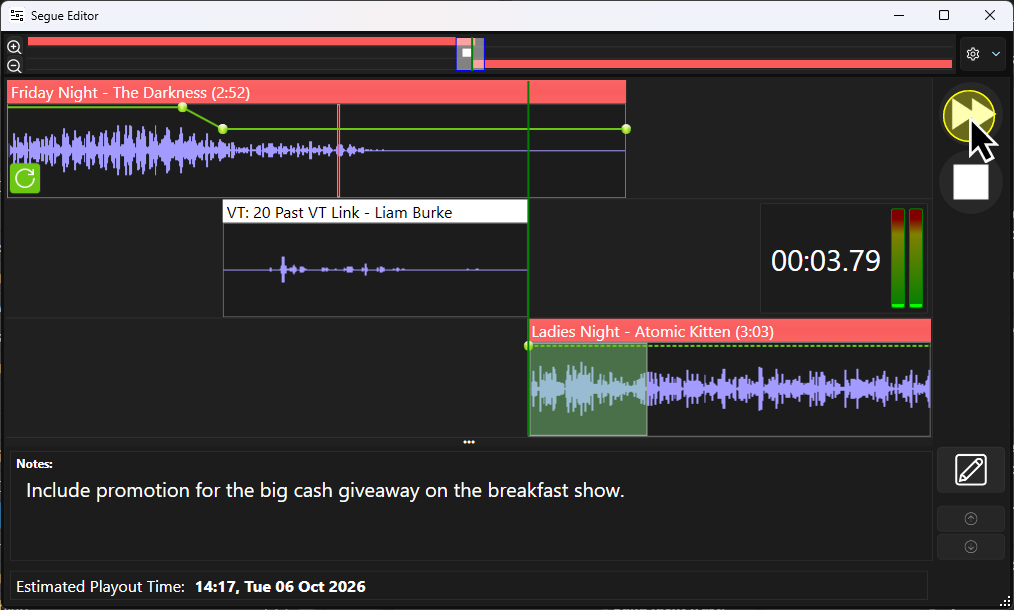
- The Media Item in the Media Out Track will start playing with the volume dipped to the preset level (Settings Menu > General > Media Playback Options).
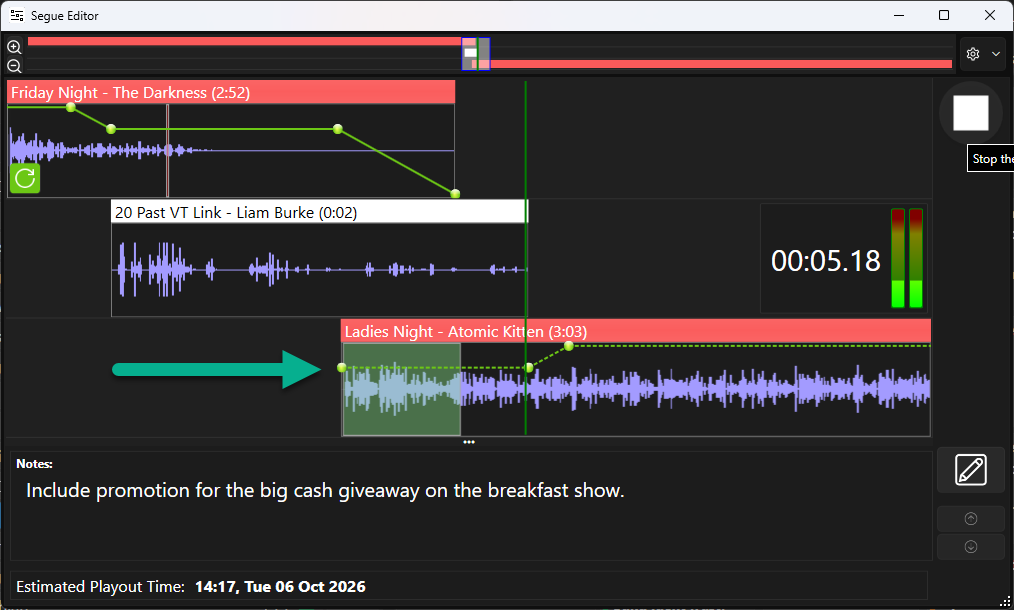
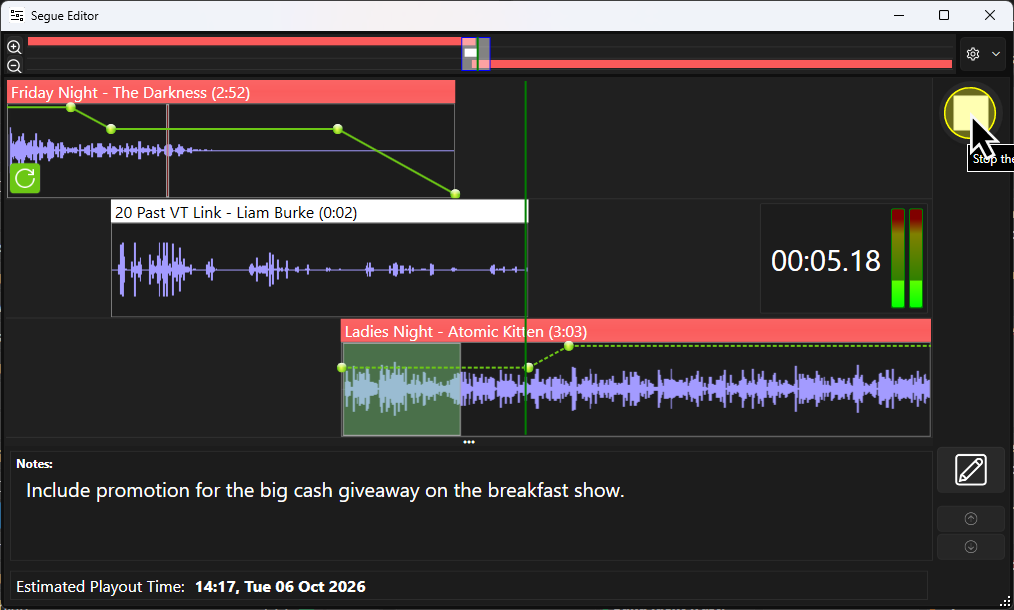
- To stop recording and complete the VT, click on the Start / Step button (or <spacebar>) - which now displays a 'stop' icon.
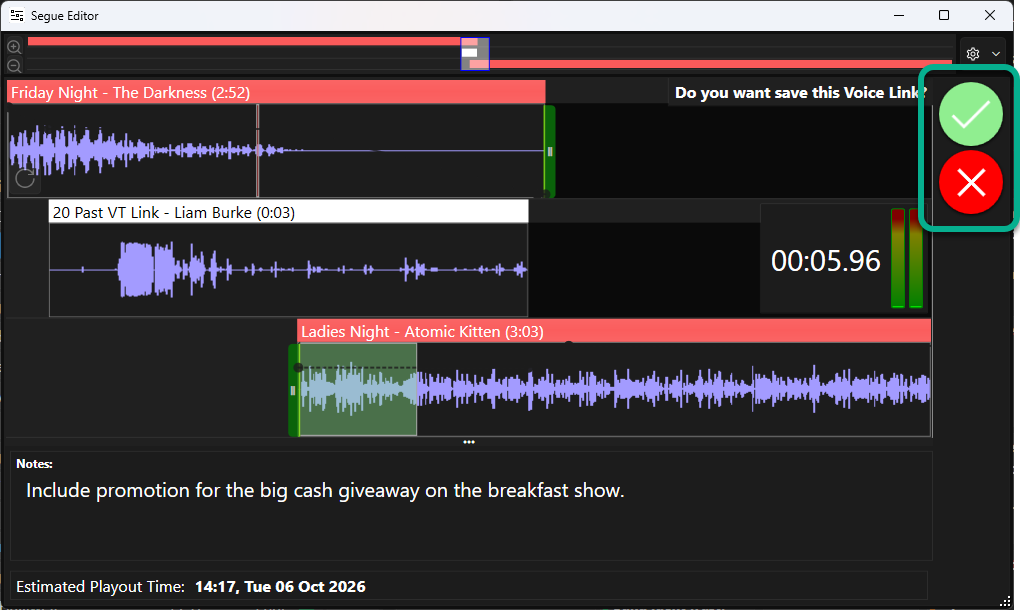
- You can now choose to Save or Abandon the VT. To save click on the Green Tick button to save or the red cross button to abandon.
- The default normalisation for Voice Tracks will be applied to your recorded VT and the final positioning and volume envelope for all elements will be displayed. To review your VT, click on the Preview button.
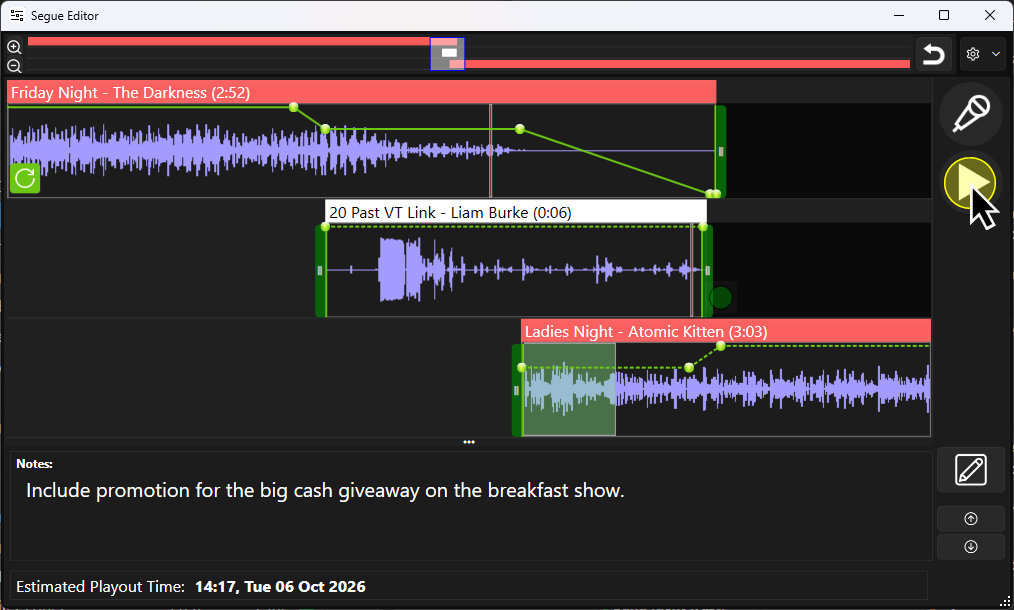
- You can adjust the positioning of the audio in the VT Playholder Track or Media Out Track by dragging either left or right. You will see the automatically ducked envelope volume on the Media Out Track will adjust accordingly as long as you have not manually edited it (if it is a dotted line, it has not been edited).
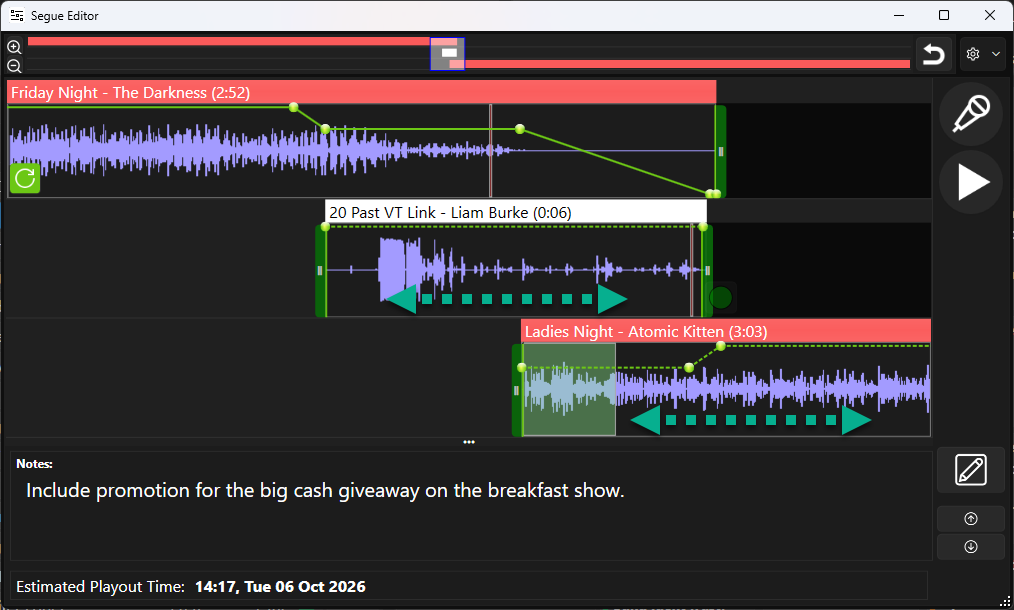
- You can manually adjust the Volume Envelope on any of the Tracks to suit your needs. Click on the envelope line to add additional points that can be dragged up or down.
Please note that once you manually edit the envelope line it becomes a solid (fixed) line and will not be automatically adjusted by Myriad.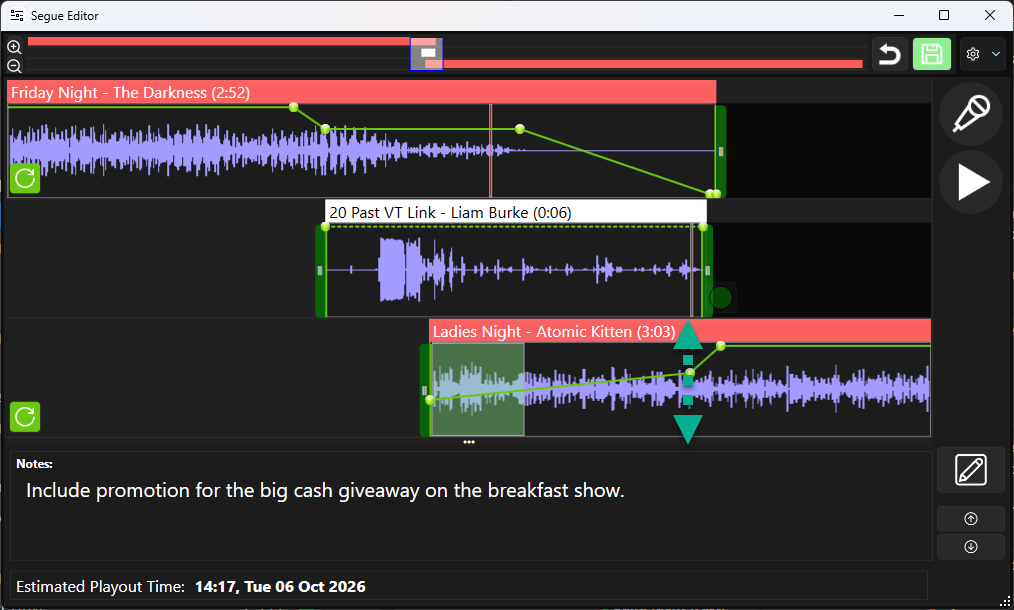
You can reset the adjusted volume envelope on any track you have altered, by clicking on the Reset Volume Envelope button.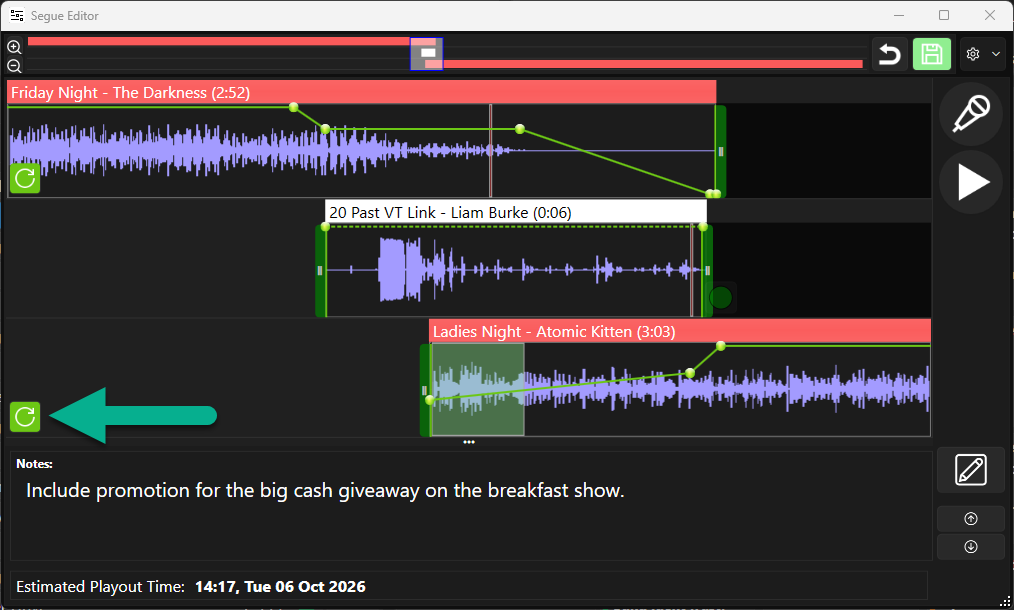
- You can use the Start / End Segue Trim marker to set the start or end point for Media Items in any of the three tracks. In the example below, we have adjusted the Start Trim Marker on the VT Placeholder Track to remove some silence from the beginning of the recorded VT.
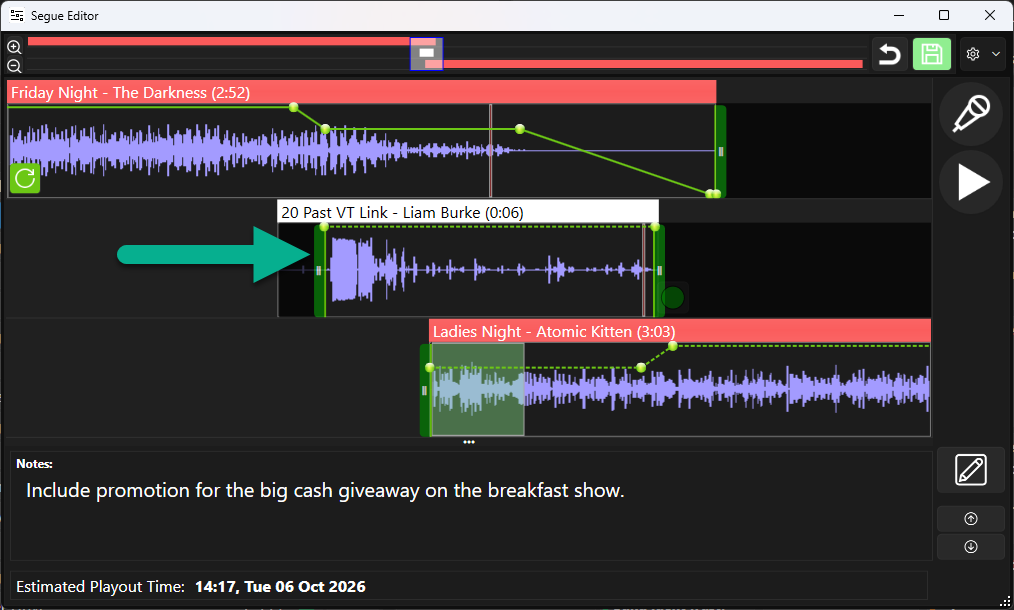
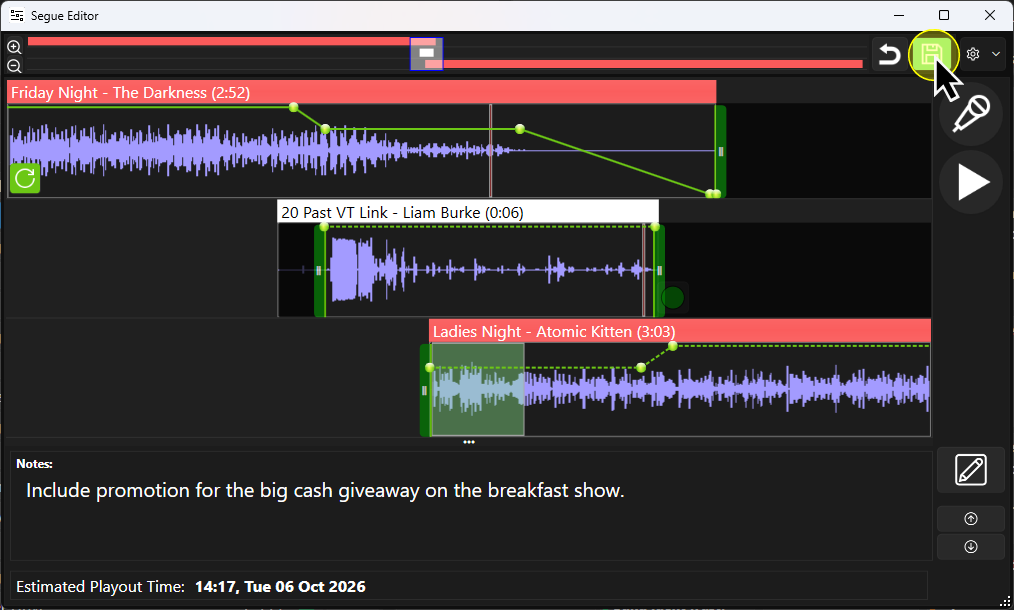
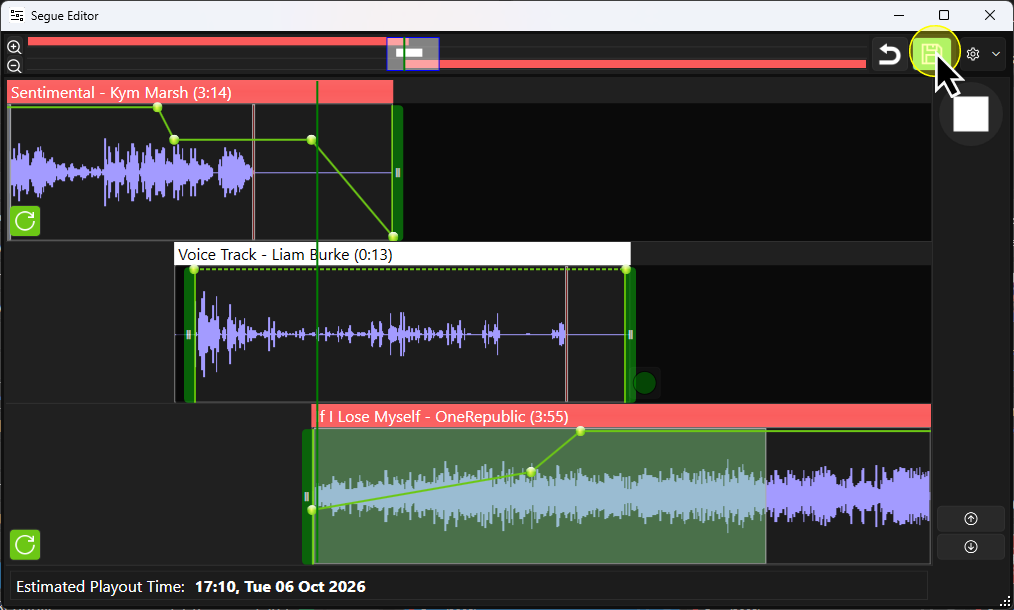
You can combine this with moving audio to the left or right within a track to ensure everything still lines up correctly! - When you have finished editing the Voice Track, click on the Save button.
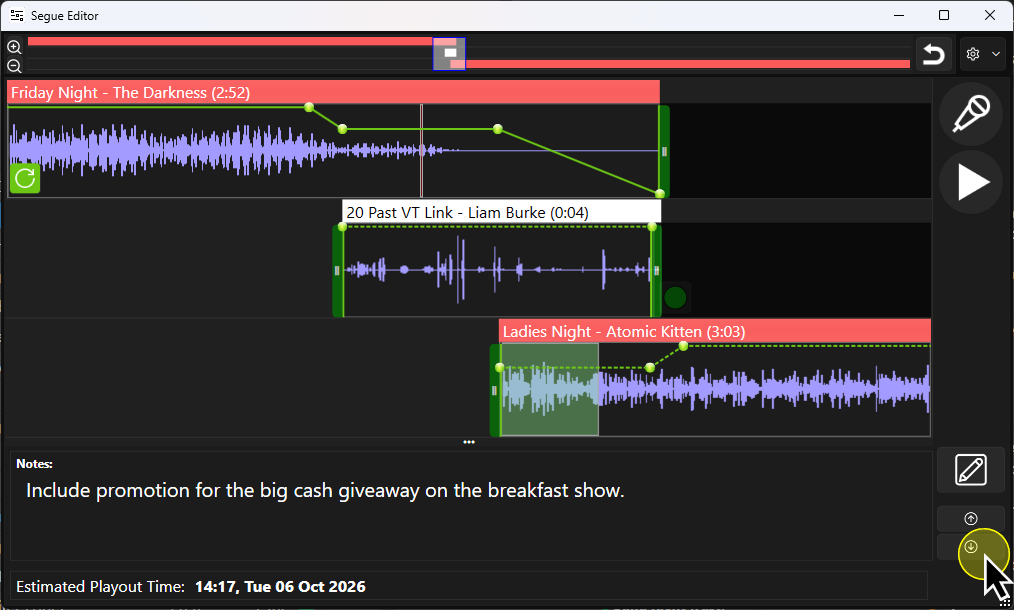
- To jump to the next VT Placeholder in the Log, click on the Jump to Next VT button.
Adding Ad-hoc VT's To The Log
To add ad-hoc Voice Tracks to a Log, follow these steps:
- Us the Goto button on the Log Home ribbon and select the date and hour you want to add Voice Tracsk to.
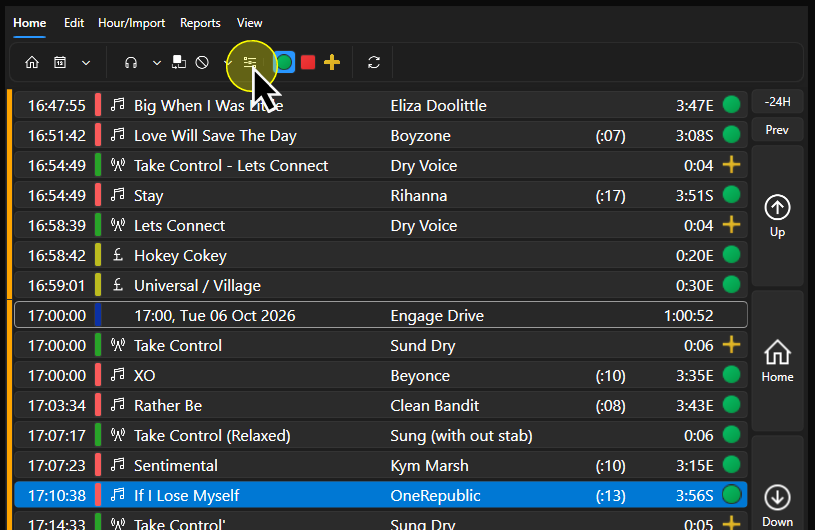
- Select the Song you want to be playing at the end of you VT.
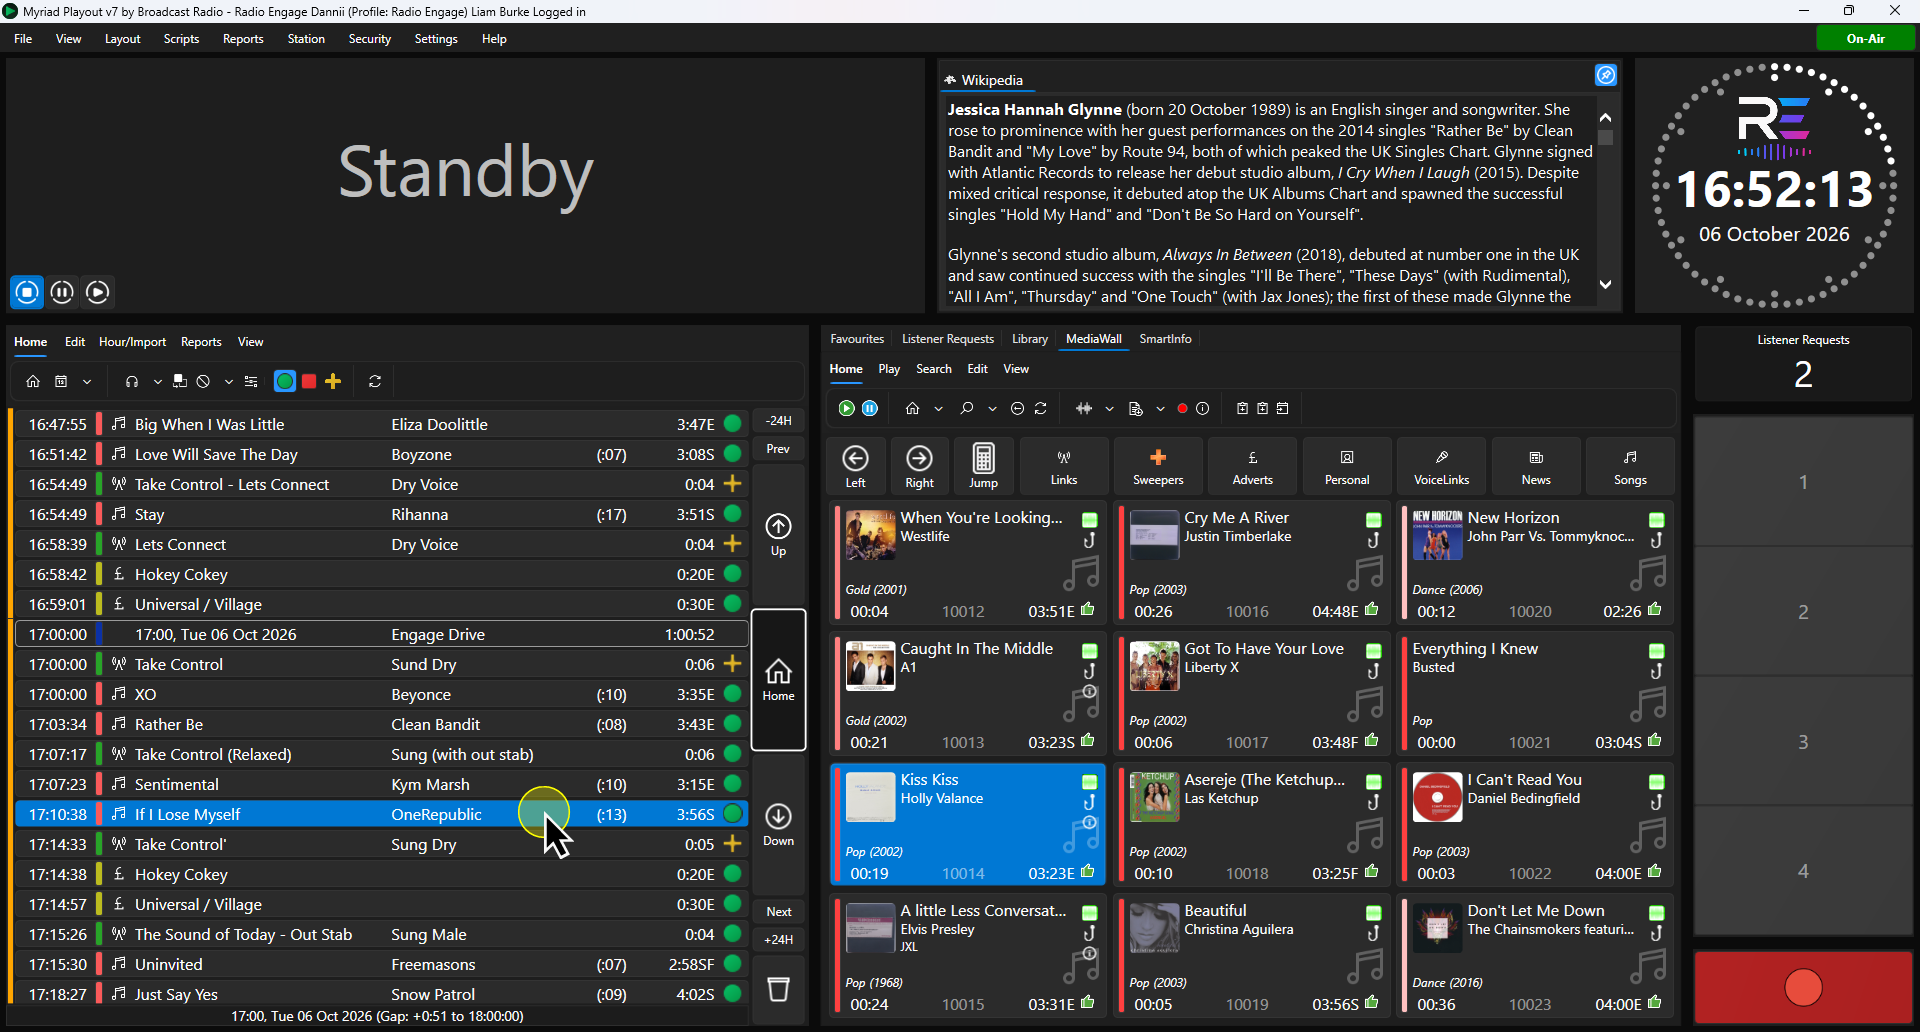
- Click on the Segue Editor button on the Home Tab of the ribbon, or double click on the Song.
- This will open the standard Segue Edit window.
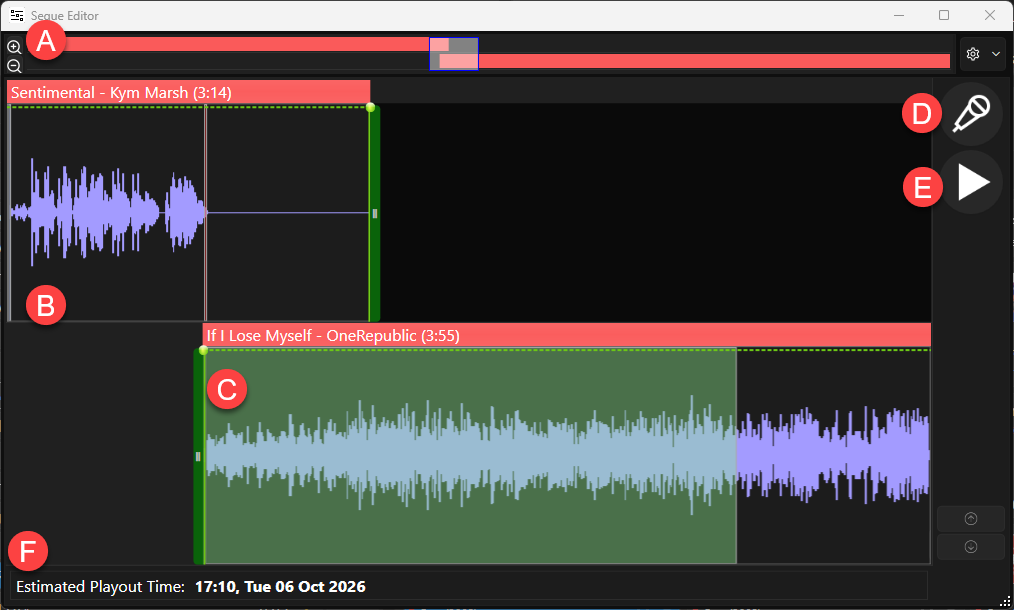
- Time Line - Use this to move the view across the segue. You can also use the +/- buttons to zoom the view in or out.
- Media In Track - Shows the tail end of the Media Item playing just before the Voice Track.
- Media Out Track - This shows the beginning of the Media Item that will be playing by the end of the VT.
- Start / Step Button or <spacebar> - This button is used to step through the VT process.
Typically the process will be:
Start VT (end of Media In Track will start playing automatically) > Start Record (can be triggered by button press or audio level) > Start Media Out (start of Media Out will play) > Stop Recording > Save VT.
The function of the Start / Step button changes to match each of steps in the sequence.
You can also use the <spacebar> on your keyboard to advance through each step of the VT sequence. - Preview Button - Allows you to review a segue or a Voice Track.
- Estimated Play Time - Show and estimated date and play time for the VT.
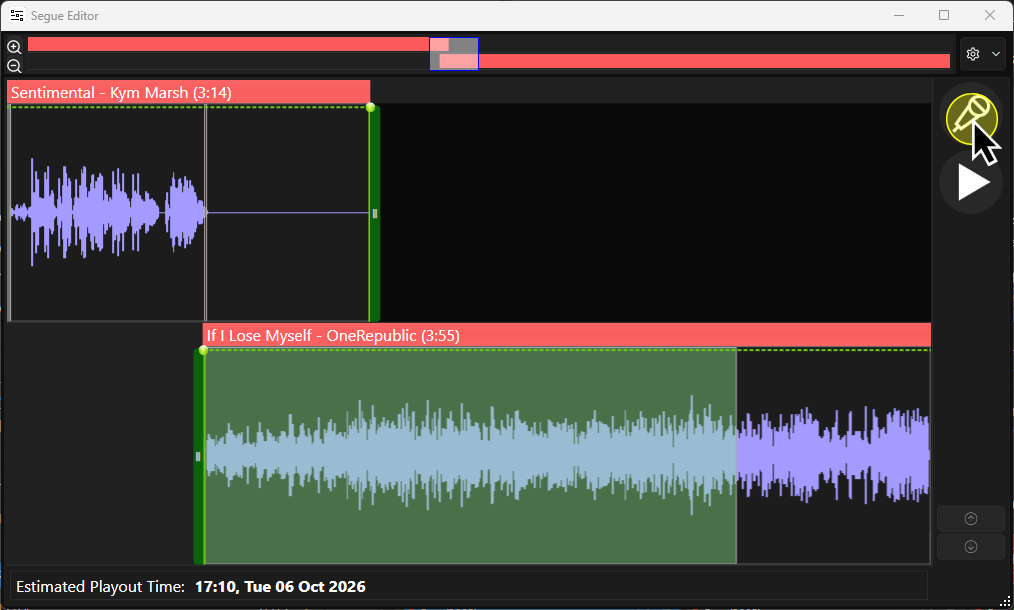
- Click on the Start / Step button to begin the Voice Tracking sequence.
- The last few seconds of the Media Item in the Media In Track will play. The play position is indicated by a green line moving from left to right.
You will also see a VT Track is added to the Segue Editor.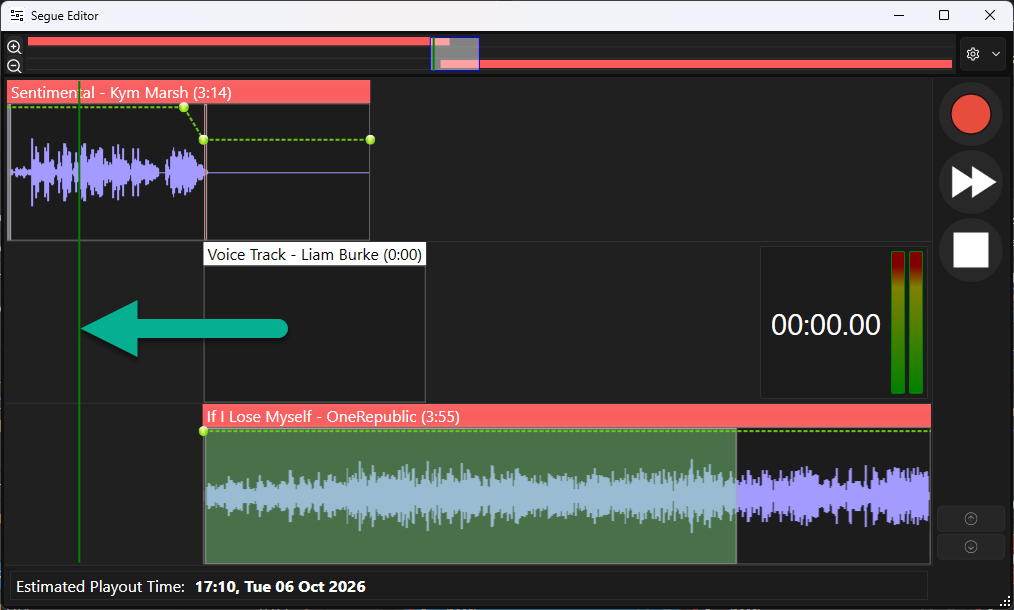
- To start recording your VT, either click on the Start / Step button (or <spacebar>) - which is showing the record button, or you can speak into your microphone if you have audio level triggering configured (which it is by default).
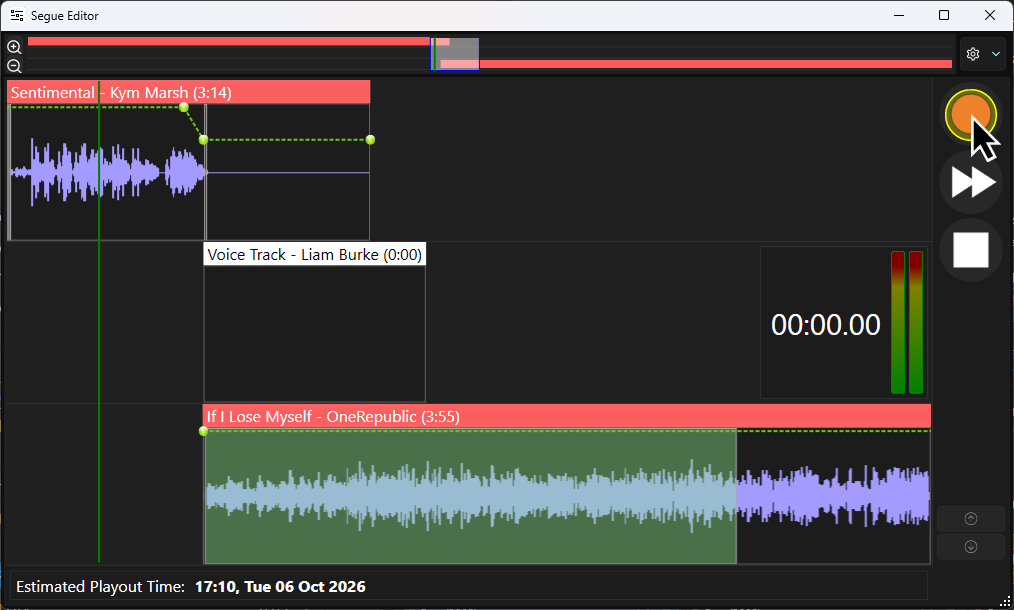
- The recorded audio will be displayed in real time in the VT Track.
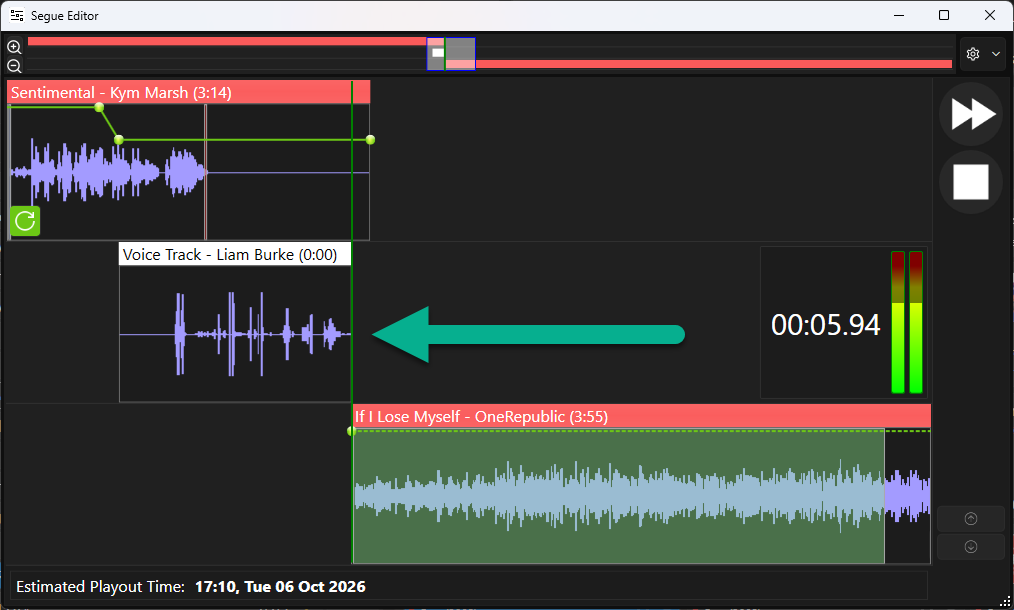
- To start the Media Item in the Media Out Track, click on the Start / Step button (or <spacebar>) - the icon has changed to >>.
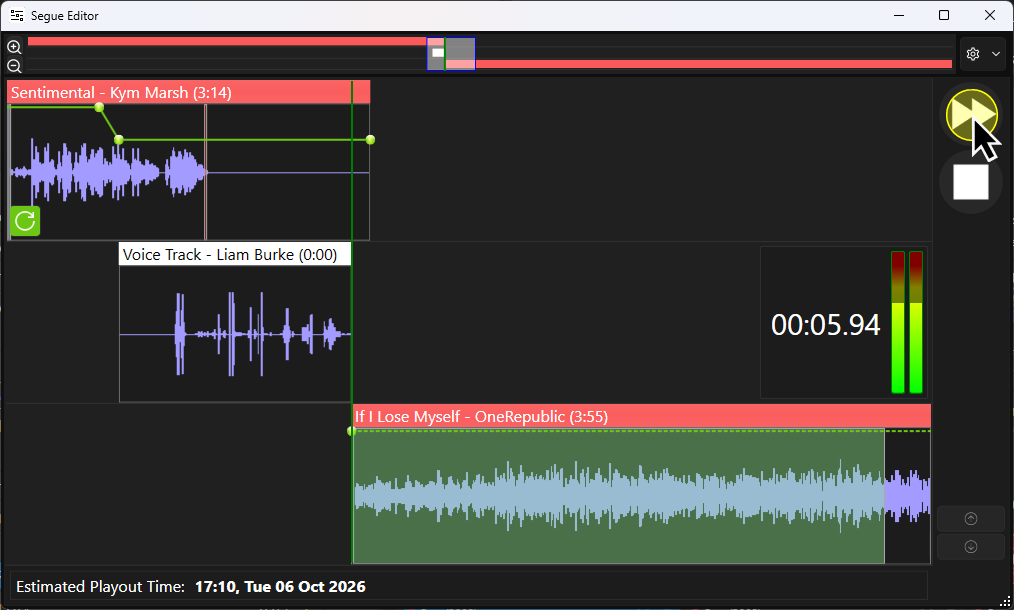
- The Media Item in the Media Out Track will start playing with the volume dipped to the preset level (Settings Menu > General > Media Playback Options).
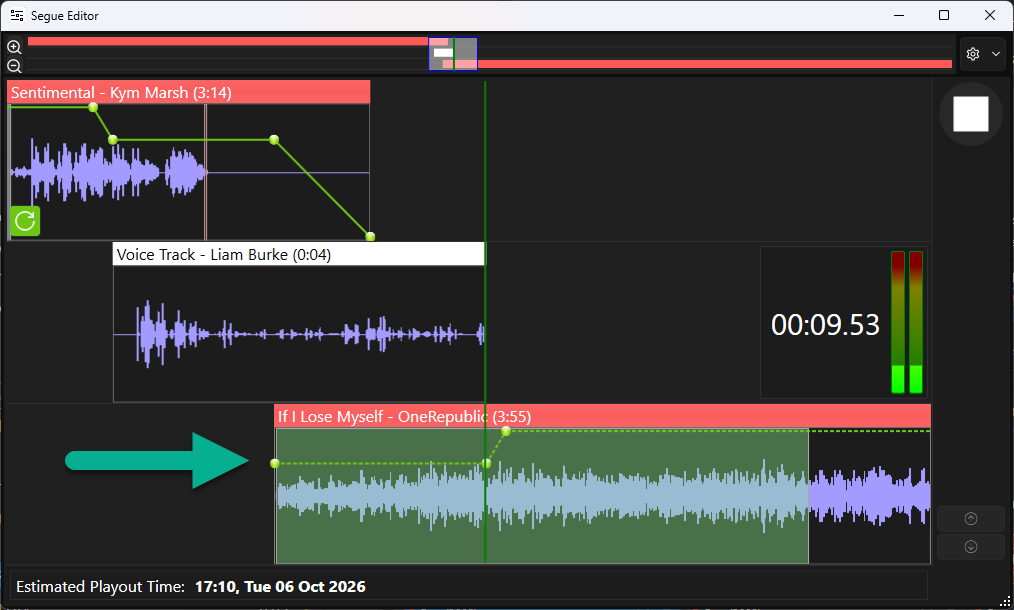
- To stop recording and complete the VT, click on the Start / Step button (or <spacebar>) - which now displays a 'stop' icon.
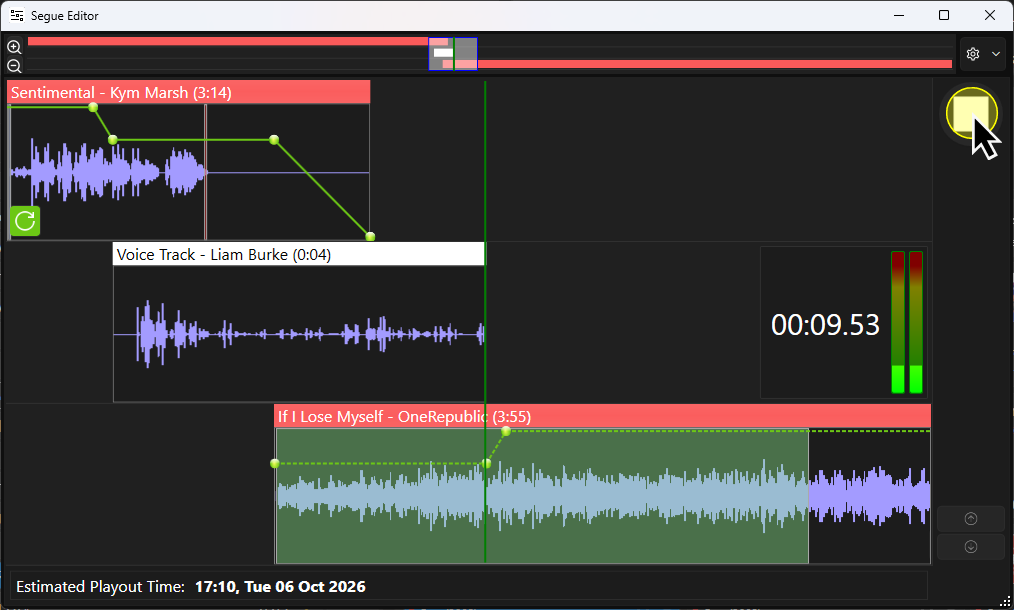
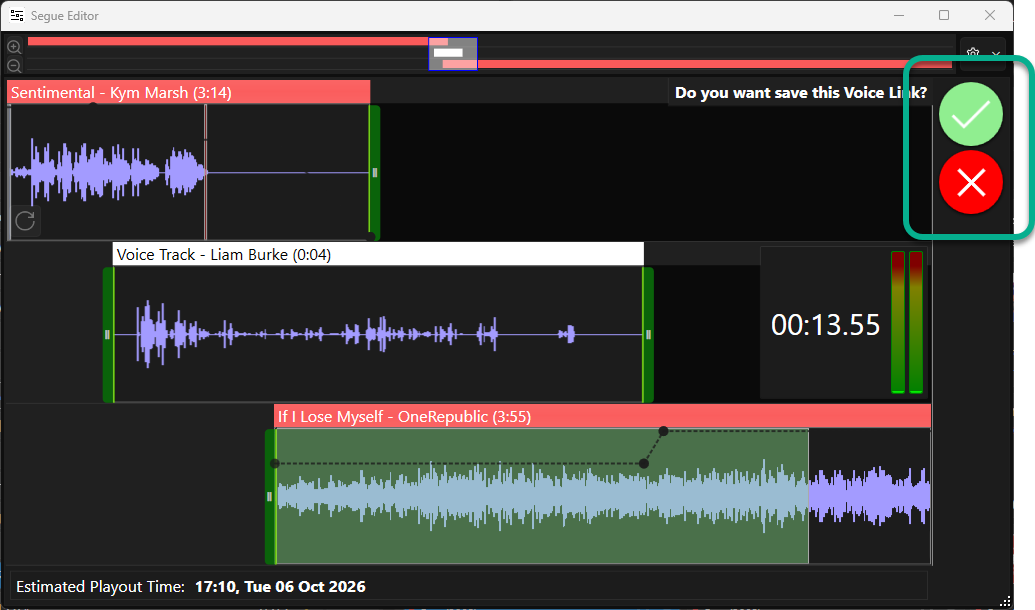
- You can now choose to Save or Abandon the VT. To save click on the Green Tick button to save or the red cross button to abandon.
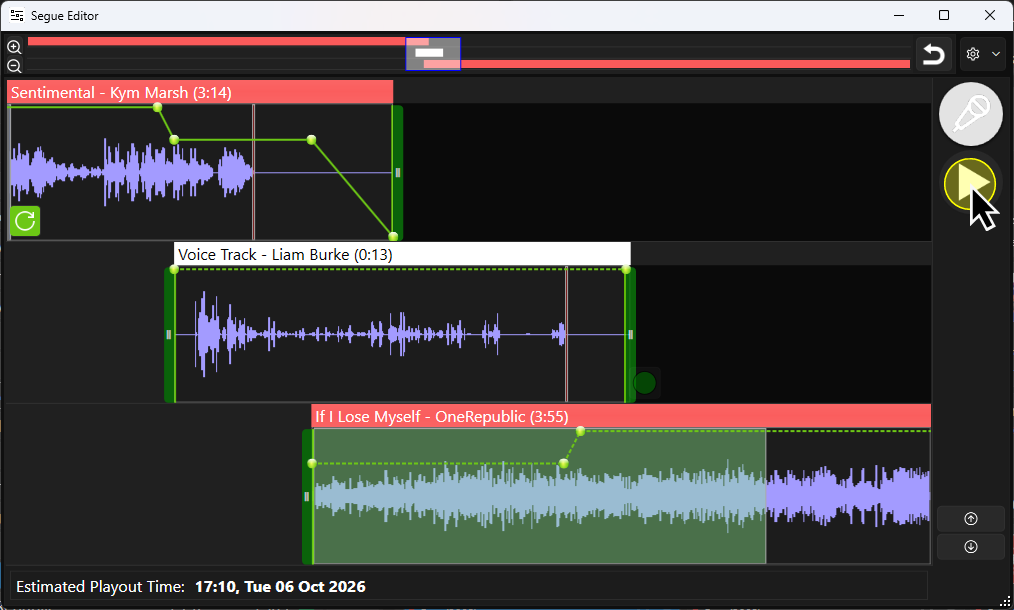
- The default normalisation for Voice Tracks will be applied to your recorded VT and the final positioning and volume envelope for all elements will be displayed. To review your VT, click on the Preview button.
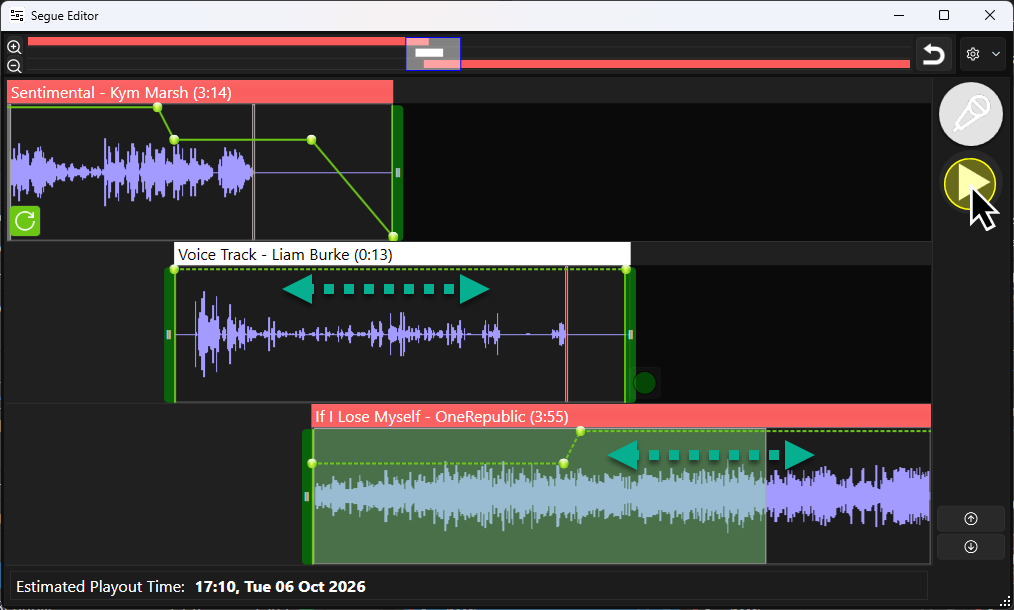
- You can adjust the positioning of the audio in the VT Track or Media Out Track by dragging either left or right. You will see the automatically ducked envelope volume on the Media Out Track will adjust accordingly as long as you have not manually edited it (if it is a dotted line, it has not been edited).
- You can manually adjust the Volume Envelope on any of the Tracks to suit your needs. Click on the envelope line to add additional points that can be dragged up or down.
Please note that once you manually edit the envelope line it becomes a solid (fixed) line and will not be automatically adjusted by Myriad.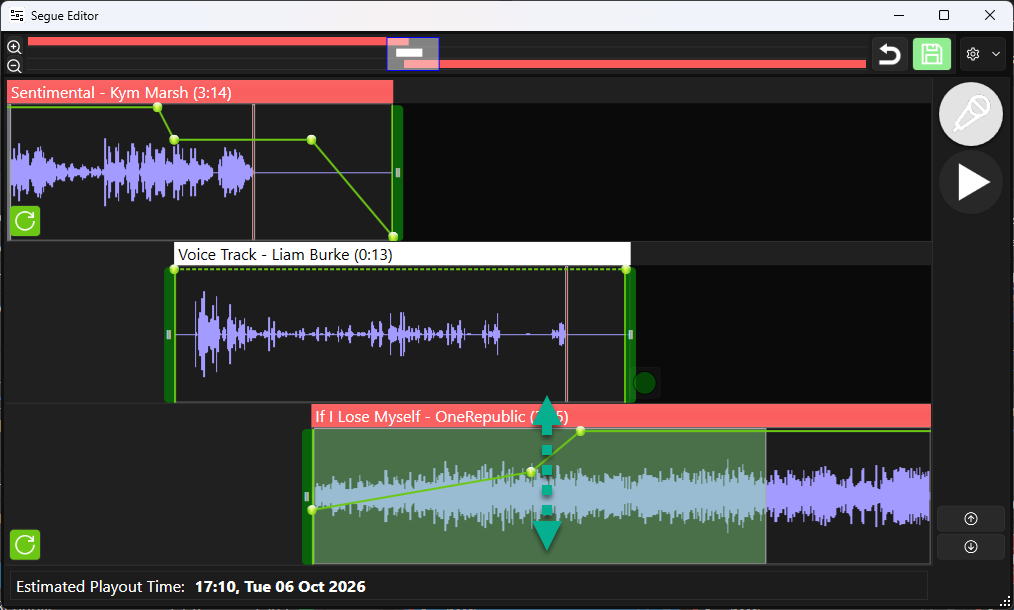
You can reset the adjusted volume envelope on any track you have altered, by clicking on the Reset Volume Envelope button.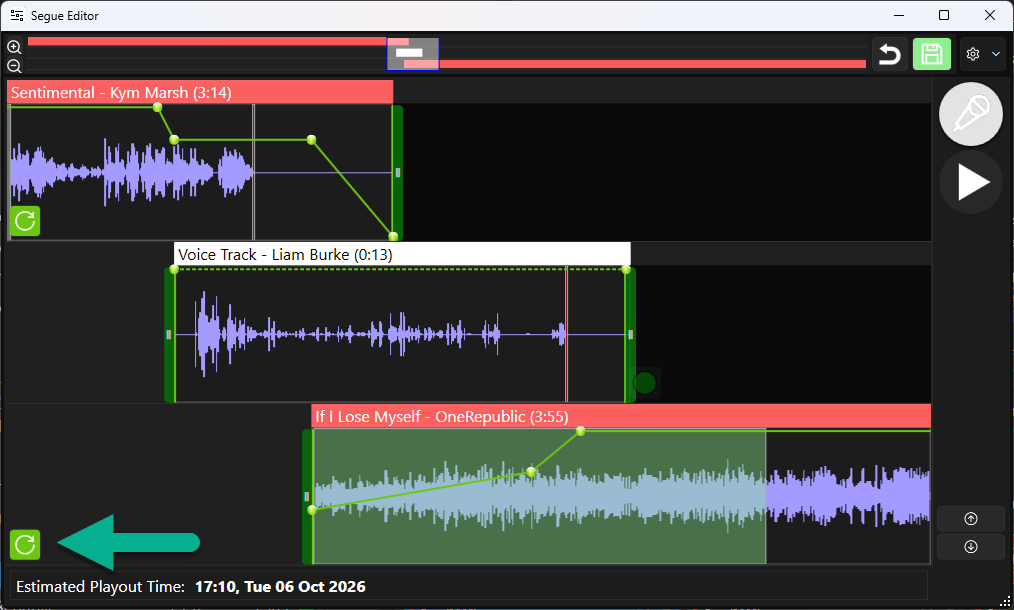
- You can use the Start / End Segue Trim marker to set the start or end point for Media Items in any of the three tracks. In the example below, we have adjusted the Start Trim Marker on the VT Track to remove some silence from the beginning of the recorded VT.
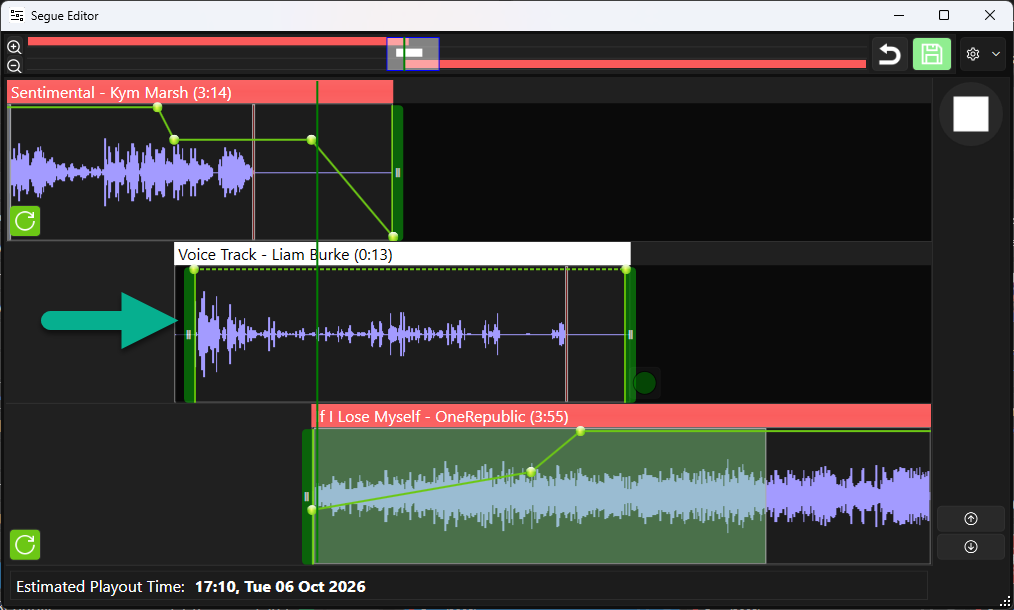
You can combine this with moving audio to the left or right within a track to ensure everything still lines up correctly! - When you have finished editing the Voice Track, click on the Save button.
Was this article helpful?
That’s Great!
Thank you for your feedback
Sorry! We couldn't be helpful
Thank you for your feedback
Feedback sent
We appreciate your effort and will try to fix the article